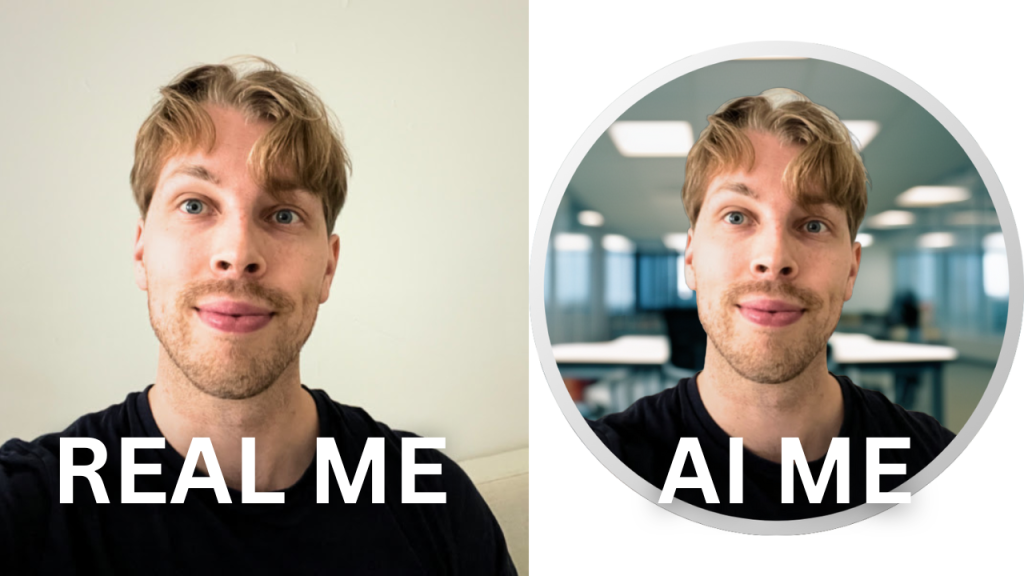
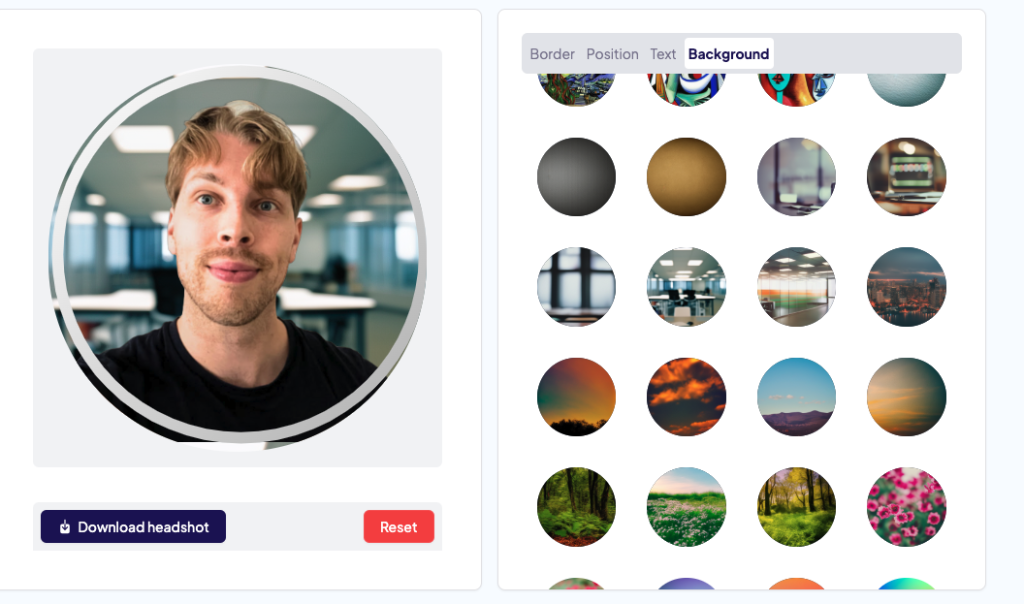
Author: Artturi

  • 7 Best AI Business Photo Generators of 2025 (I tried them all)


    I spent over $2,000 testing AI Business Photo Generators to find the best ones for LinkedIn.

    Here’s a side-by-side comparison of the top tools — both free and paid.

    Plus, I’ll show you how to use them and customize your shots.

    My Top 5 Picks

    Here are my top picks for your convenience:

    👉 1. BetterPic

    👉 2. HeadshotsByAI

    👉 3. PortraitPal

    👉 4. AI SuitUp

    👉 5. Aragon AI

    Now let me show you my results with each tool.

    Disclaimer: This post is supported by readers. It has some affiliate links at no cost to you. Thanks for the support!


    1. BetterPic

    Best overall AI LinkedIn headshot generator
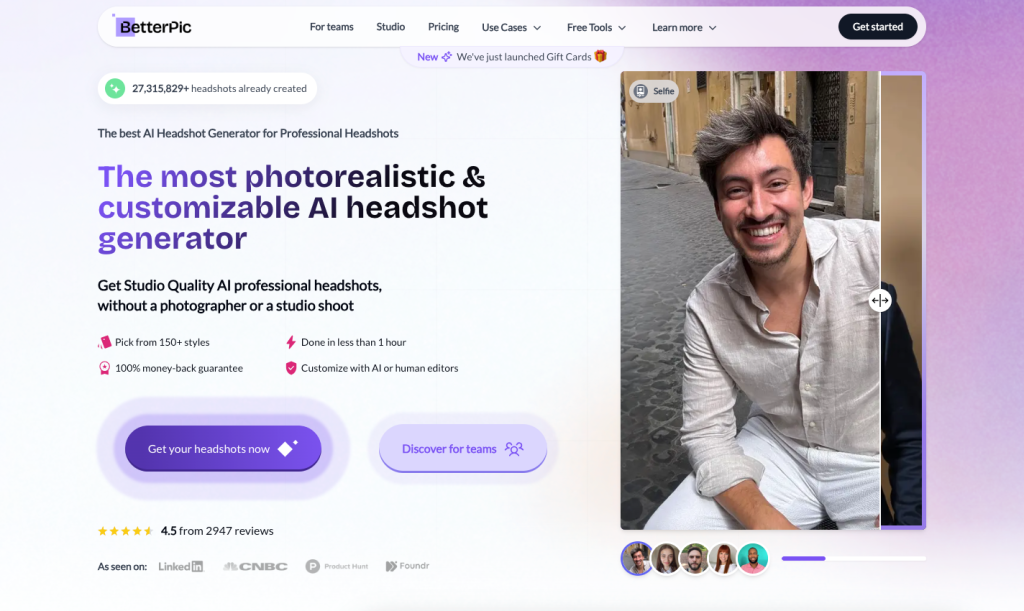
    BetterPic is my top pick for an AI Business Photo Generator.

    It delivered some of the best professional headshots I’ve seen.

    It offers powerful customization features — especially the epic human editing option.

    With the Expert plan, a real editor fine-tunes your photos to ensure they truly look like you. So it’s actually not just AI that’s working here.

    Let me show you my results.

    My Results

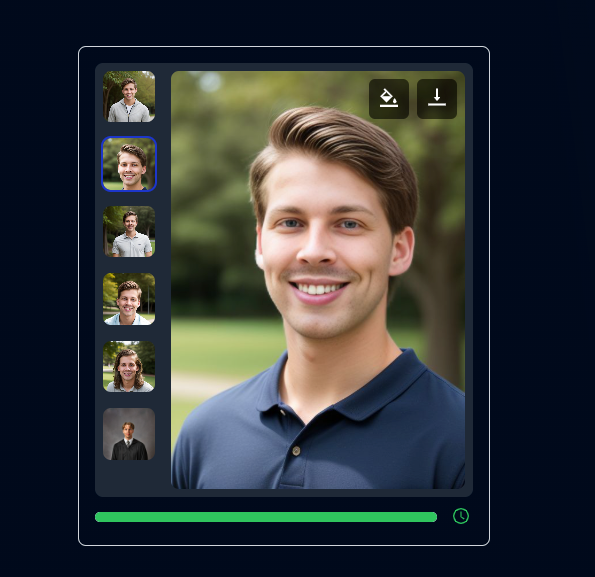
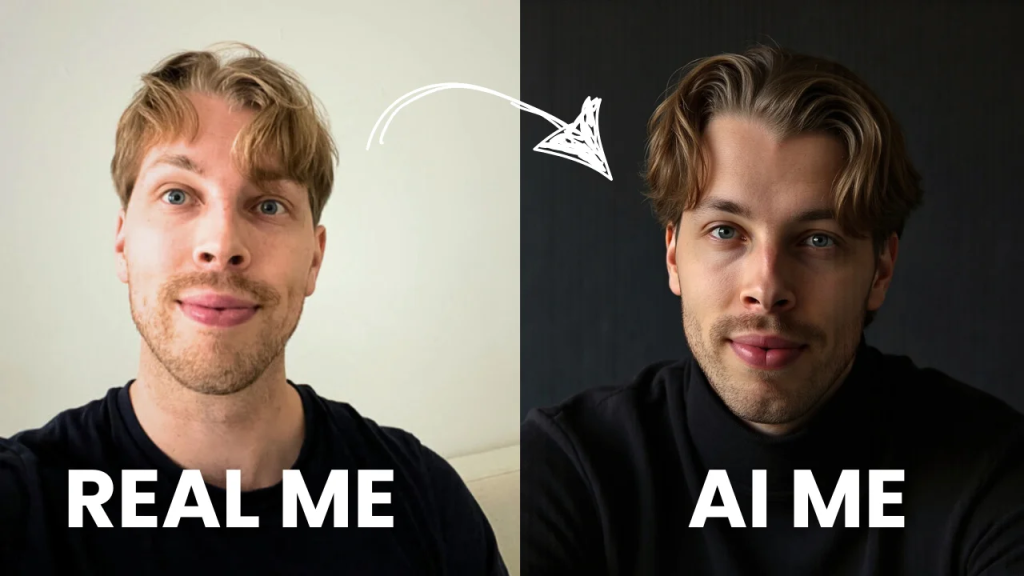
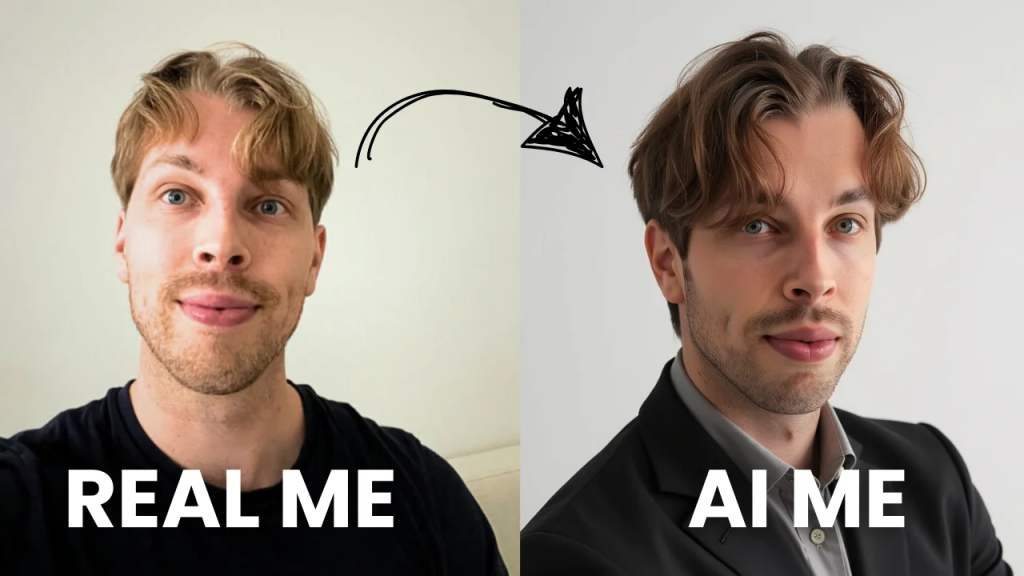
    Here’s an example image that I got from BetterPic AI:

    Before I show you more results, let me show you how easy this tool is to use.

    First, sign up here and read these instructions.
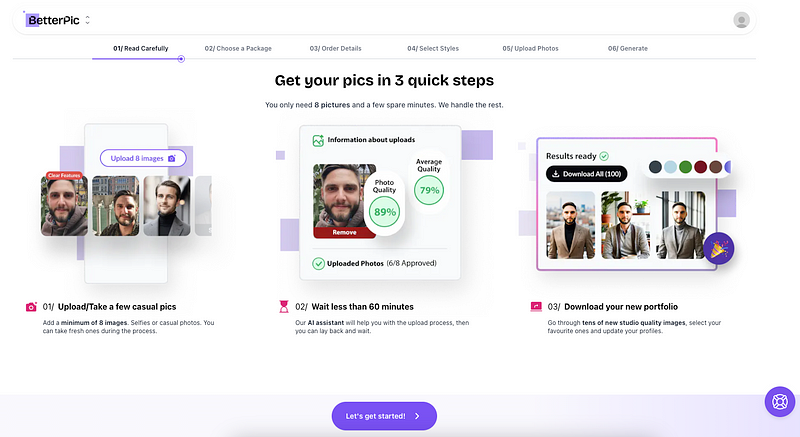
    Add your name, ethnicity, use cases, gender, and eye color.

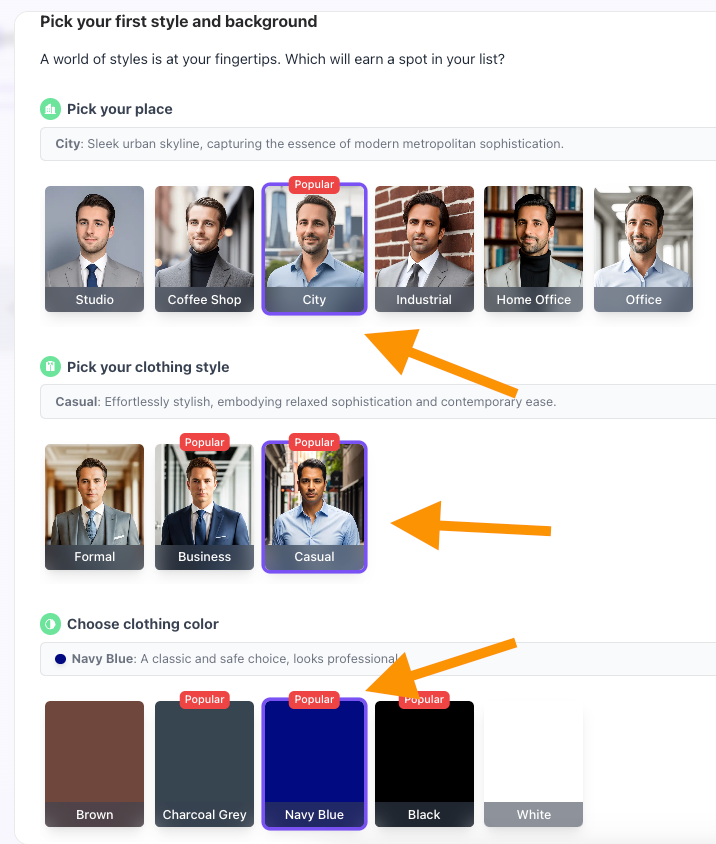
    Then, choose a couple of styles for your AI headshots.
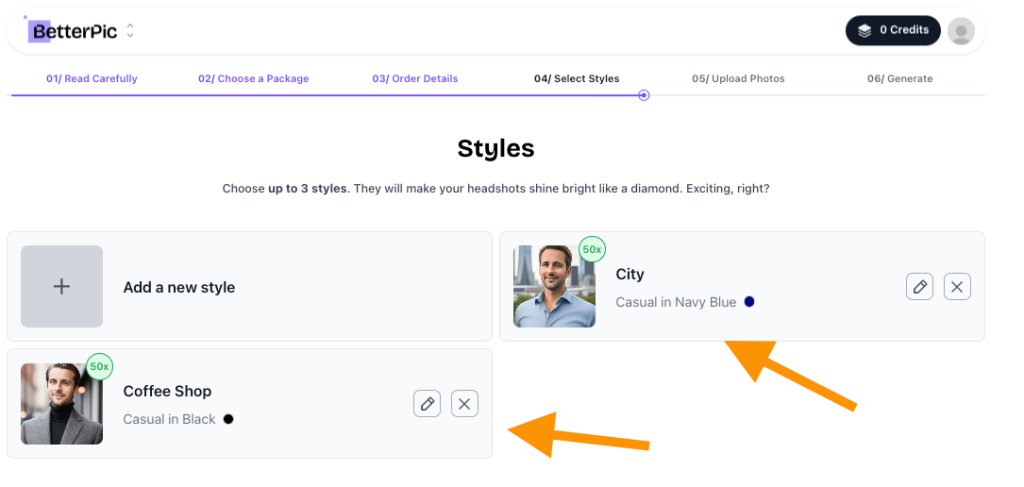
    Pick three styles to make the most out of it.
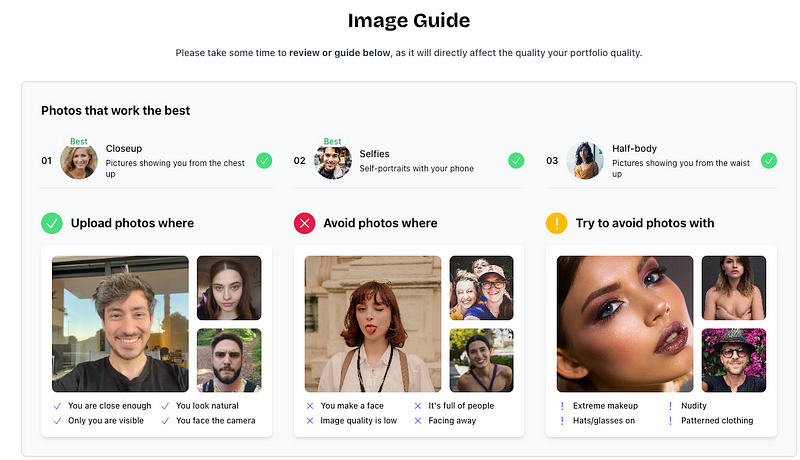
    Make sure to follow the image guidelines carefully — this directly impacts the quality of the headshots you’ll get.

    If you upload low-quality or unclear photos, the AI won’t accurately capture your look.

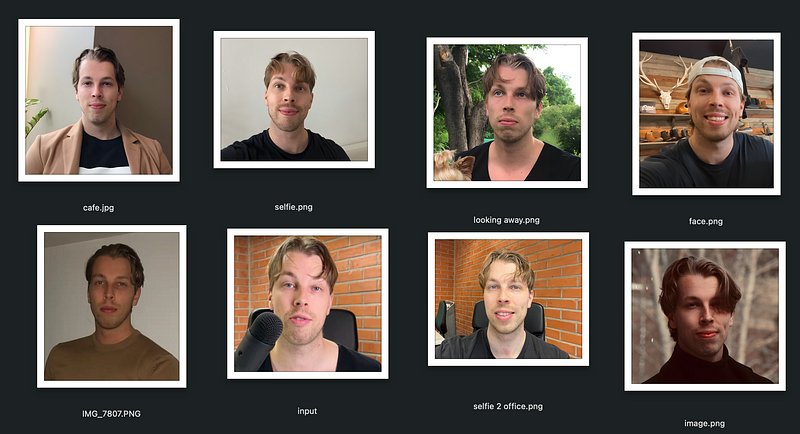
    I recommend using images with different lighting, outfits and poses to help the AI create the best possible headshots.
    Here are the real images I used to train the AI:
    Once I uploaded my images, the tool analyzed them and filtered out any low-resolution ones. Then, it was time to generate my AI business photos.
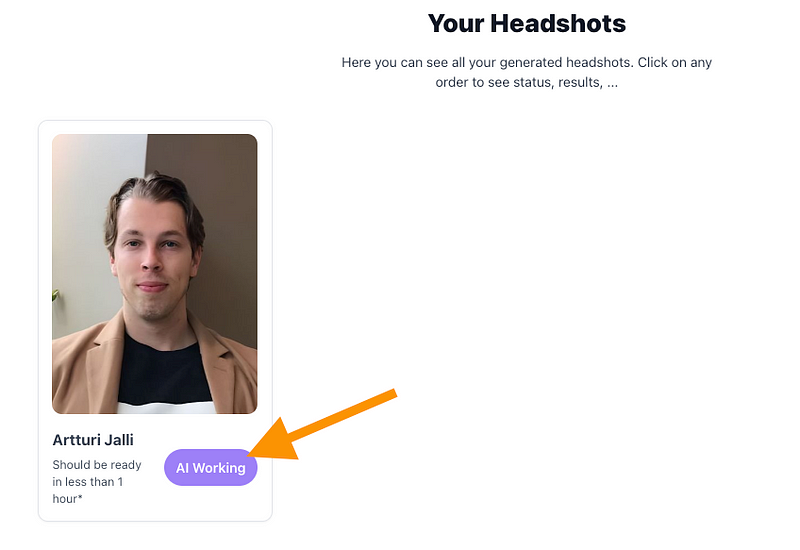
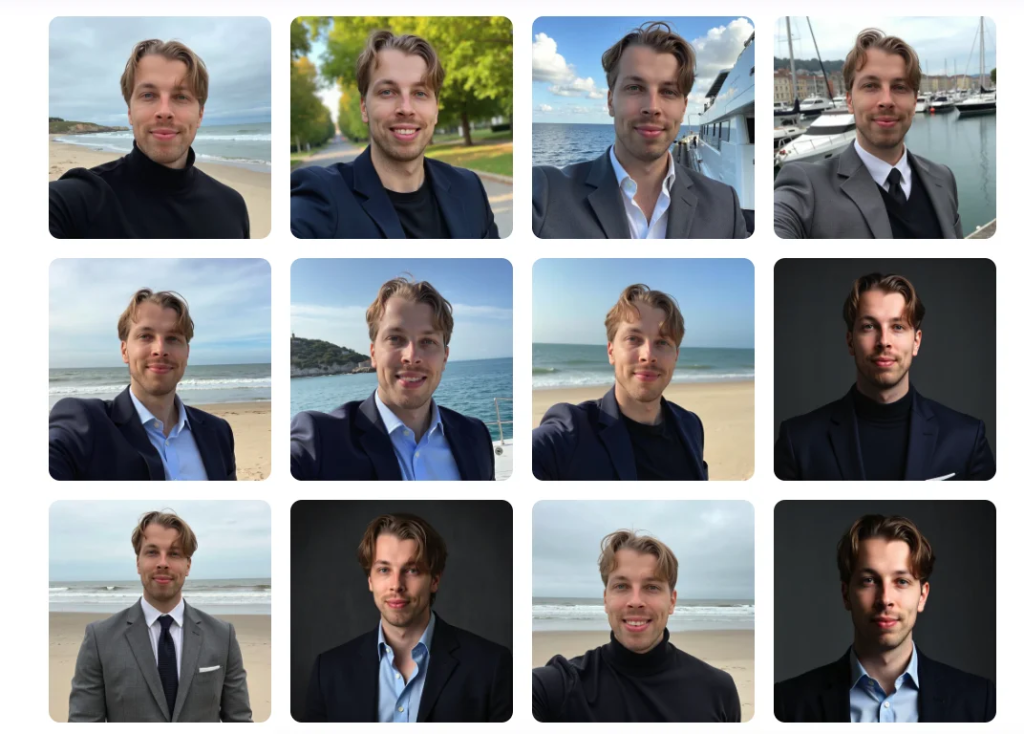
    After 30 minutes, I got my AI headshots. Here they are:

    Isn’t that cool? Those look exactly like me, huh?

    Let me show you some more:

    I won’t pretend every image was perfect.

    As BetterPic notes on the results page — most look great, some are good, and a few miss the mark.

    For example, in this one, I noticed subtle artifacts around my face and teeth.

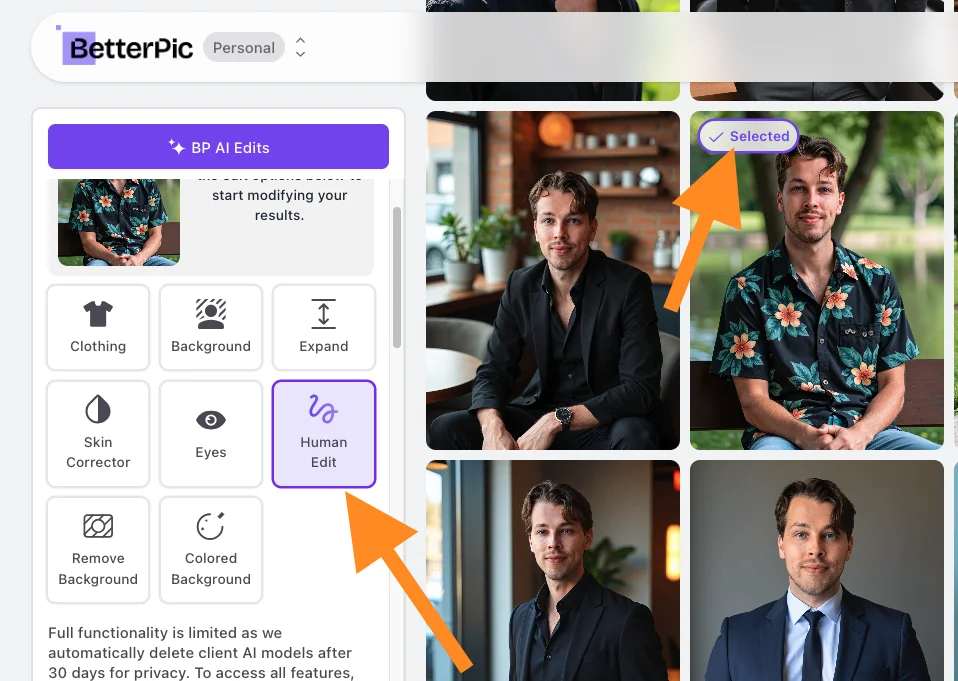
    Although here’s why I like BetterPic. It allows you to fix the failed images. Simply click on the BP AI Edit button, and make the changes.
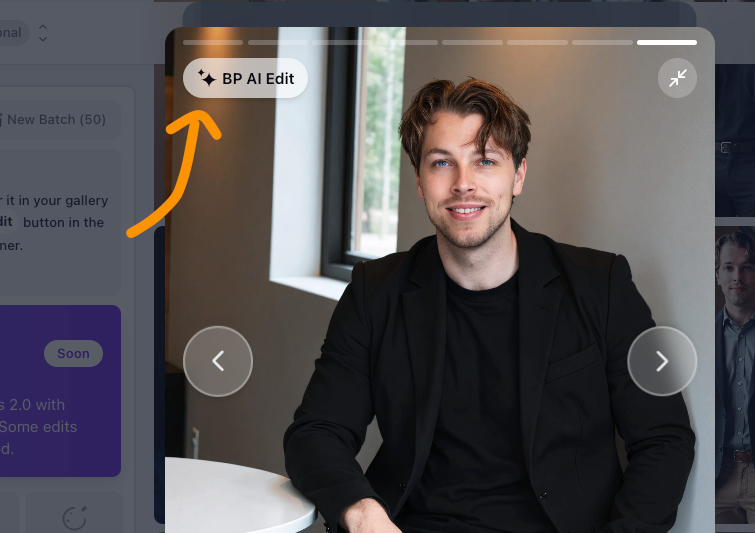
    You can request a manual edit from the BetterPic for advanced edits.

    Choose the “Human Edit” option on the list to do this:
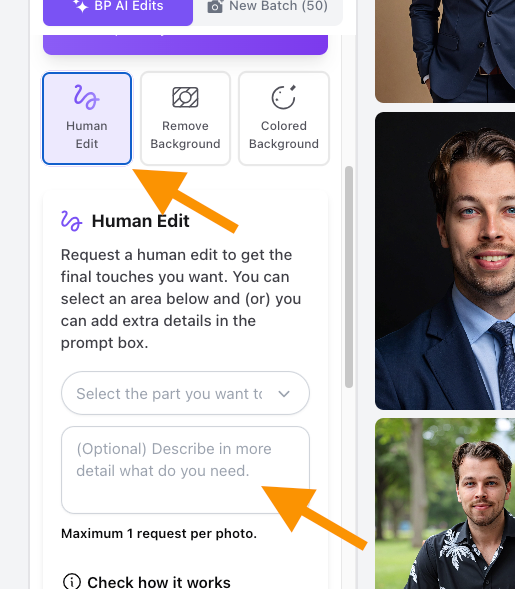
    That’s amazing. This is the reason this tool lands as the top pick for this use.

    👉 Try BetterPic

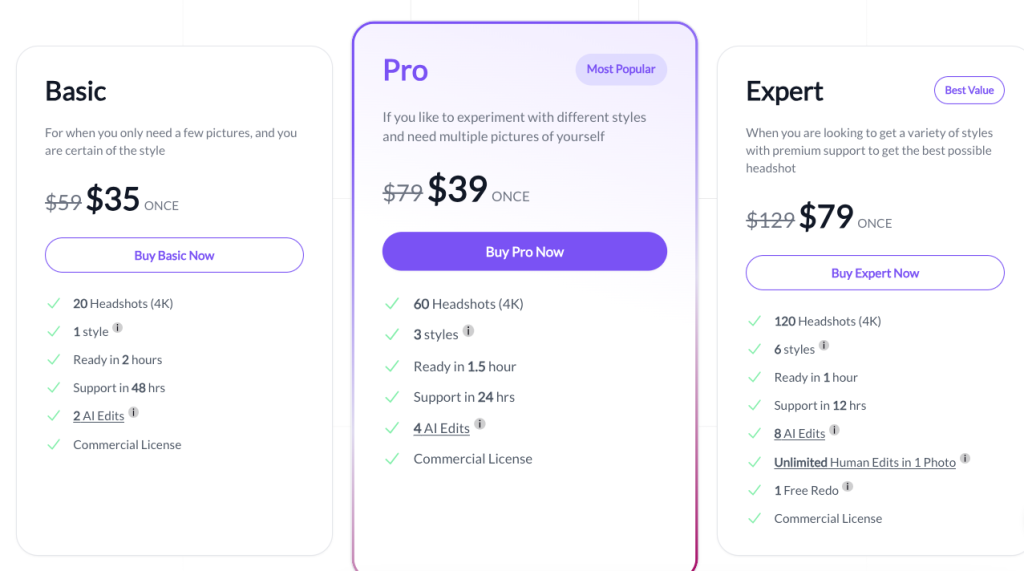
    Pricing

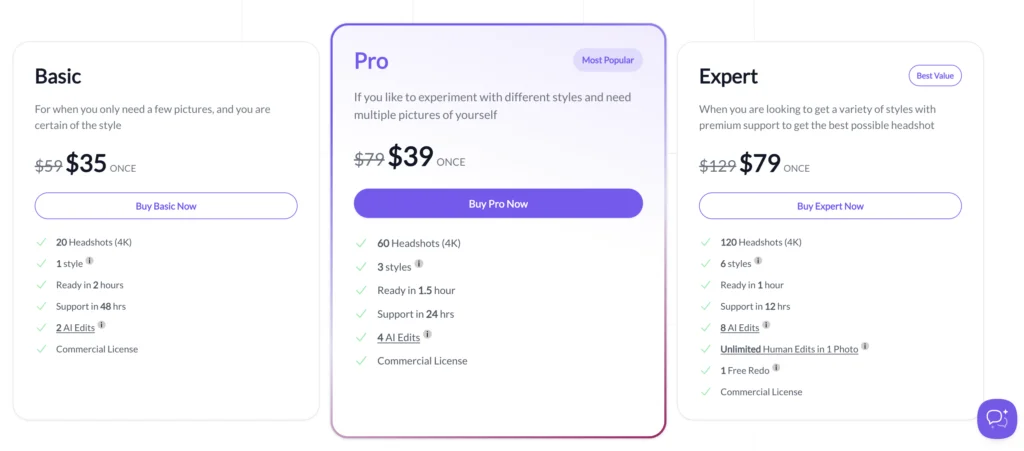
    • Basic: $35 (one time)
    • Pro: $39 (one time)
    • Expert: $79 (one time)

    👉 Try BetterPic

    To Take Home

    I’m a big fan of BetterPic. The results are impressively realistic, and it’s faster than most other AI Business Photo Generators.

    Plus, there’s no risk — if you’re not happy with the results, you can get a refund.

    BTW; I made a video on this tool as well. You can check it here:

    /media/9eea92fc29058d76d32d1c774c00bfcf

    👉 Try BetterPic


    2. HeadshotsByAI

    Next up is HeadshotsByAI, another powerful AI Business Photo Generator that turns your everyday photos into professional-quality headshots.

    It delivers some of the best results I’ve seen — let’s check it out!

    My Experience

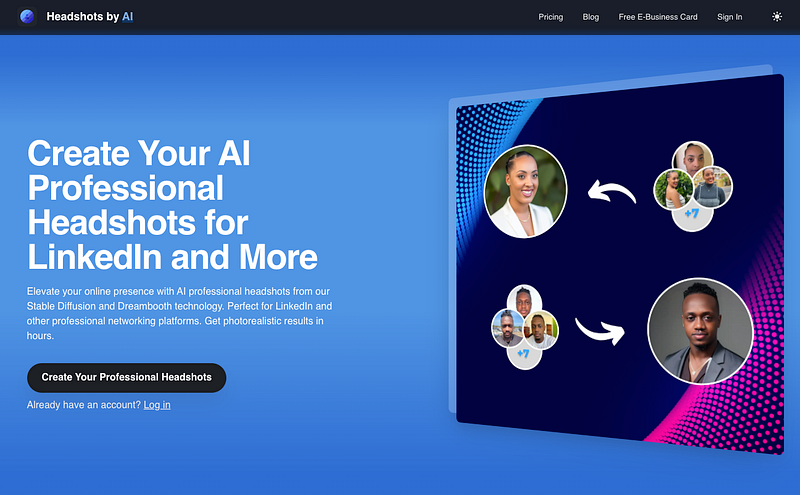
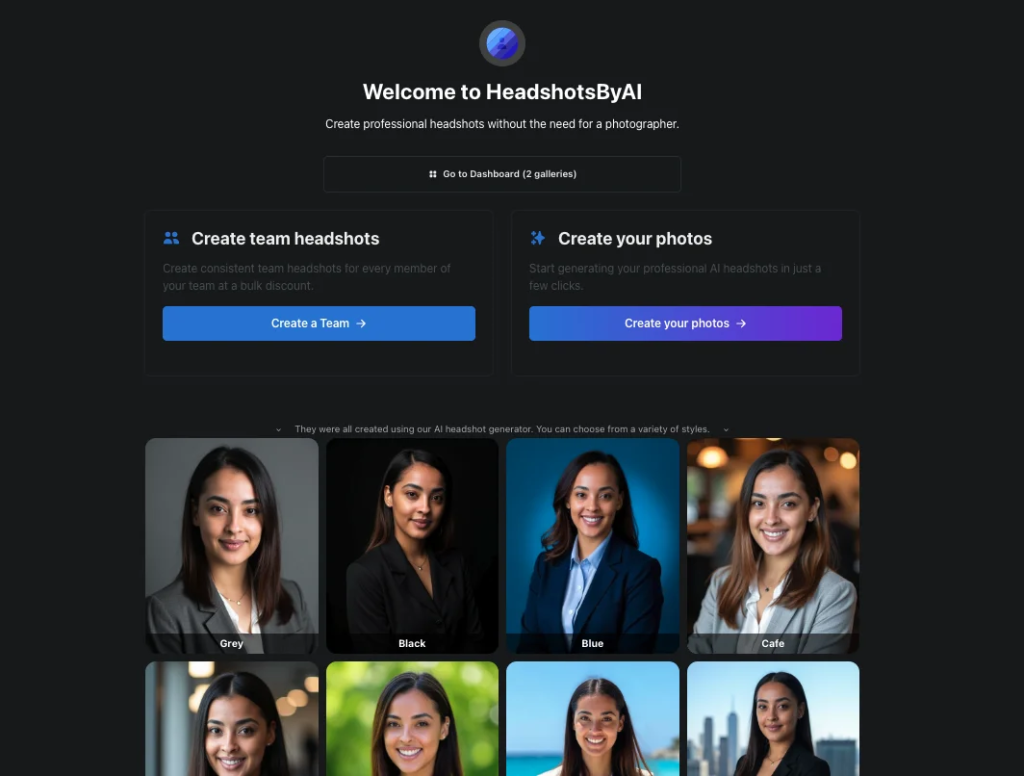
    To use this tool, all you need to do is head over to the HeadshotsByAI homepage and sign up.

    Enter your information:
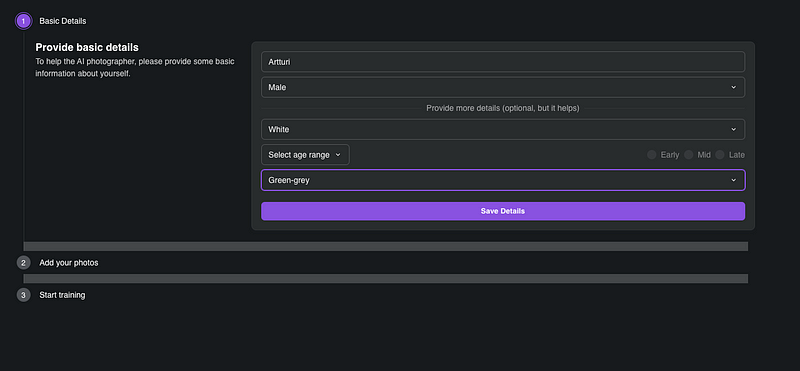
    Choose the input images. Traditional selfies will do.

    Here are the images I used:
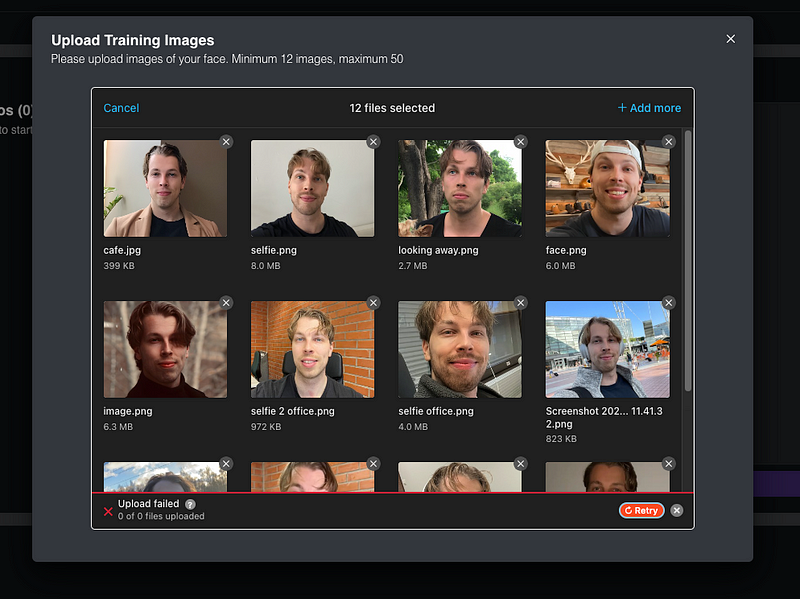
    Then click “Start training.” It sends the images to AI and the AI will start to process your images and generate realistic replicas of yourself.
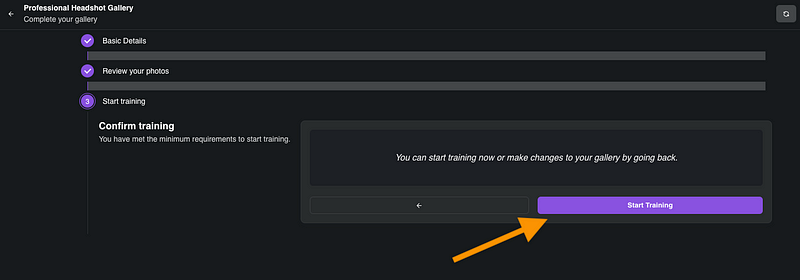
    It takes a while, though. I think for me this process took a good hour or two.

    Once the images are ready, you’ll receive an email so you don’t need to wait.
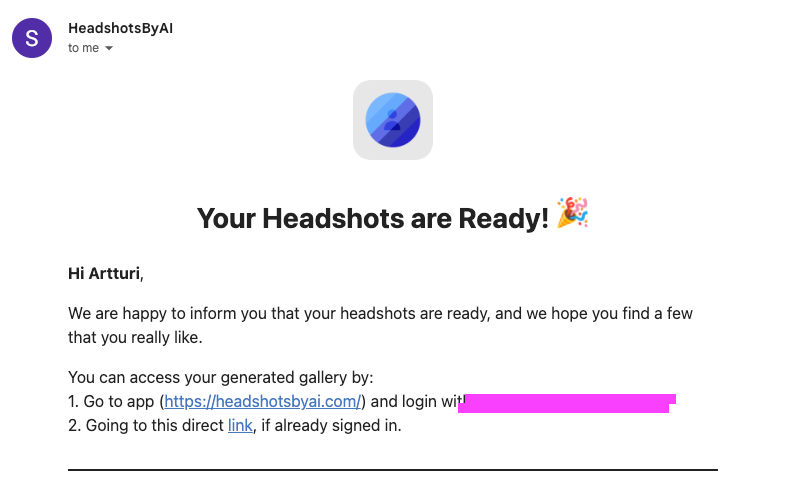
    Click the link and enjoy the LinkedIn headshots.

    Here are the professional business photos that the AI made:

    That’s crazy. Those look exactly like me.

    The images look so realistic that, in my opinion, you can hardly tell the difference.

    Here are more photos the AI created for me:

    I love the lighting and quality — better than any other tool I’ve tried.

    The only issue for me is that my forehead looks a bit too tall in some images, but you probably wouldn’t notice. There are also small glitches, like messed-up teeth and overly smooth skin.

    But that’s subtle and rare. Most of the headshots are epic.

    Pricing
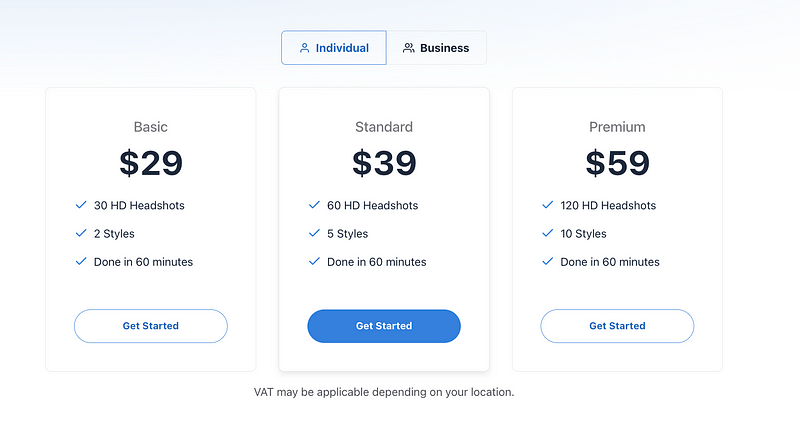
    • Basic: $29 for 30 headshots
    • Standard: $39 for 60 headshots
    • Premium: $59 for 120 headshots

    👉 Try HeadshotsbyAI


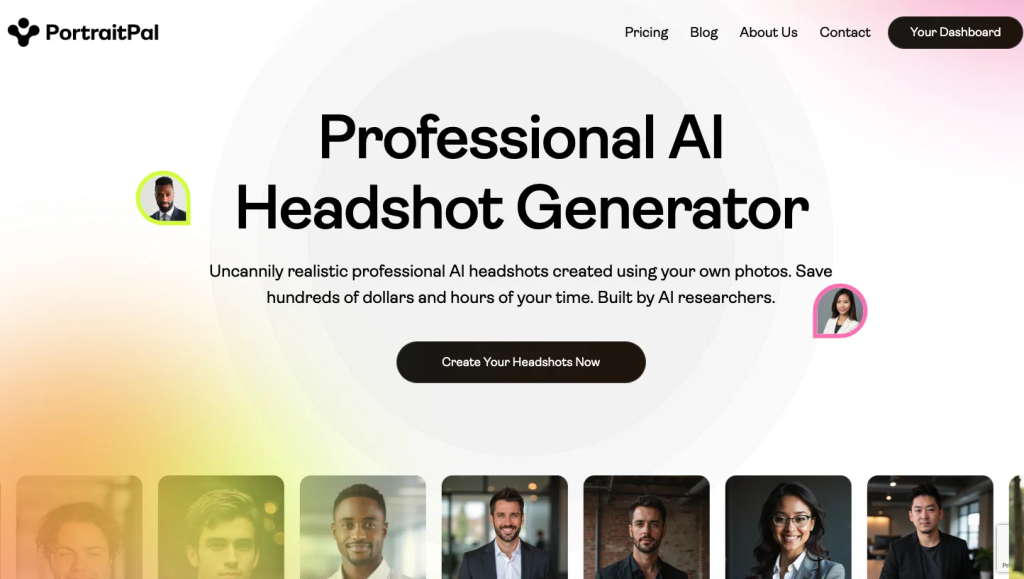
    3. Portrait Pal

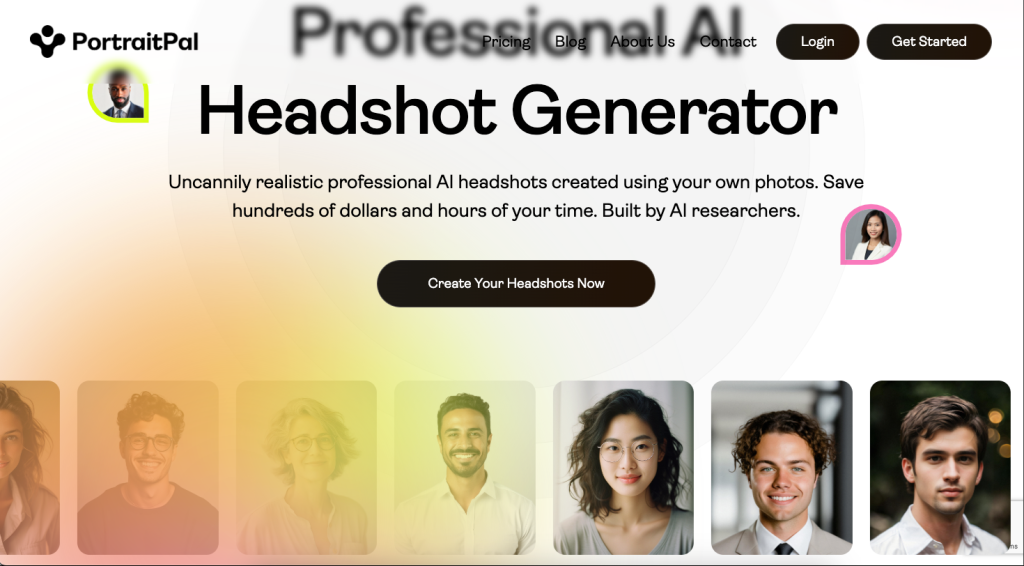
    Portrait Pal turns your selfies into professional AI business photos. This tool creates vintage-style images with a calm and soothing vibe.

    Let me show you what I got from it.

    👉 Try Portrait Pal

    My Experience

    Here are the real images I used to train the AI.

    Here are the results:
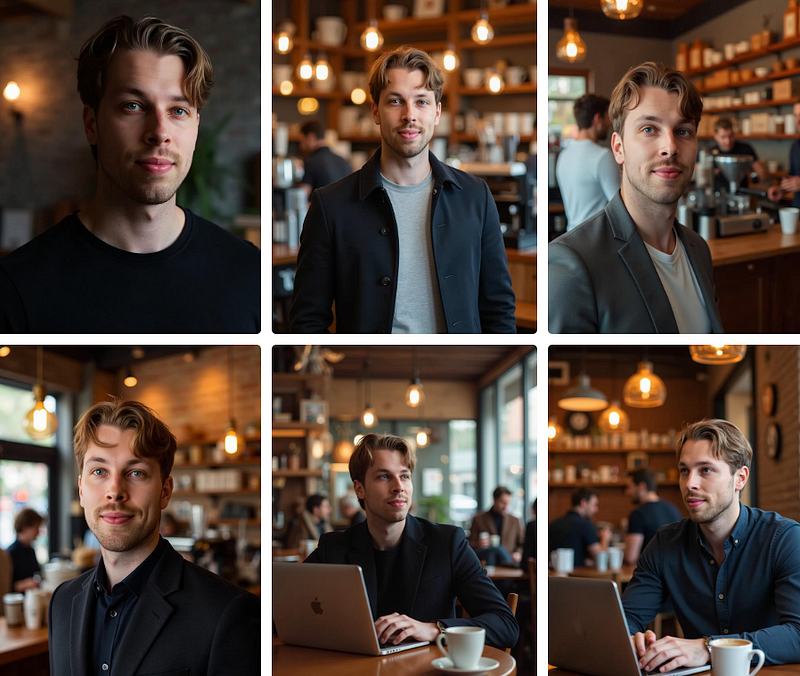
    Once again, what a nice tool! Those results are accurate, realistic, and usable in my socials.

    Now, let me show you quickly how to do the same.

    First, head over to this page.

    Click “Create Your Headshots Now.”
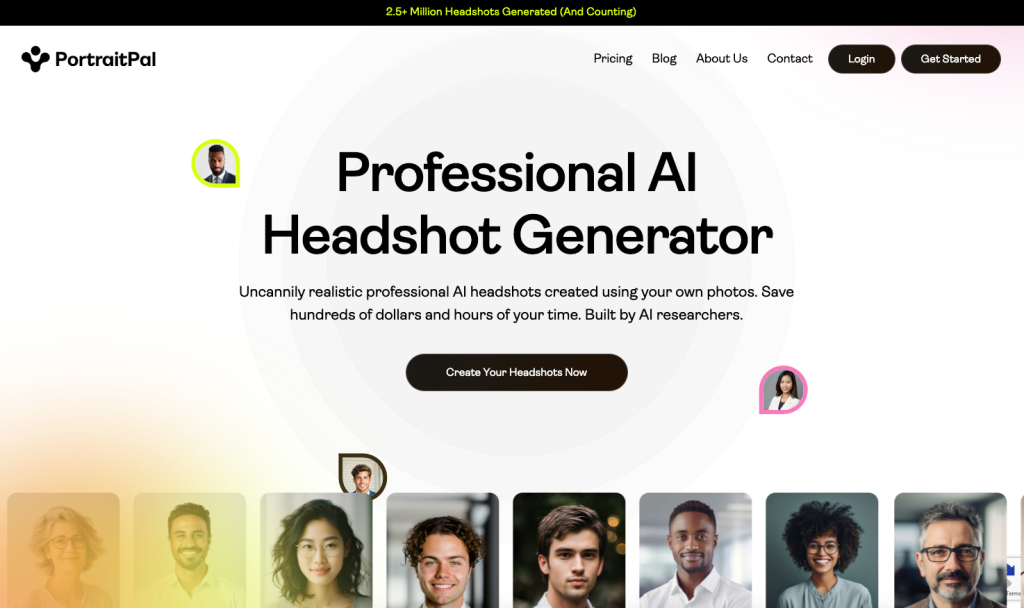
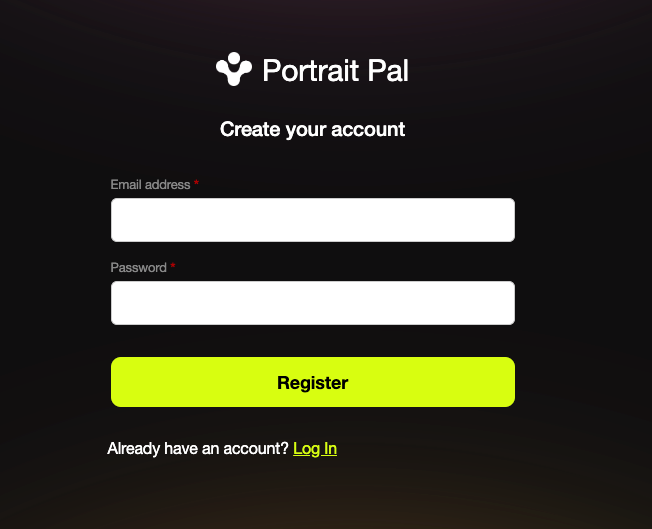
    Then sign up for the service.
    Then start creating your images. Specify your characteristics, such as gender, age, eye color, and ethnicity.

    Then, upload a bunch of images of yourself and keep these instructions in your mind while doing so:
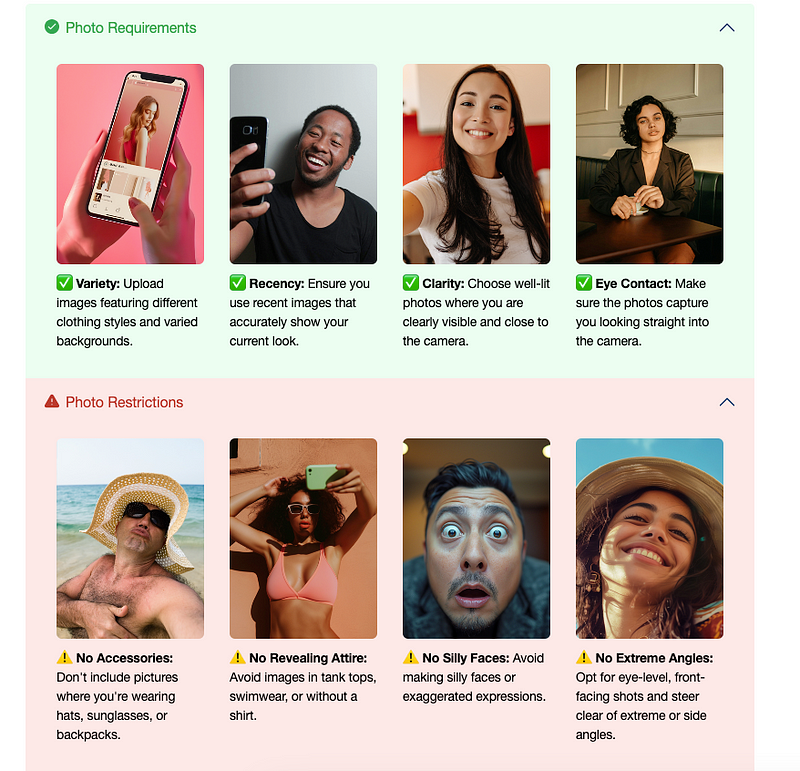
    Use clear images with no other people in the frame and avoid silly faces. This helps the AI better understand your look in different contexts.

    Just drop your images in like this:
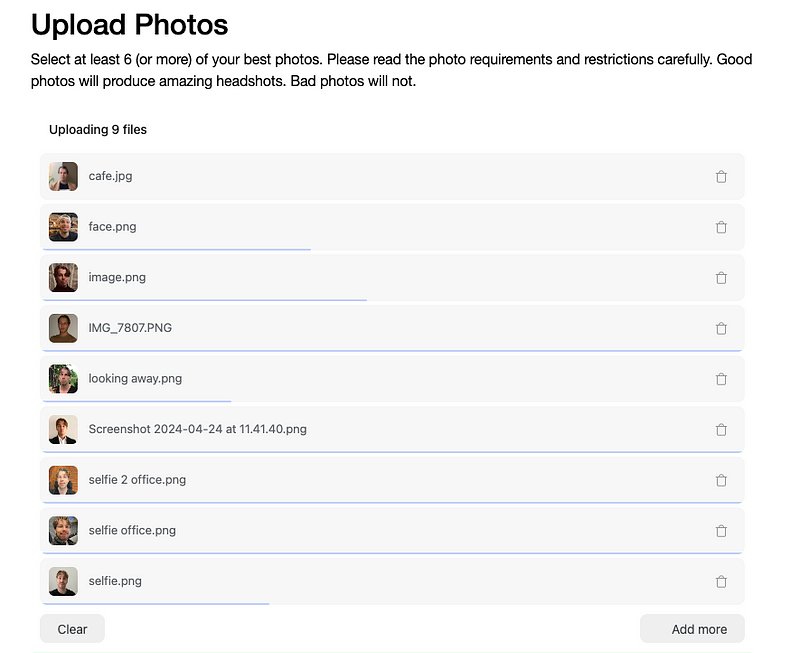
    Then wait for the AI to make your business photos.

    You’ll receive an email once the images are ready.

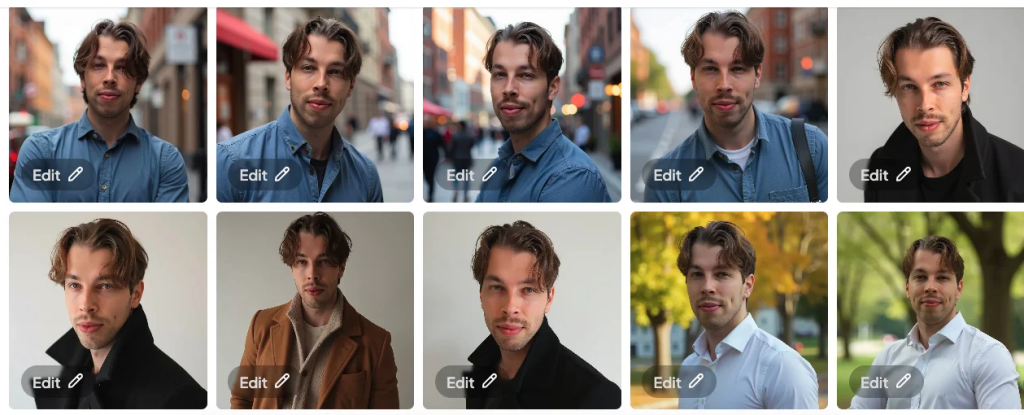
    Here are my AI business photos from PortraitPal:
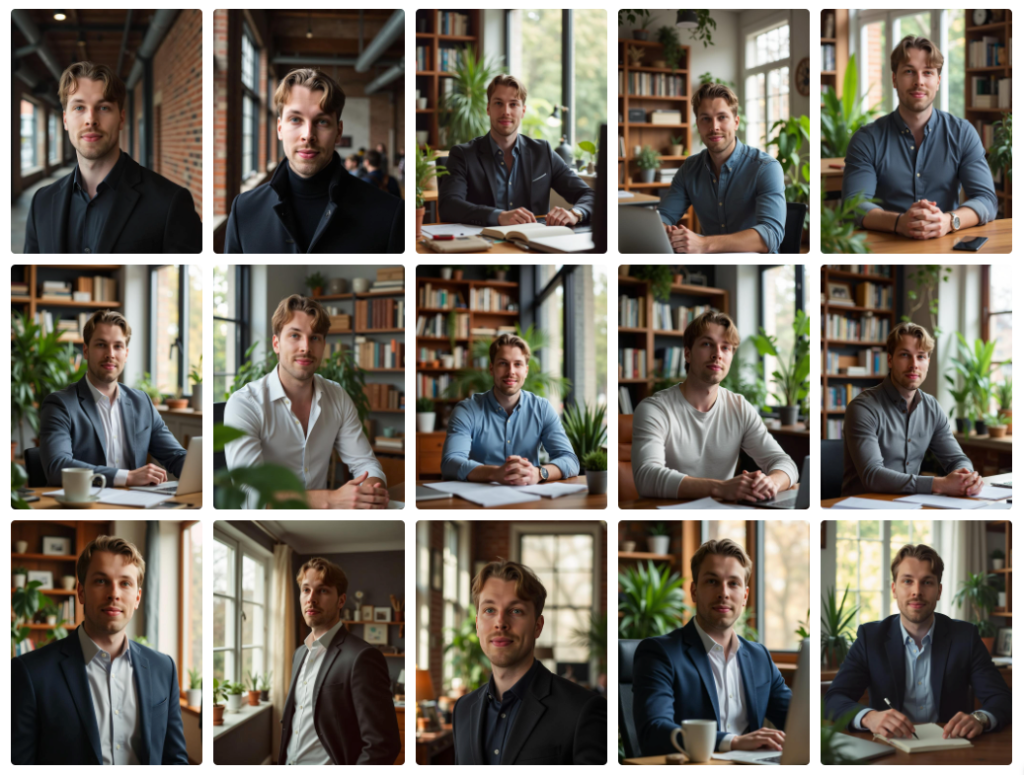
    Here are some more:

    What a masterpiece and a handsome dude. 😉

    I’m really happy with these images. There are just a small number of flawed images where I don’t exactly look like myself.

    Perhaps the only thing I don’t like is that you can’t customize the images, for example, if you want to change the background, that’s not possible.

    Other than that, I’d definitely give it a try—especially if you are after those vintage-style older professional images.

    👉 Try PortraitPal

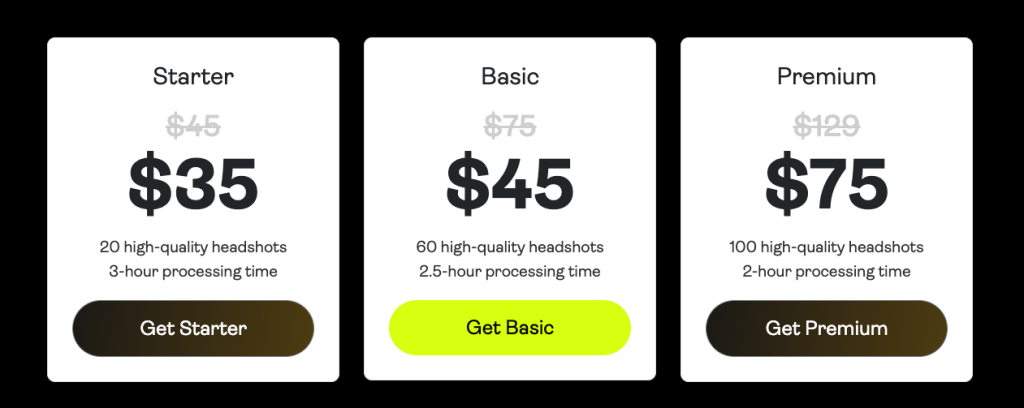
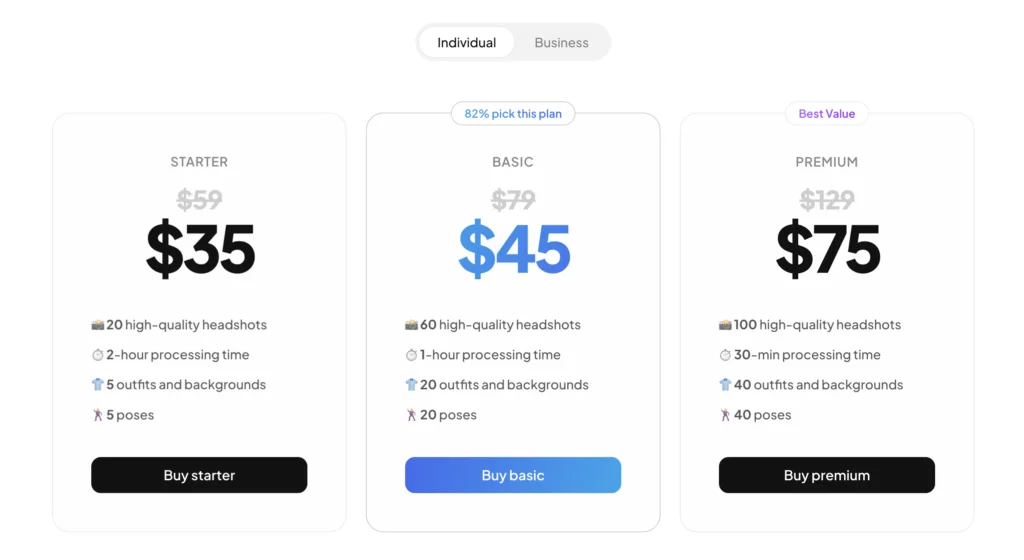
    Pricing

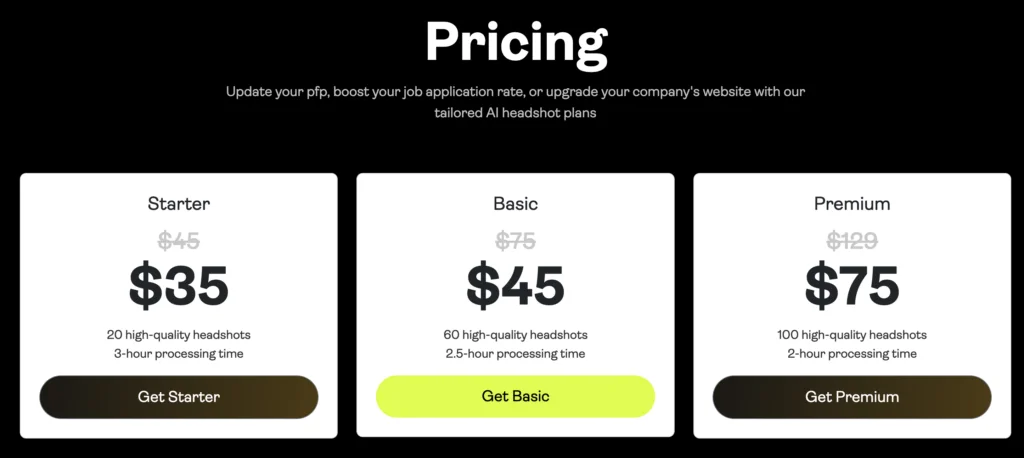
    • Starter: $35 (one-time)
    • Basic: $45 (one-time)
    • Premium: $75 (one-time)

    👉 Try Portrait Pal


    4. AI SuitUp

    Best on-budget AI LinkedIn headshots
    AI SuitUp is one of the best AI business photo generators, and it’s available with a pricing plan under $30.

    This makes it one of the cheapest on the list.

    It’s not higher on the list because it doesn’t offer customization, but the results are often so good that it’s not needed.

    My Experience

    To create AI SuitUp professional business headshots, head over to this page.
    I recommend the Professional plan, as it gives you 100 headshots. However, the Basic plan still offers great results, and the price doesn’t impact the quality.

    Next, make sure to read the AI headshot instructions on what types of images you should upload.
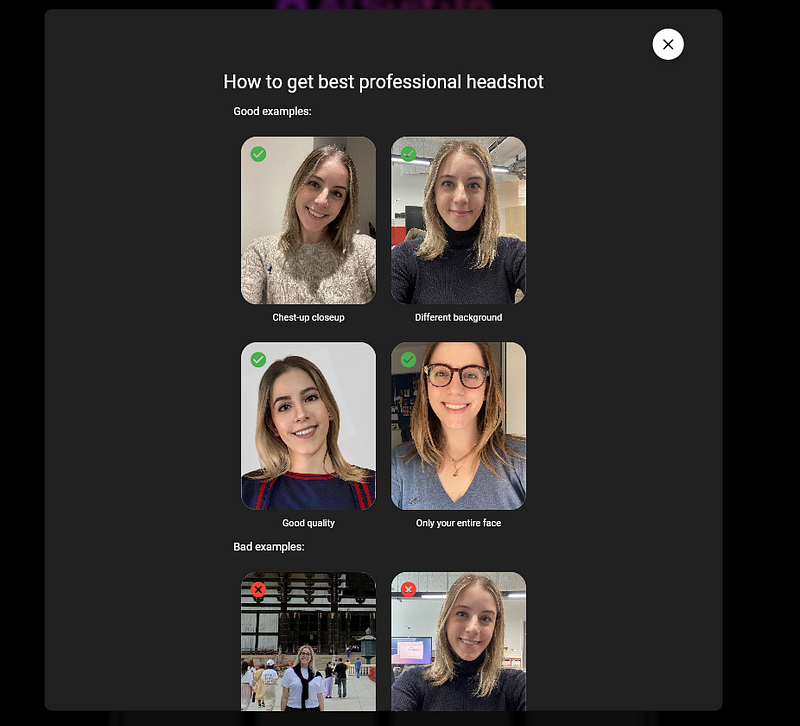
    Next, specify your characteristics:

    Upload your selfies directly from your mobile device’s camera roll — no need for professional photos.
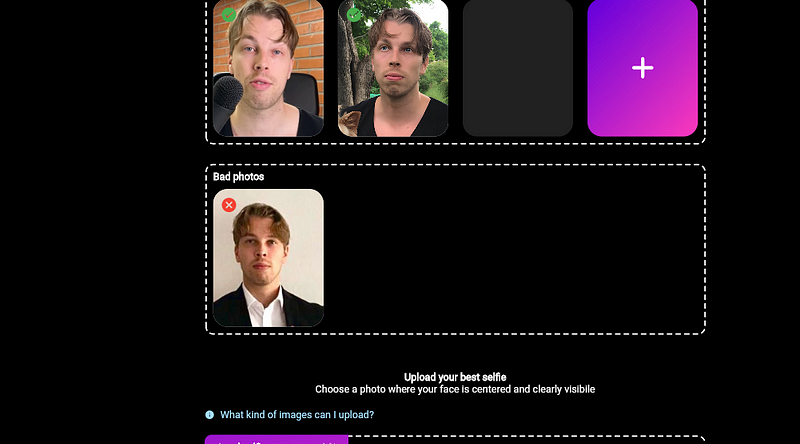
    Then choose your base image. This is the “main image” you’re most proud of that you want the AI to pay the closest attention to.
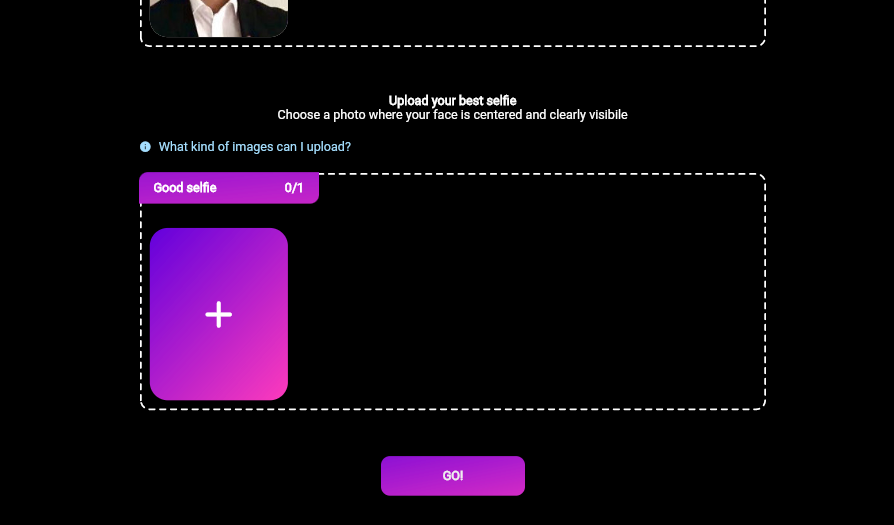
    Click “Send.”
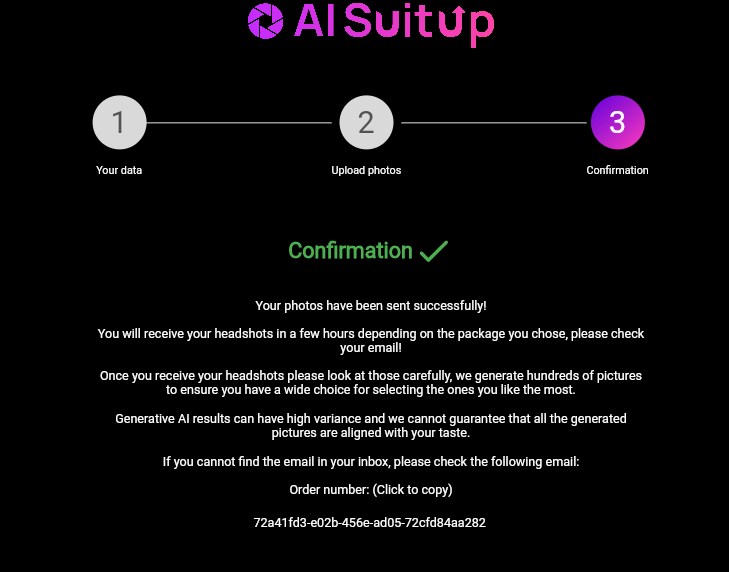
    Then, wait about an hour or two. Once the AI generates your images, you’ll get an email notifying you that they’re ready.

    Here are the AI business photos I got back from AI SuitUp:
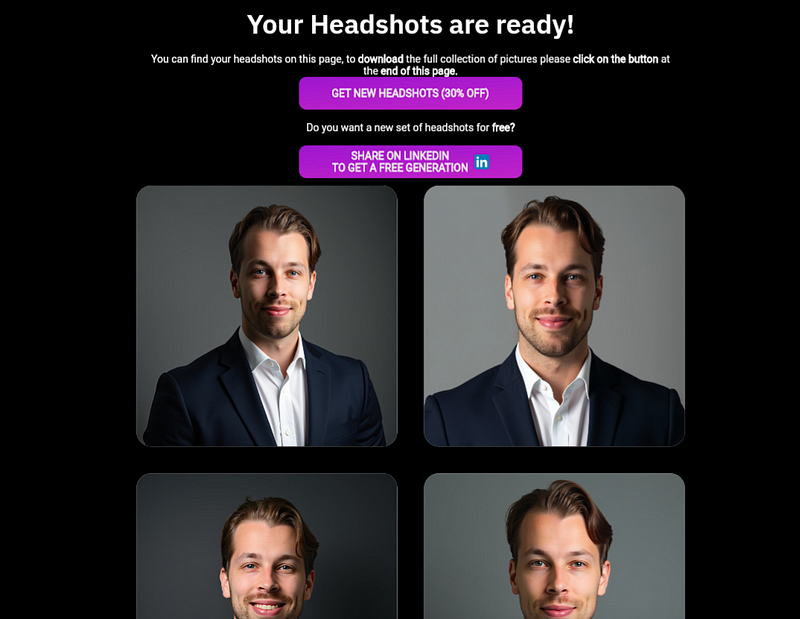
    Aren’t those cool? They look just like me! You can use the like/dislike buttons to remove any images you’re not happy with from the gallery.
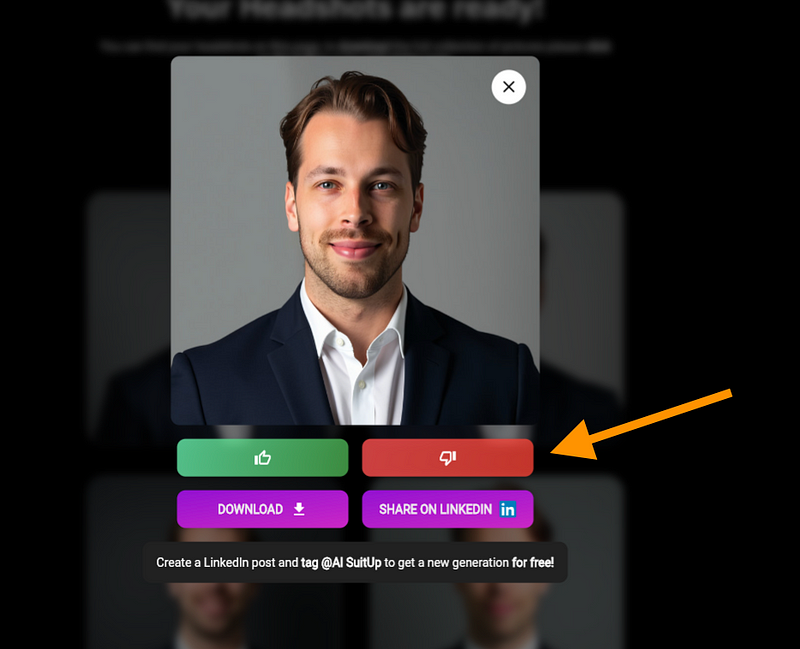
    Make sure to save the email/catalog link, as you can’t sign in to AI SuitUp. This is the only way to access your images later.

    Pricing
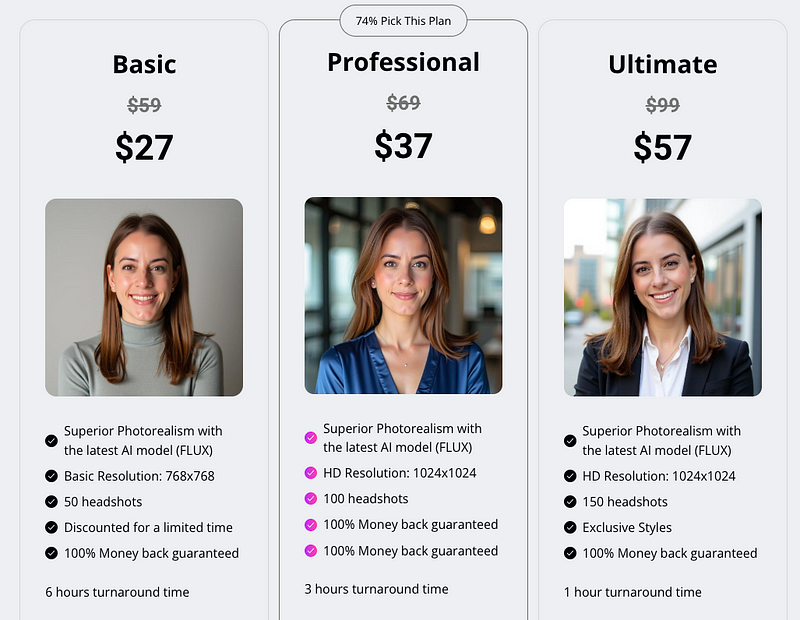
    Basic Package

    • Price: $27 (Originally $59)

    Professional Package

    • Price: $37 (Originally $69)

    Ultimate Package

    • Price: $57 (Originally $99)

    👉 Try AI SuitUp


    5. Aragon AI

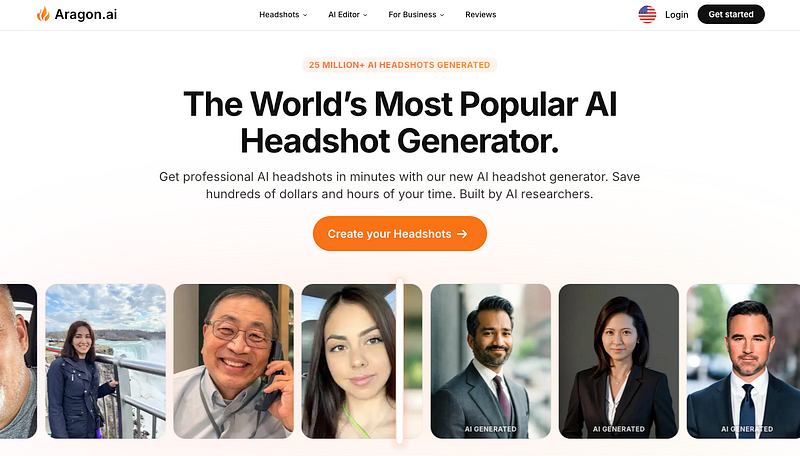
    Aragon is another cool AI business headshot generator that gives you quite a bit of customization options.

    Let’s see the results.

    My Results

    Let me show you what I got from Aragon.

    First and foremost, creating with Aragon is easy.

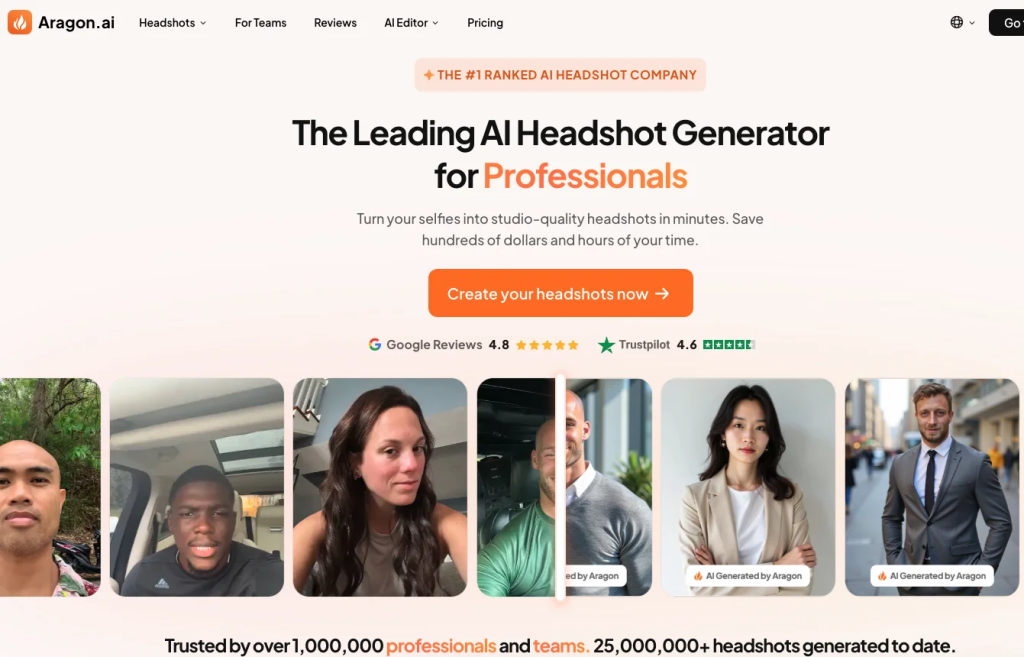
    Open the Aragon AI headshot generator homepage and sign up.
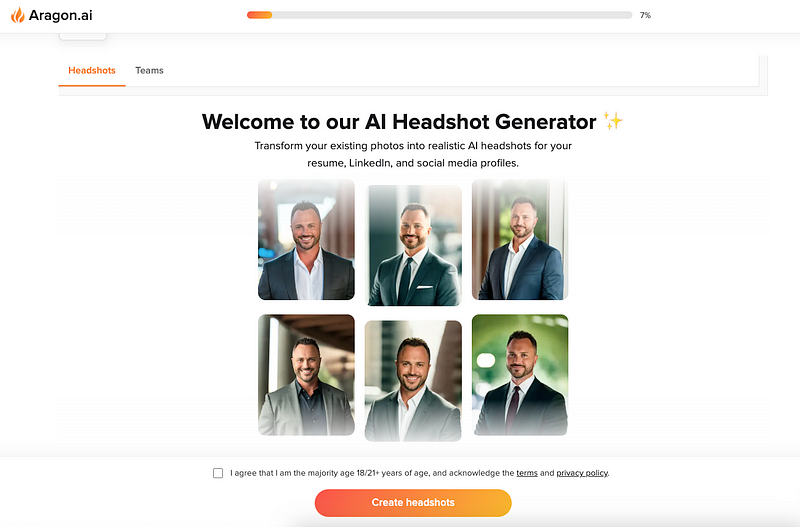
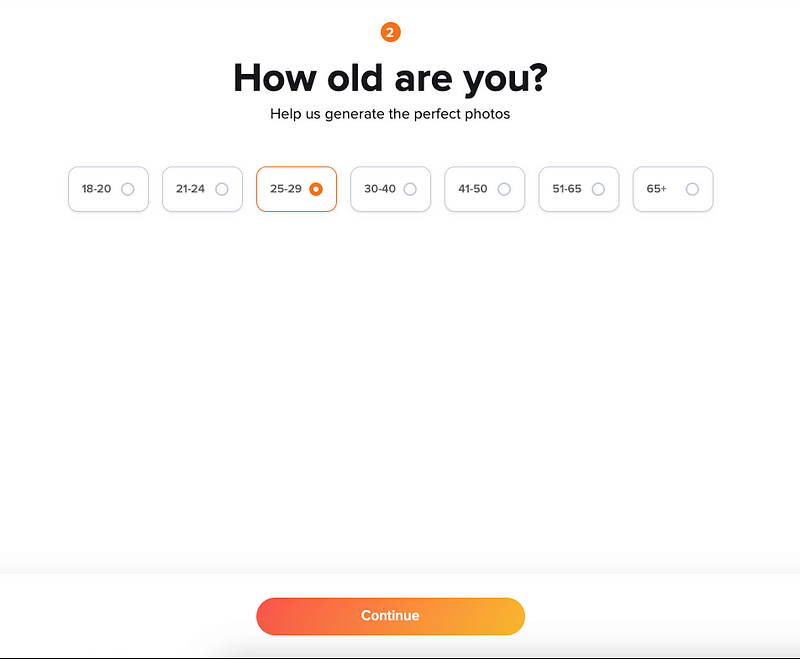
    Answer the questions about your characteristics.
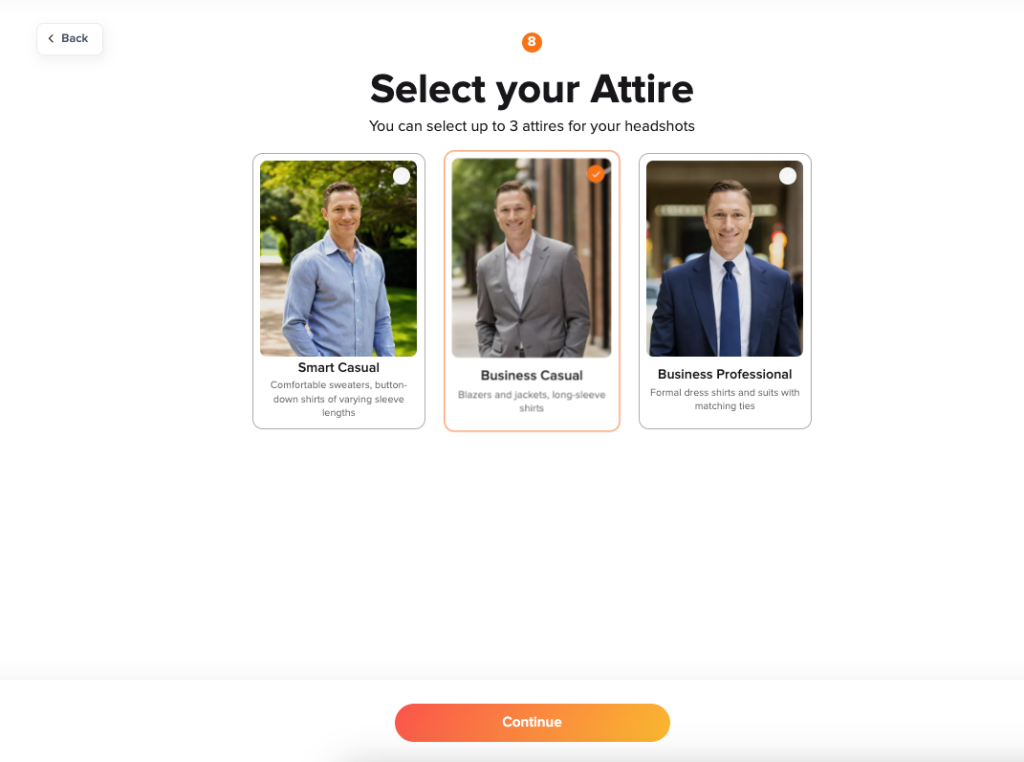
    Then choose a style:
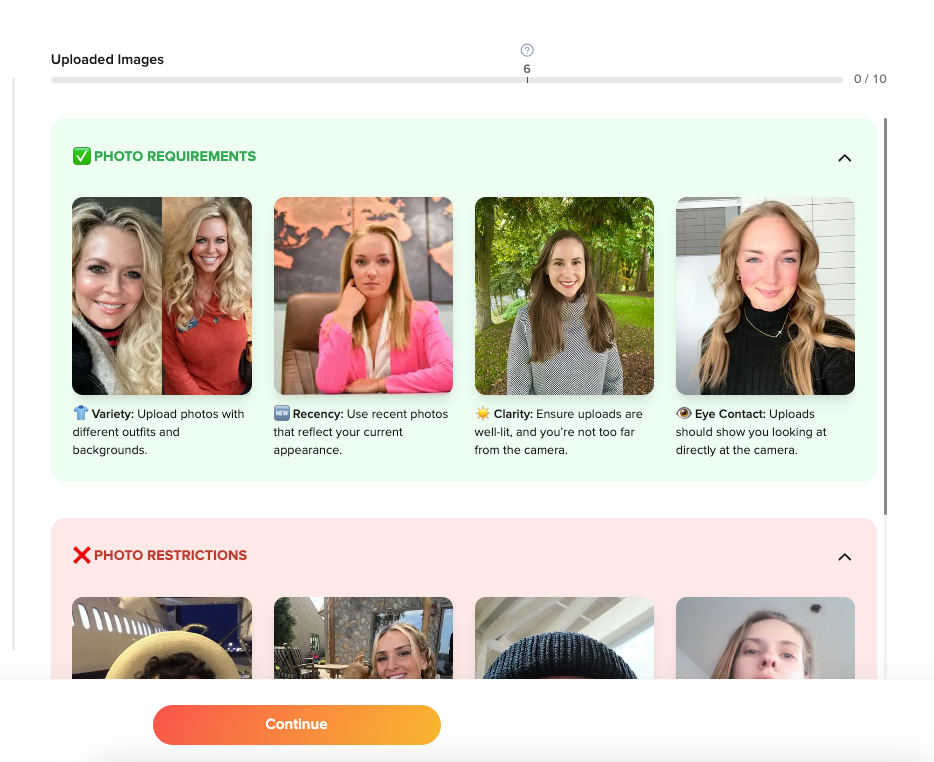
    Then upload your photos and before that, read the instructions.
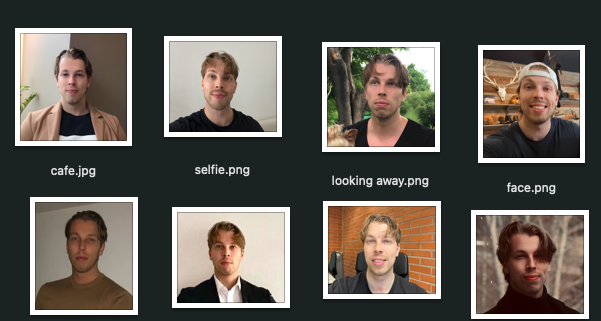
    Here are the images I used:
    Then before you send it all, double-check your details:
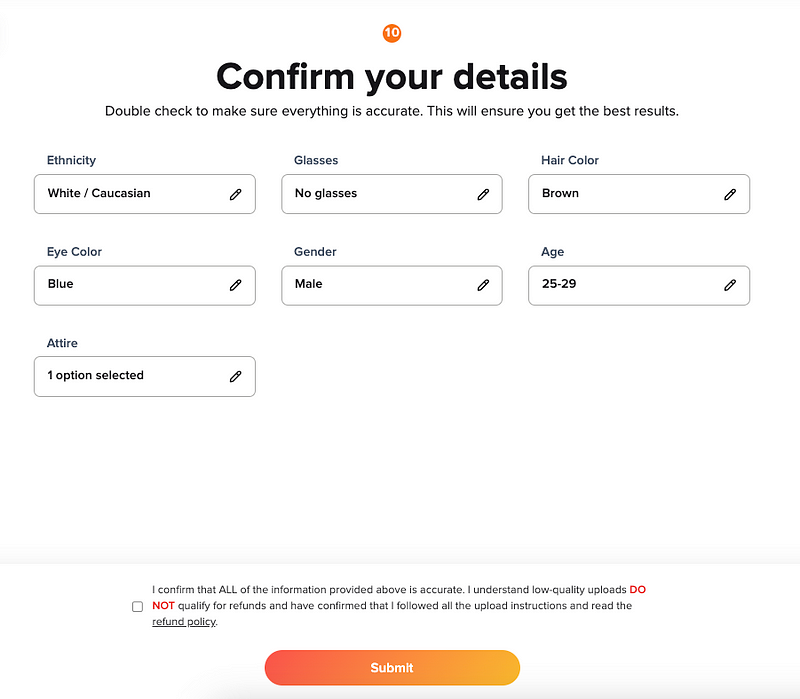
    Then just submit the order and wait for your AI LinkedIn headshots to generate.
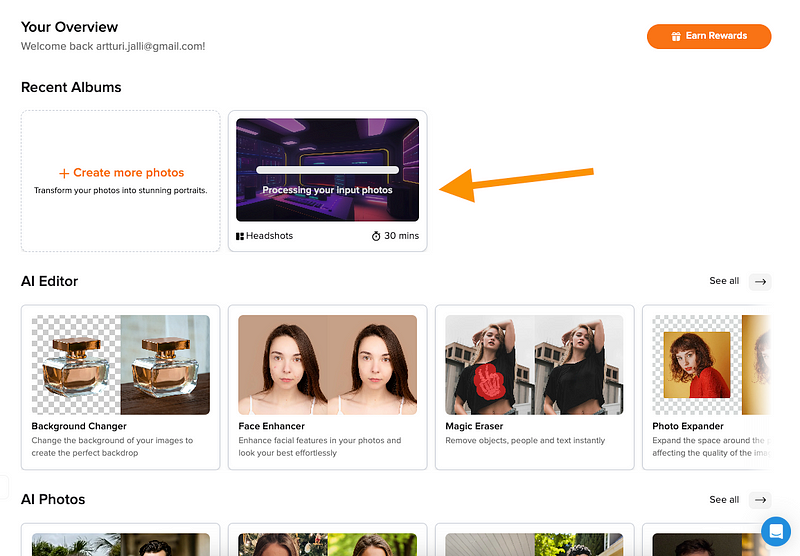
    After a while, you’ll get an email about the completion of the AI images:
    Here are the business photos I got from it:

    Cool!

    Here are more images of me:
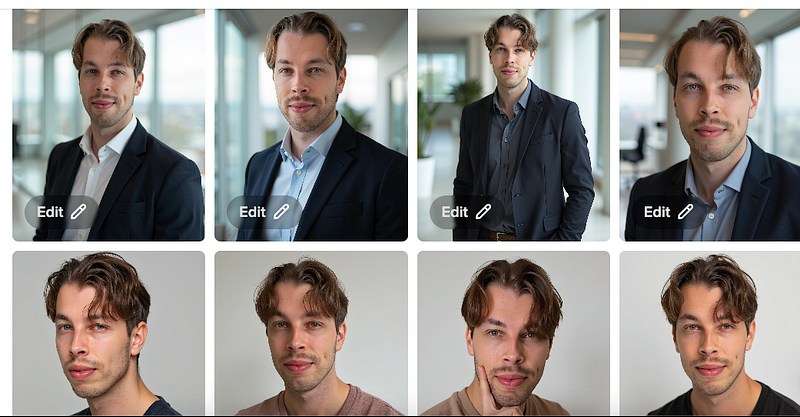
    That’s cool and somewhat realistic.

    But also, there are lots of flaws, to be honest. So compared to some of the other best business image generators, this one is not up there yet.

    Don’t forget you can fix the mistakes with the custom options.

    Pricing
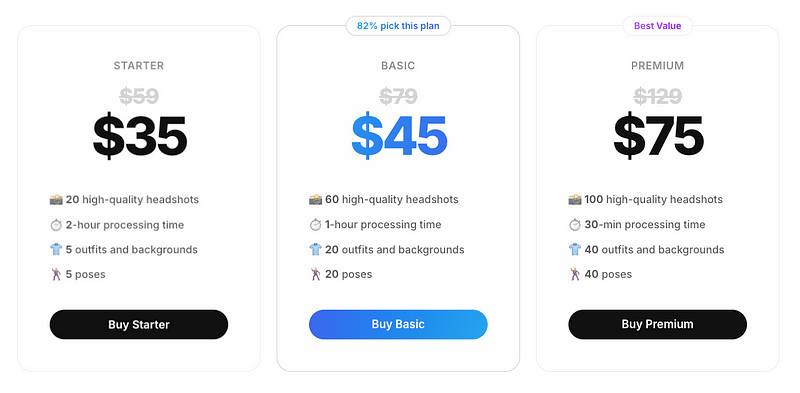
    • Starter: $35 for 20 headshots
    • Basic: $45 for 60 headshots
    • Premium: $75 for 100 headshots

    👉 Try Aragon AI


    6. Supawork AI (Free)

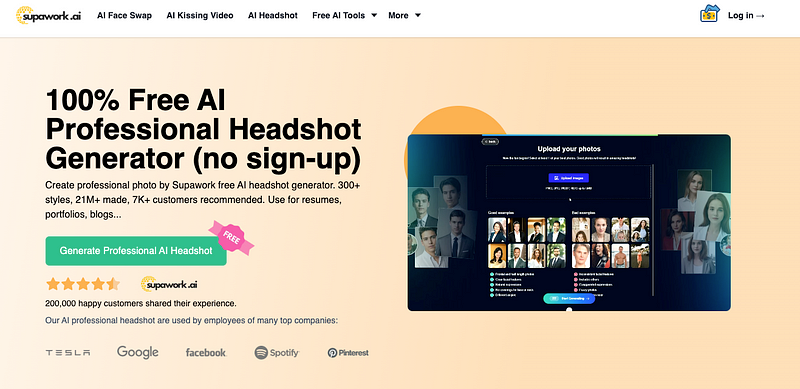
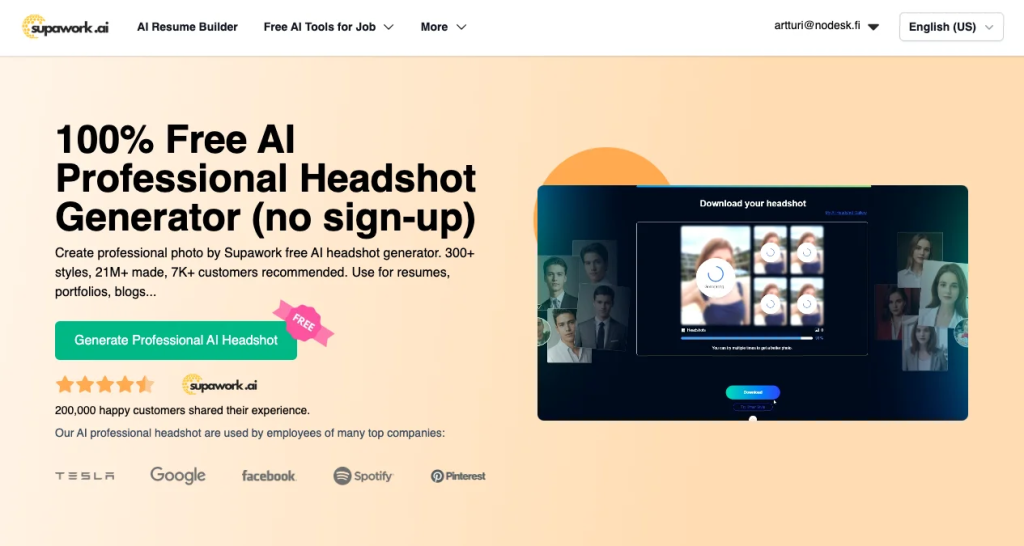
    Supawork is a free AI business photo generator that turns selfies into professional LinkedIn headshots and resume-ready photos.

    It offers various styles without requiring sign-up and prioritizes user privacy.

    Unlike the paid tools on this list, Supawork is free and only needs one image to generate four AI-enhanced headshots.

    Let’s see the results I got from it.

    My Experience

    First, choose the characteristics that best represent you.
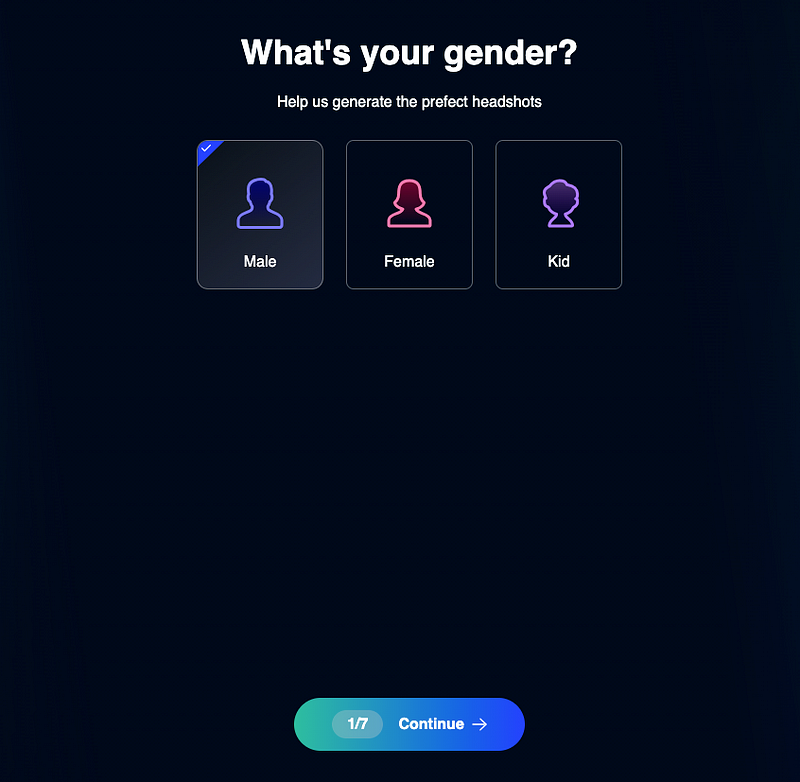
    Upload an image of yourself.
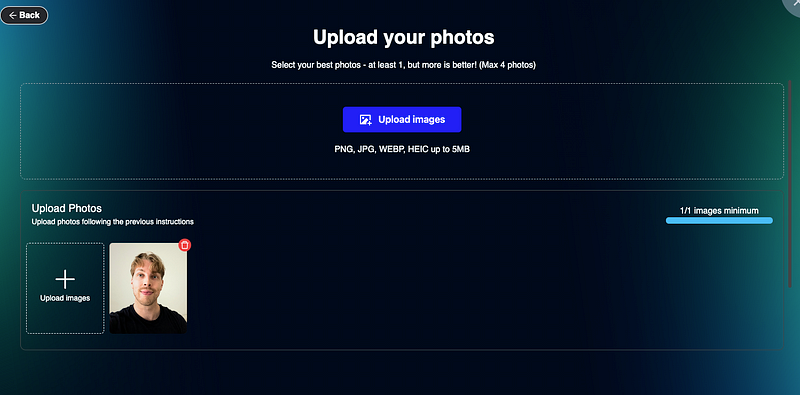
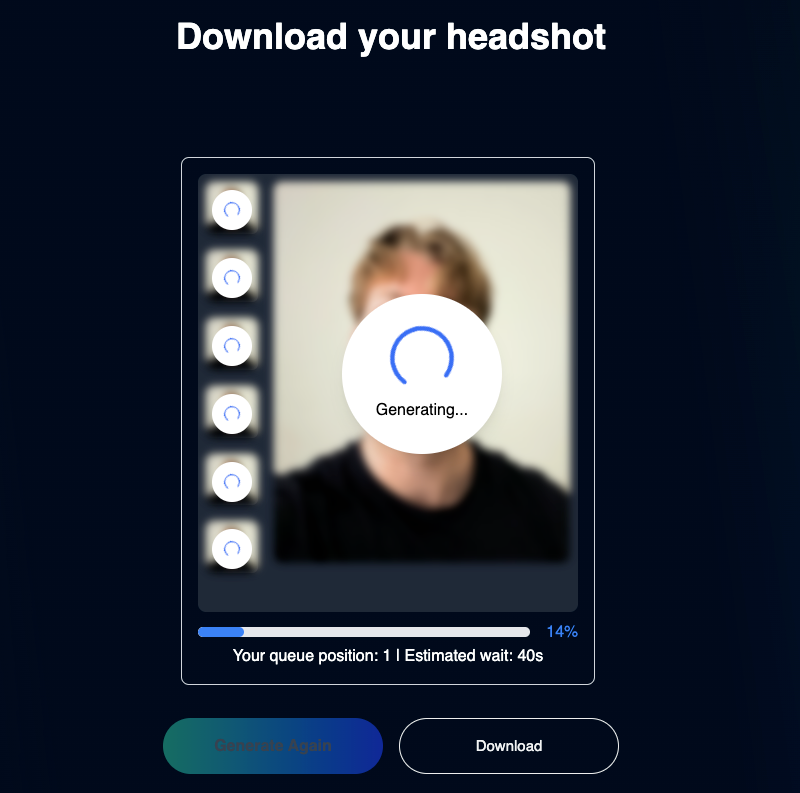
    Wait for 3 minutes.
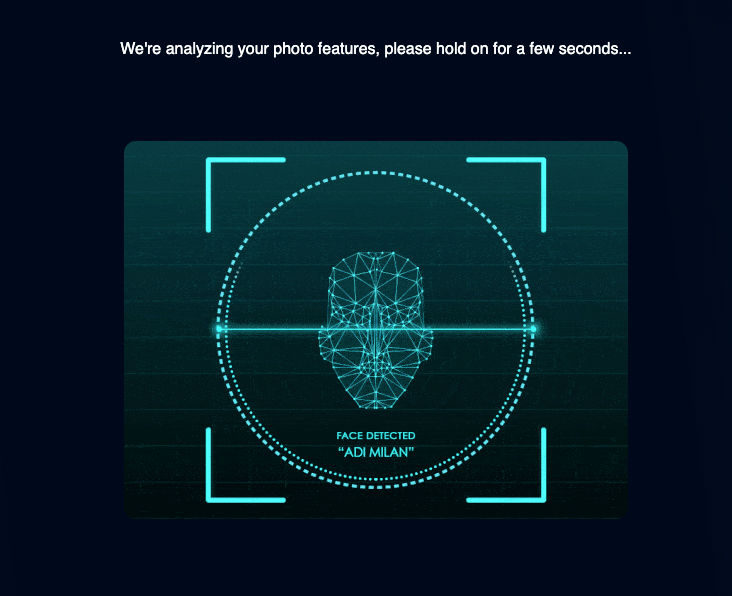
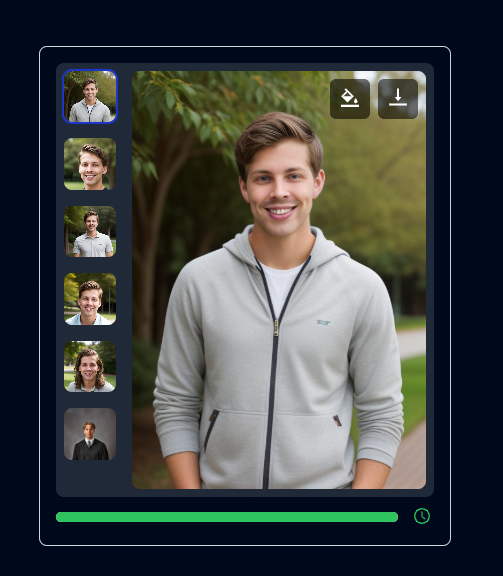
    Here are my business photos:
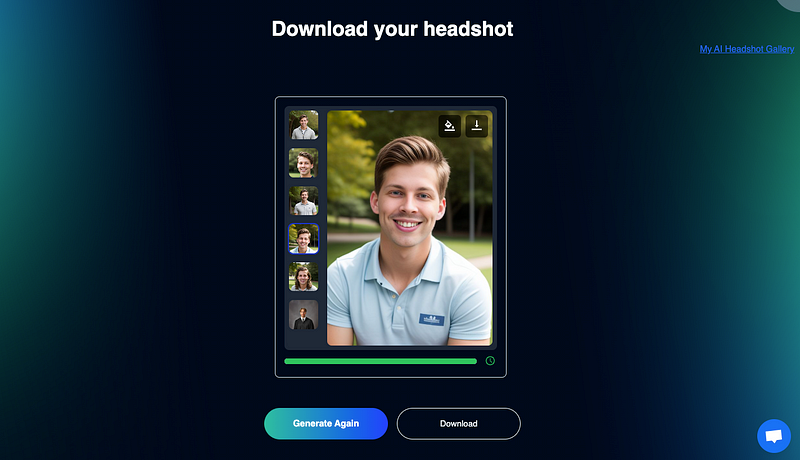
    You can view additional results by opening the options on the left-hand side.

    For example, here are some more LinkedIn headshots of me:
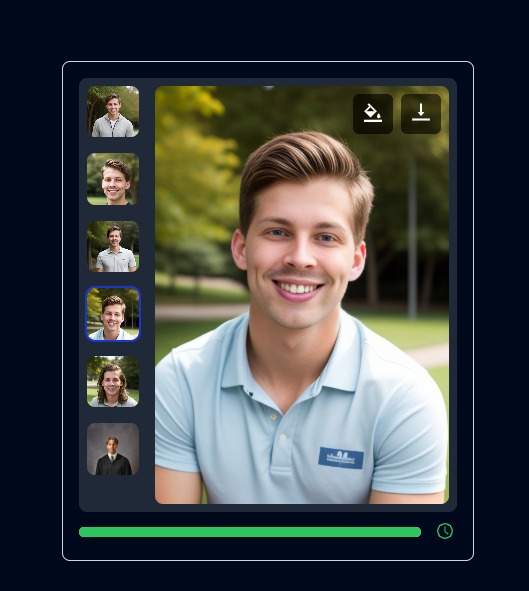
    You can change the backgrounds in the images using the editing options.

    That’s pretty impressive, especially for a free tool.

    But let’s be honest — it’s not a perfect match. The closer you look, the more it resembles a 3D-rendered character rather than a true replica.

    Pricing

    Free!


    7. PFPMaker
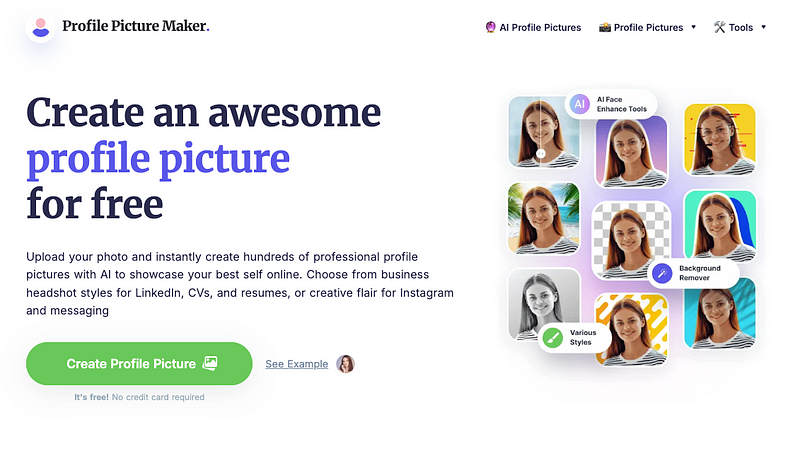
    PFPMaker is a free AI tool that helps you create professional business pictures by swapping out your image background.

    It’s faster than traditional headshot generators, as it removes and replaces the background rather than generating new images.

    But this is not a real photo generator but rather a background swapper tool.

    Let me show you what I got from it.

    My Experience

    To use this tool, just upload an image to this view:

    Then wait for 10 seconds:
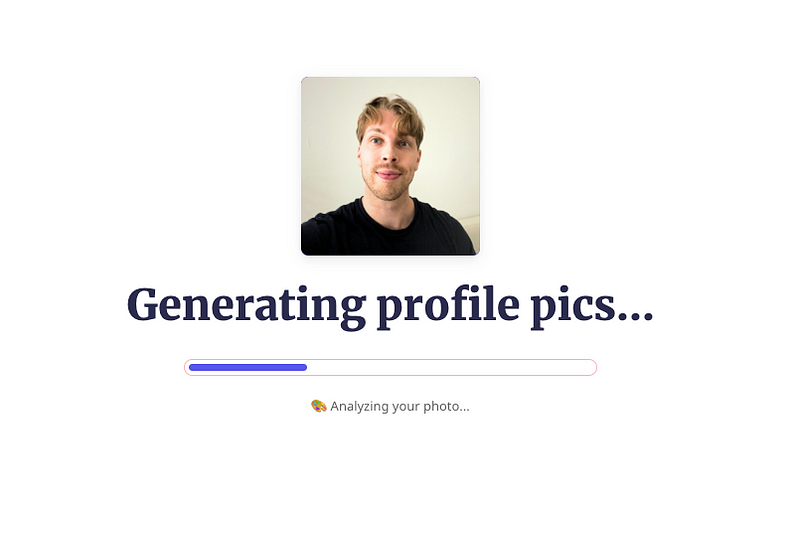
    Enjoy your images:
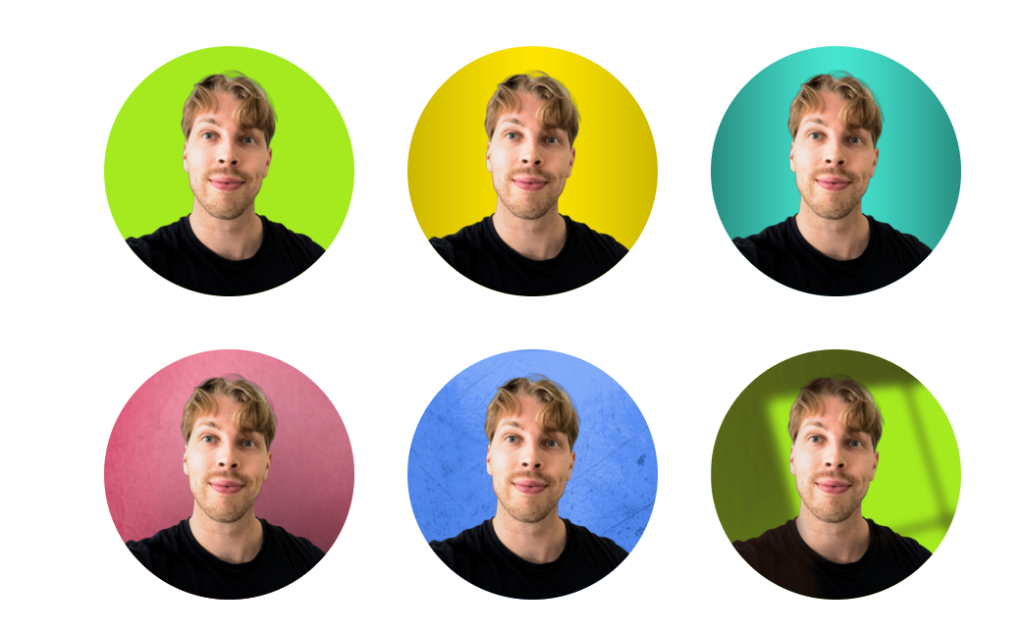
    Here’s a closer example:
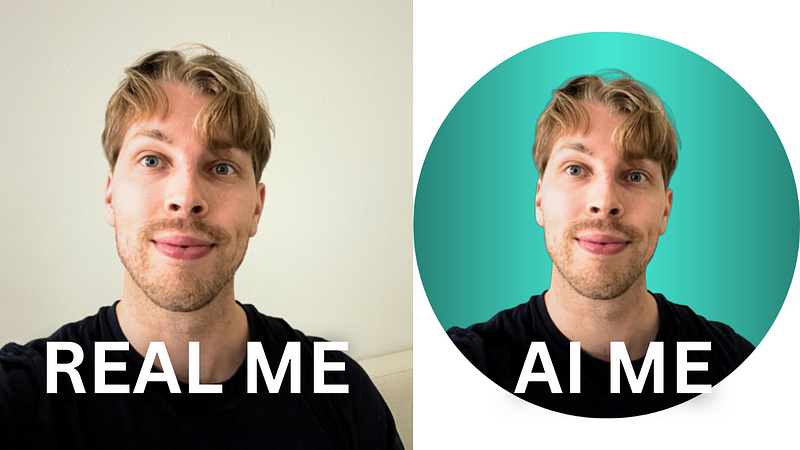
    That’s pretty cool! But obviously, it looks exactly like me because it is me—the background just changed.

    In that sense, this free business photo generator is not really a generator but rather a background changer tool.

    Noteworthy

    This tool doesn’t generate faces — it removes backgrounds using AI and replaces them with pre-made options.

    The process is quick, and you can easily try different backgrounds to see which one fits best.

    Since the backgrounds are fixed, the AI doesn’t create new ones each time. Essentially, it’s more of a background remover and changer.

    Don’t forget that you can also edit your images:
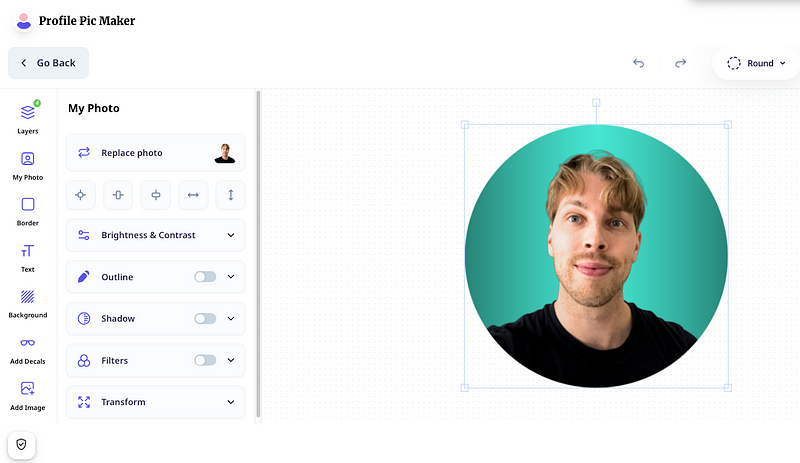
    Pricing

    Free!

  • Podia Review & Tutorial: The Best Course Platform?

    Podia is an online course platform that lets you create and sell courses and memberships.

    But it’s not only a course platform.

    Podia also comes with the tools you need to start making sales. It gives you features for building a website, marketing your site and courses, student management, and more.

    But does it work? How easy is it to use? How much can you earn?

    I’ve used Podia (and many other similar platforms) to find out.

    Let’s dive right into it.

    Try Podia for Free

    Disclaimer: This post has affiliate links at no cost to you.

    Main Features

    Before I showcase the product and share my experiences, here’s a brief recap of the main features of Podia just to give you an idea.

    • Course Creation: Tools for creating and selling courses.
    • Digital Downloads: Sell eBooks, PDFs, and more.
    • Membership Sites: Manage exclusive content access.
    • Website Builder: Customizable, no-code builder for non-technical users.
    • Email Marketing: Tools for newsletters and automation.
    • Sales Pages: Design high-converting course landing pages.
    • Webinars: Host live or recorded sessions.
    • Affiliate Program: Set up affiliate promotions to earn more.
    • Payment Processing: Integrated solutions to handle everything.
    • Analytics: Detailed sales and customer tracking.

    As you can see already from these, Podia is not just for creating and selling a course. It’s much more than that.

    Now, let me share my experience and results.

    My Experience

    Let me show you how Podia works first.

    You can follow this step-by-step guide either by reading the post or by following the actions I take.

    One thing I love about Podia is that it’s kind of an “independent” platform. This means anyone can just sign up and start creating. You don’t need to apply to become an instructor, unlike some other platforms.

    After signing in, you’ll see your main dashboard that looks something like this:

    To start building your first Podia course, choose the “Create a product” section.

    Then pick the Online course from the options.

    Next, you’ll find the course details page, where you can create lessons and add new sections to your course. How handy is that?

    Here you can give it a name. I call mine “Blogging Masterclass.”

    Make sure to come up with a good price point too.

    When it comes to creating your learning content, Podia offers you a bunch of content options to choose from.

    These include:

    • Text
    • Embedded content
    • Quiz
    • Coaching
    • Files

    For example, here’s what a quiz looks like in Podia. You can ask a question and then give a bunch of answers and set the right one.

    As another example, here’s what setting up a coaching call with your students looks like:

    Here you can link your Calendly (or another calendar tool) to let students book a slot with you automatically. This way you don’t need to do the back-and-forth emails.

    The course text editor is also quite good.

    It gives you tools for basic formatting. This way your text chapters or lessons won’t just be dull walls of text.

    You can further organize your content with basic features like lists, bold, italics, and more.

    Once you’ve added the course content, it’s time to edit the landing page. It’s crucial because this is the page every potential student sees. It’s the one that can be in a make-or-break role in your course sales.

    To create a landing page, click on the “Edit page” button.

    After this, you can choose your layout.

    For example, Podia asks you to choose a color scheme that meets your eye.

    After these steps, here’s what my landing page’s initial draft looks like:

    Nothing too epic, but it has the key elements in place.

    Creating a page like this from scratch or without templates would be time-consuming. You can quickly customize it by changing colors, fonts, buttons, links, and media.

    Once you’re ready, click “View product” to see your course.

    This gives you a student’s view of the course — a very handy feature.

    Once you’ve published your course, you can share a link to it:

    That’s the course creation process on Podia — simple with all the essentials but limited in customization compared to platforms like LearnWorlds.

    However, creating a course is just the start; selling it is key, and this is where Podia excels.

    You can set up email campaigns to engage your leads and potential students.

    Create a campaign by clicking “Start campaign.”

    Next, enter the name and choose the conditions for sending it to your subscribers.

    You have several email templates to choose from, but a simple text template is often the best option today. It’s straightforward, relatable, and highly effective — no need for flashy colors or elaborate formatting anymore.

    Here I’m adding titles and preview texts to my emails:

    Email marketing success could use its tutorial, but let’s keep it brief.

    Once your course, landing page, and emails are set up, you can start tracking your analytics to see metrics like email sends, open rates, and more.

    You can encourage students to buy sooner by offering limited-time coupons, like 50% off for Jan 2025.

    I haven’t created any coupons yet, but you just need to set a coupon name, discount amount, expiration date, and an optional usage limit.

    Finally, you can build a community around your learning content, which is quite common nowadays. You can set up topic pages and membership sites on Podia easily.

    Once your customer base grows, you can try affiliate marketing.

    This allows your students to review your products and earn a commission automatically whenever they generate a sale through their affiliate link.

    This is great and, once again, not something every platform offers. Depending on your niche, an affiliate program can give your sales a serious boost.

    With all this being said, I’d say Podia is a great platform with many great features for creating and selling a course to a warmed-up community of students.

    Why Podia, Though?

    But at this point, you might wonder what sets Podia apart.

    The difference is quite straightforward:

    For instance, unlike Udemy, which is a marketplace, Podia gives you full control over your branding and customer relationships.

    On the other hand, compared to platforms like Thinkific, Podia is more of an all-in-one solution with built-in email marketing, whereas Thinkific requires a third-party email service.

    But there’s plenty of overlap too! Podia indeed shares a lot of similar features with platforms like UdemyLearnWorlds, and Teachable.

    Pros

    • All-in-One Platform: Podia offers everything you need for course creation, digital downloads, memberships, and email marketing.
    • User-Friendly: The platform is easy to use. Just sign up, start creating courses and landing pages, and start selling. While building and warming up an audience takes time, Podia minimizes the technical hurdles.
    • No Transaction Fees: Unlike some competitors, Podia doesn’t charge transaction fees on any plan.
    • Customer Support: Podia has a responsive and highly-rated customer support team ready to help with any platform-related questions.

    Cons

    • Limited Customization: There are fewer design customization options compared to some other platforms, and the content options are quite basic.
    • Too Basic Reporting: The analytics and reporting features are not as advanced as some might prefer, but this isn’t a big issue for beginners.
    • Limited Community Features: The community tools are less robust than those on other platforms; using Slack or another third-party service might be a better option.
    • Fewer Integrations: Podia offers fewer third-party integrations compared to some competitors.

    Podia Alternatives

    Before wrapping up, let me show you a bunch of good Podia alternatives for different use cases.

    These might be better options based on your specific needs.

    1. LearnWorlds

    LearnWorlds is the most complete course platform out there.

    If you’re looking for more customization and features, LearnWorlds is a better option than Podia.

    For example, it lets you customize your websites and landing pages to a much greater detail than Podia.

    Also, it has more features overall.

    But a lot of features are not automatically a good thing.

    If you use LearnWorlds as a beginner who just needs to host a course, you’d end up paying for features you don’t need.

    But if you have a team or if you think you need more customization and community features, LearnWorlds might be exactly what you need.

    Try Learnworlds

    2. Udemy

    Udemy is great if you want to teach but don’t want to do marketing.

    Udemy does marketing behind the scenes. They run sales and ads, and they have a reputable brand.

    The drawback is that they take a big cut from your courses and limit your pricing. Most of the time, the courses are at an 85% discount. After Udemy takes its cut from that, you might be left with just a couple of bucks from a $100 course.

    But this is good because it’s much easier to start. If you use platforms like Podia or LearnWorlds, you need to build a reputation and audience. This takes years of hard work. In this sense, a course marketplace like Udemy can be a lot easier and a lot more stress-free option.

    Try Udemy

    3. Khan Academy

    If you think education should be free, use Khan Academy. Especially if your audience is K—12.

    Khan Academy lets you build free and non-profit courses from their expert-created materials. This is not only affordable but also quick. Instead of having to record your classes and materials, just combine existing results.

    Also, you can act as a teacher on the platform. Once you’ve created a course, you can invite your students to take the classes. You can also create quizzes and assignments and track their progress with the built-in Khan Academy features.

    If you want to teach K—12 subjects like maths, physics, or coding as a school teacher, Khan Academy can be a great place to start.

    Try Khan Academy

    Pricing

    • Free Plan: $0/month
    • Starter Plan: $4/month
    • Mover Plan: $33/month
    • Shaker Plan: $59/month (first year pricing, then $75/month)

    Try Podia for Free

    To Take Home

    I really like Podia.

    While it might not be my top choice right now, it’s excellent for course creation.

    It’s more than just a tool for building courses and setting prices; it also offers marketing and community features.

    Podia lets you maintain full control over your branding and customer relationships, unlike platforms like Skillshare or Udemy.

    Try Podia for Free

  • 8 Best AI Video Upscalers of 2024 (I’ve tested them all)

    Did you know you can use AI to enhance your videos?

    I’ve tested the best AI video enhancer/upscaler tools on the market so you don’t have to.

    In this post, I will show you the best AI video enhancer tools and what kinds of results you can expect from those.

    Let’s dive right into it!


    Disclaimer: This post has affiliate links at no cost to you. Thanks for the support!


    1. VideoProc AI

    👉 Try VideoProc AI for free

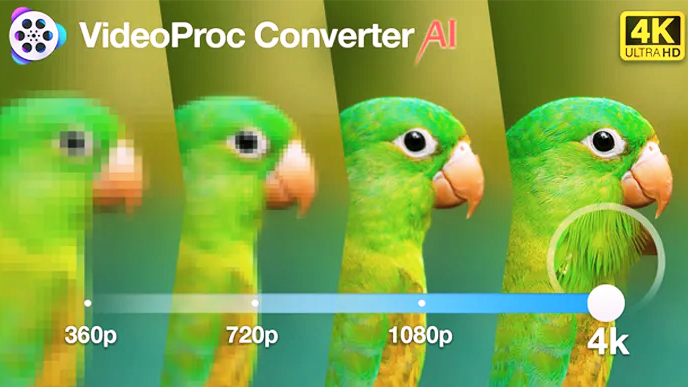
    VideoProc Converter AI is my favorite AI video upscaler tool.

    It allows you to drag and drop a video to the view and then improve its quality in just minutes.

    This is hands down the best tool for upscaling videos online!

    But is it just hype? Let me actually show you around and how it works.

    Key Features

    • AI Super Resolution: Upscales videos to 4K or 8K, enhancing detail and texture without adding artifacts.
    • AI Frame Interpolation: Creates smoother videos by increasing the frame rate, perfect for slow-motion or fluid footage.
    • AI Video Stabilization: Reduces camera shake and motion distortion, ideal for handheld videos.
    • Extensive Format Support: Handles over 370 input formats and 420 output formats, making it incredibly versatile.
    • Full GPU Acceleration: Speeds up video processing and encoding with Level-3 GPU acceleration.

    My Experience

    VideoProc is simply fantastic, taking video upscaling to the next level. Let me show you how it performs in my hands.

    To get started, first, you’ll need to download it to access the tool, and there’s a free trial available to get you started.

    After you’ve set it up, you can start improving your videos with it.

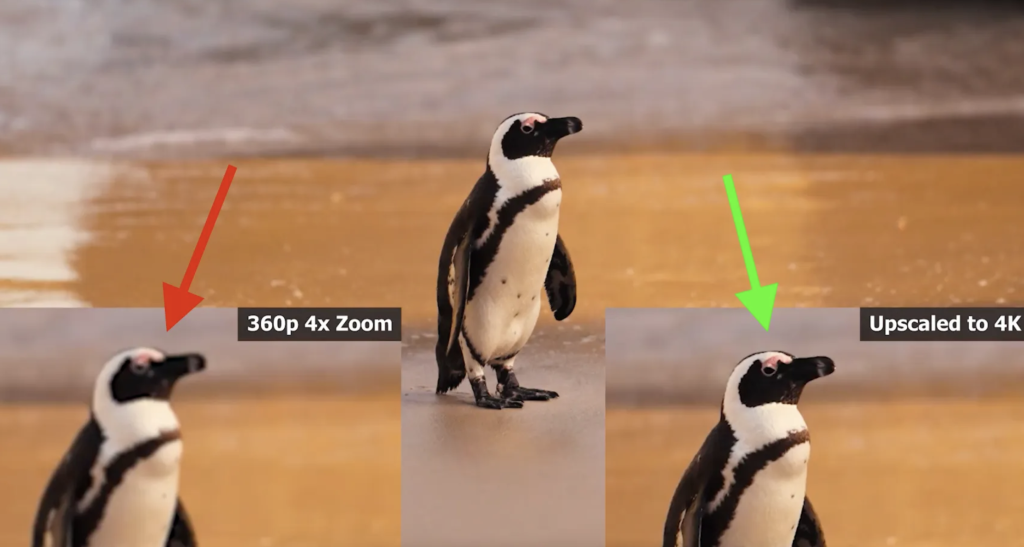
    For example, here’s a screenshot of a video I upscaled with this product.

    As you can see on the left-hand side, the video quality of that poor penguin is lost. This is because the original video is simply not sharp and detailed enough.

    However, once I used the VideoProc AI, the quality of the zoomed animal improved by quite a bit.

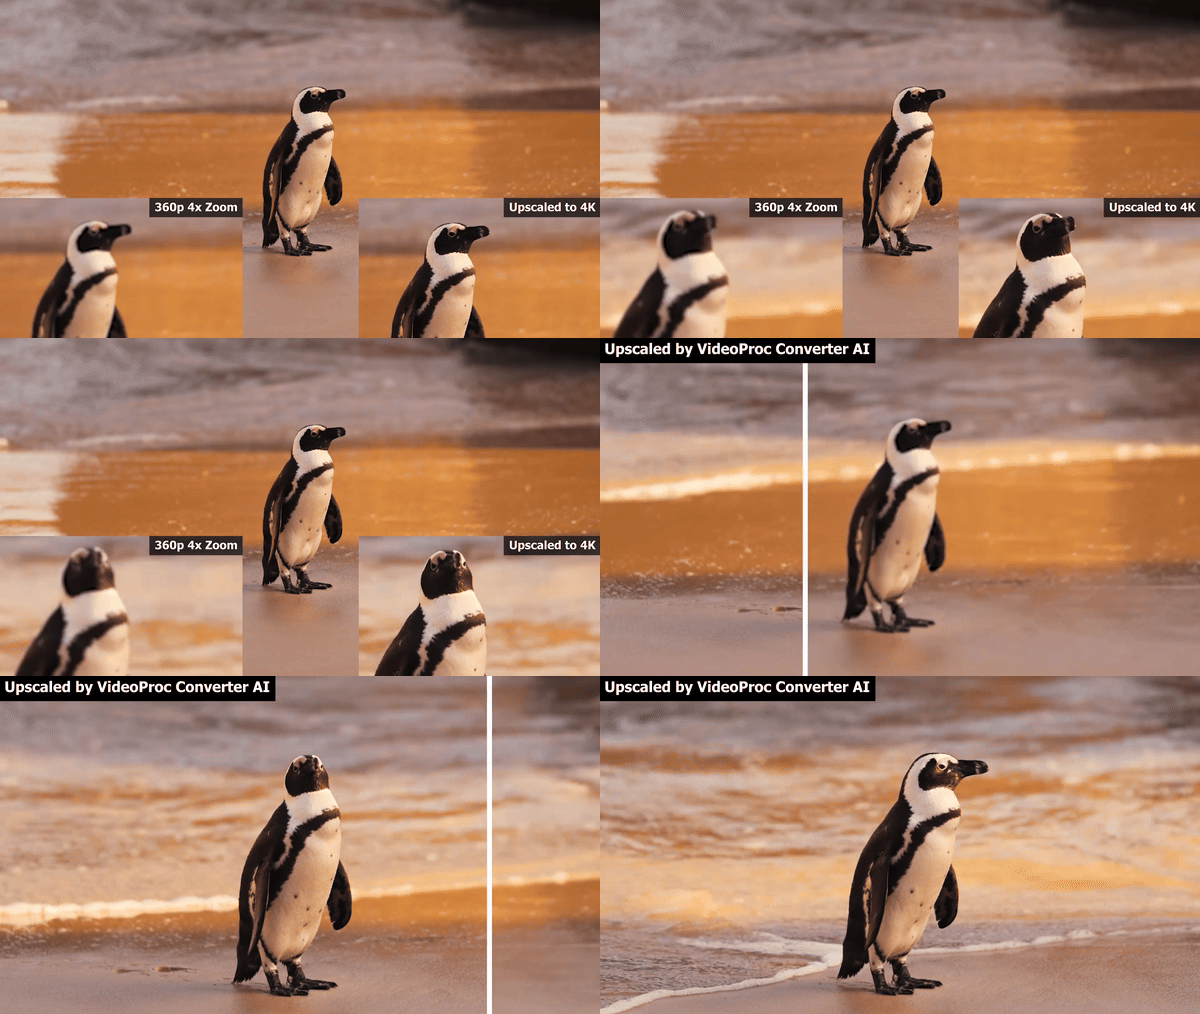
    I can actually add a GIF for you to see the upscaling in action:

    But please keep in mind this is just a gif. It doesn’t do full justice because the GIF lags annoyingly. The point is to show you how good the video quality is now.

    Oh, and here’s something epic.

    You can not only upscale your videos but also improve frame rates with the “fill in” feature. This interpolates what it predicts to happen between the frames and fills in your video to make it smooth.

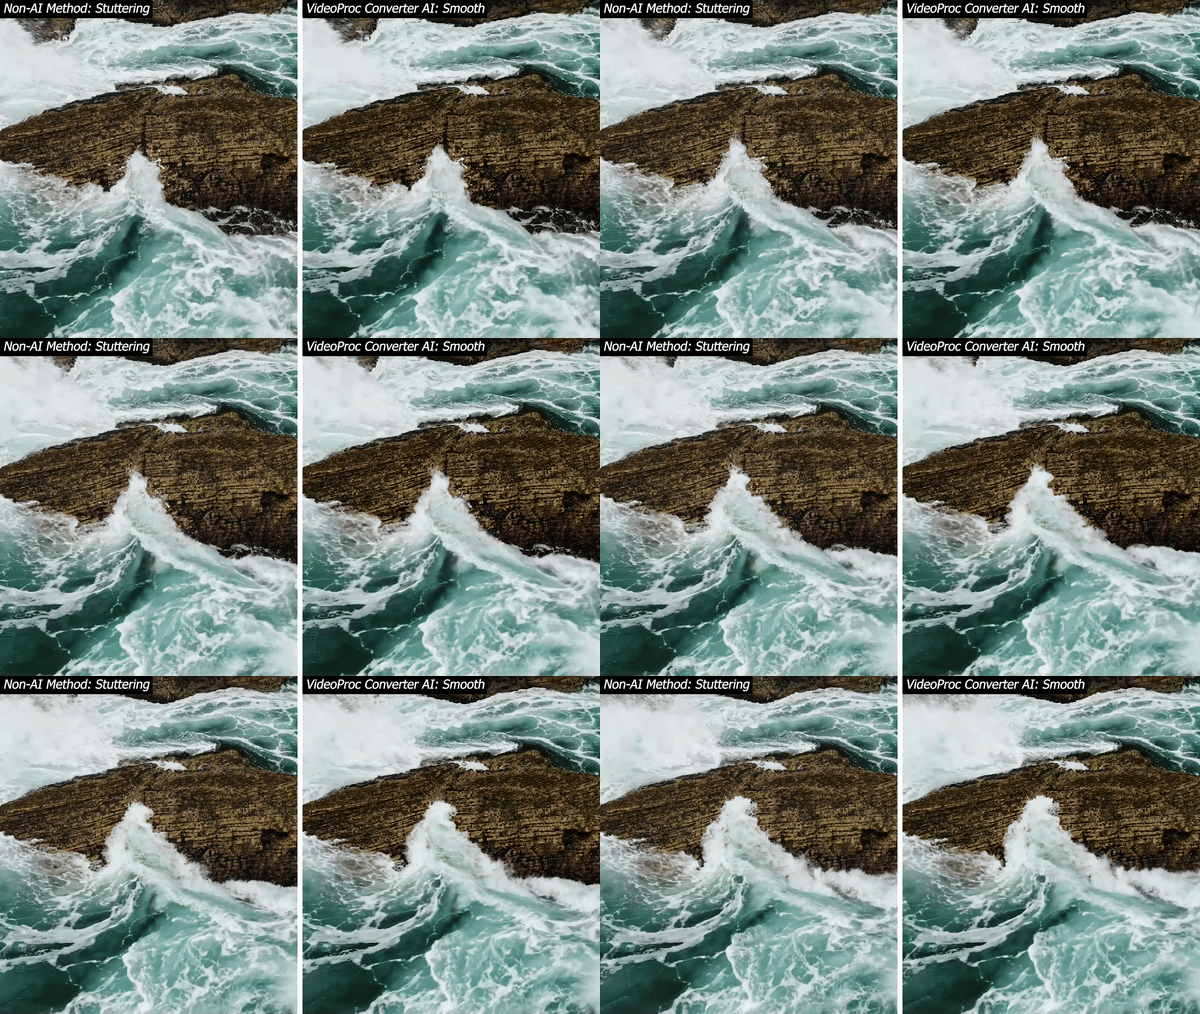
    This sounds like a math lecture so let me show you an example of what I mean:

    In the above comparison, the left-hand side video has a low framerate. This is a slow motion of a wave hitting the rock and this is typically what happens—especially with older footage.

    But these days you can use AI to fix that. The right-most video is a lot smoother take, huh? Because the AI cannot go back in time to see what happened between the frames, it’s not perfect.

    But it’s close.

    It fills in the “missing frames” based on the “averages” between the two frames.

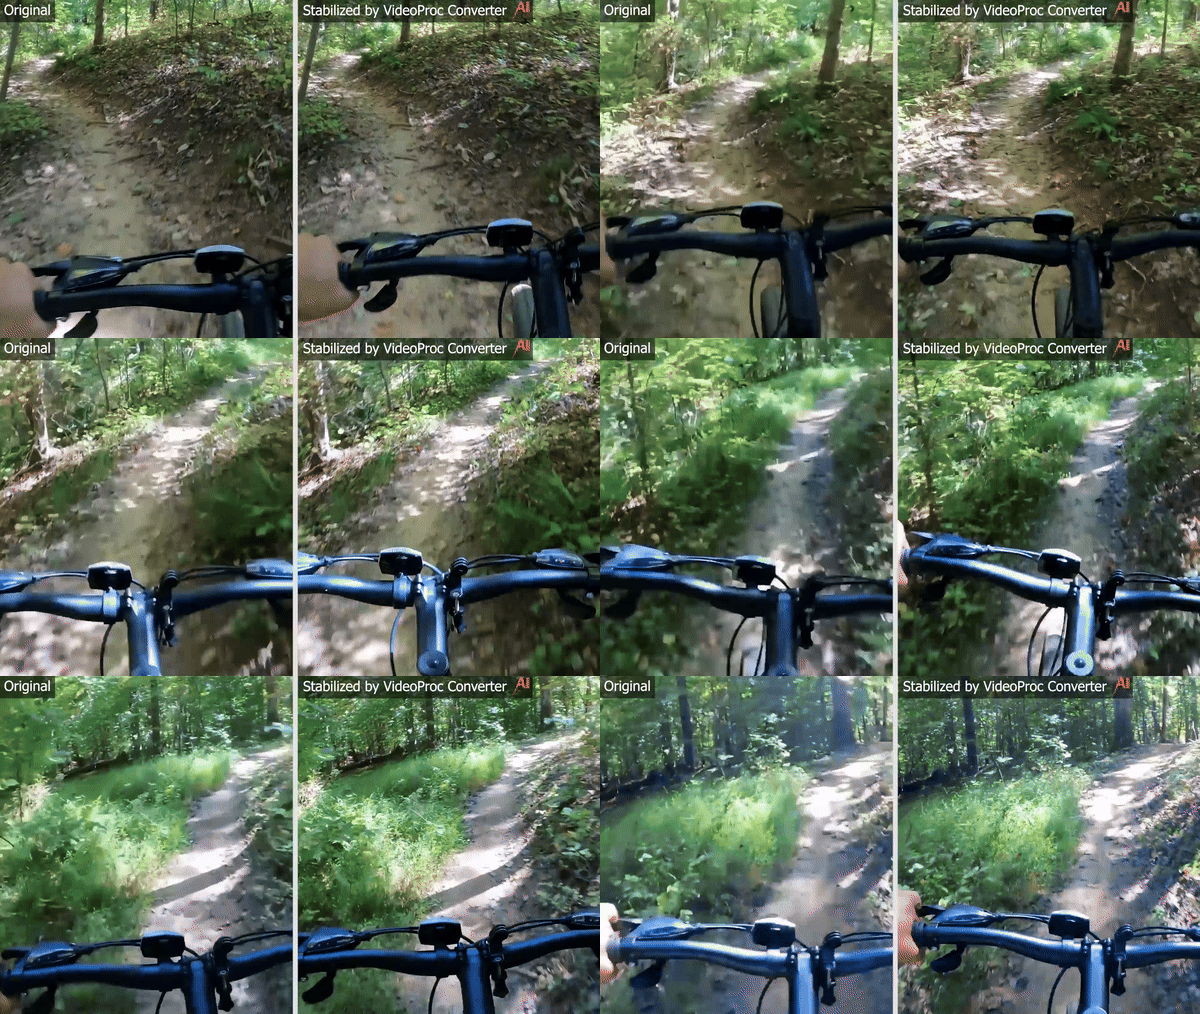
    Then one more cool feature I must bring up is the stabilizer feature. If you have shaky footage, you can use VideoProc AI to stabilize your videos.

    For example:

    Just a heads-up, the GIF format doesn’t quite capture the full effect. The real video looks even more impressive.

    Still, this highlights VideoProc’s capabilities perfectly. If you’re serious about enhancing videos, you’ve got to try it. The best part? There’s a free trial that’s incredibly easy to activate and use.

    Pros

    • High-Quality Upscaling: AI-driven upscaling creates sharp, detailed videos and outperforms all the online upscalers I’ve tested.
    • Ease of Use: User-friendly interface, perfect for beginners—just a few clicks to upscale your videos.
    • Versatility: Ideal for hobbyists, vloggers, and professionals, offering tools for stabilization, interpolation, and upscaling to enhance video quality.
    • Comprehensive Editing Tools: Includes options for cutting, merging, cropping, and adding effects.

    Cons

    • Limited AI Features on Mac: Currently, AI features are only available on Windows, with Mac support still in the works.
    • Cost: While a free trial is available, the full version comes with a price, which may be a concern for those on a budget.

    Pricing

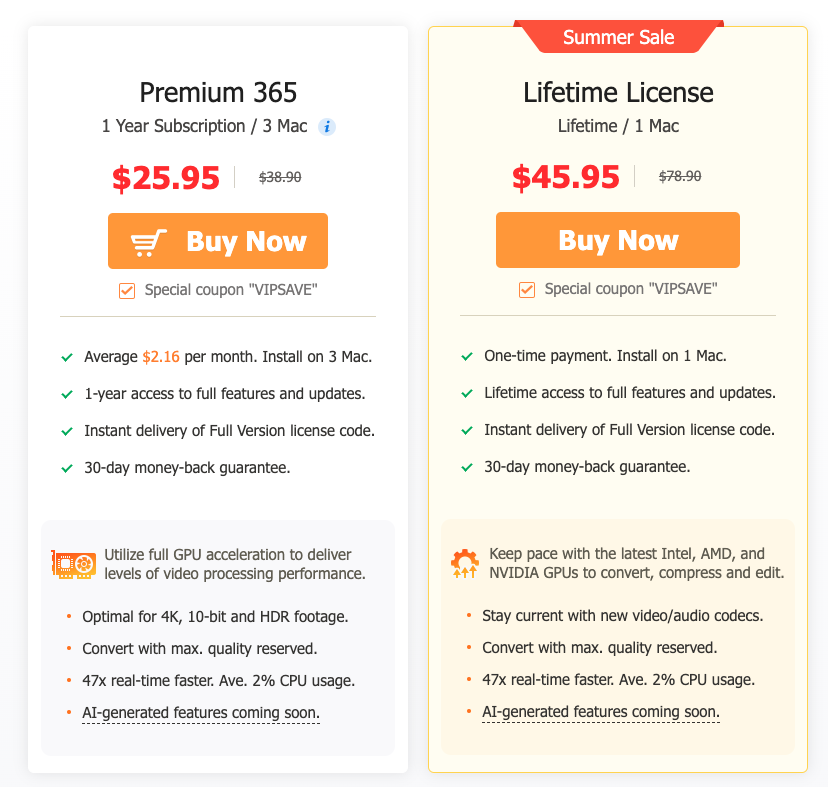
    • Premium 365: $25.95/year for 3 Macs, with full GPU acceleration, optimized for 4K/HDR, 47x faster processing, and AI features coming soon. Includes a 30-day money-back guarantee.
    • Lifetime License: $45.95 for 1 Mac, offering lifetime access, latest GPU compatibility, high-quality conversion, and future AI features, along with a 30-day money-back guarantee.
    • Family License: $57.95 for up to 5 Macs, including everything from the Lifetime License, ideal for families or small teams, with lifetime access and a 30-day money-back guarantee.

    For detailed pricing for both Windows and Mac, visit the pricing page.

    To Summarize

    I love VideoProc Converter.

    This AI tool enhances your video quality in seconds with the power of AI.

    Simply upload your video and let it work its magic.

    Though it’s a cost-effective option, it’s currently limited to Windows users (as of now). If you’re using a different OS, stay tuned for more options!

    👉 Try VideoProc AI for free


    2. AVCLabs AI Upscaler

    👉 Try AVCLabs Free

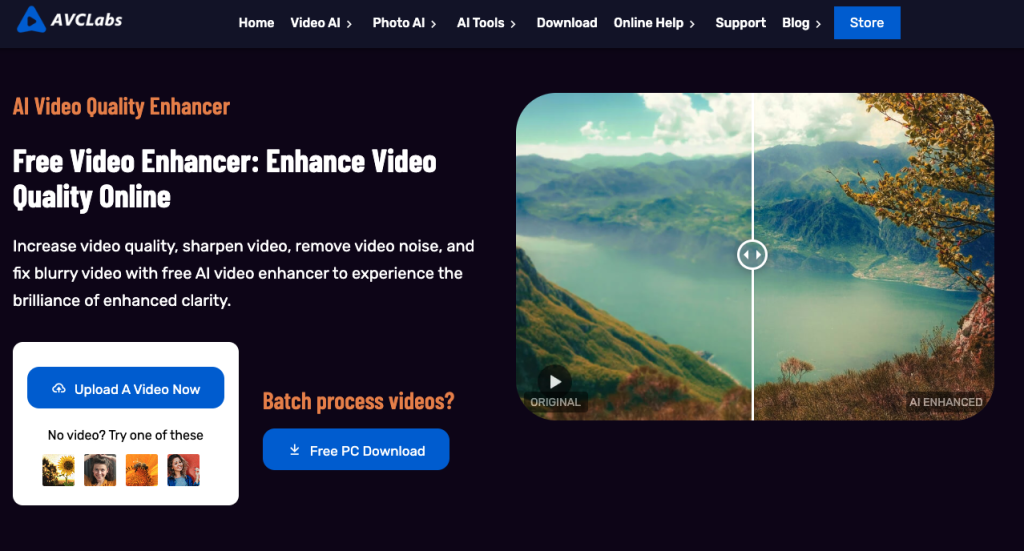
    AVCLabs Video Enhancer AI is another epic software that uses AI to enhance video quality.

    It comes with AI-driven features that improve video quality, smoothness, color, and focus.

    But is it just hype? Let’s see how it performs in my hands.

    Features

    • AI Super-Resolution Algorithm: Upscale videos from SD to HD, HD to 4K, and 4K to 8K, significantly enhancing quality.
    • Frame-by-Frame Editing: This tool allows you to edit and trim videos.
    • Face Refinement: Use AVC to sharpen blurred faces and enhance facial details.
    • Natural Output: Creates enhanced videos with a natural look. This tool also avoids over-saturation and excessive brightness common in other upscalers.
    • User-Friendly Interface: No technical background is needed. Just install the software and start upscaling your videos.

    My Experience

    Let me show you how I use AVCLabs and what kinds of results you can expect.

    First, you install the software if you want to use it. If you trust my word, then just read along as I will show you realistic results and use cases.

    Download the app for Windows or Mac to try it for free.

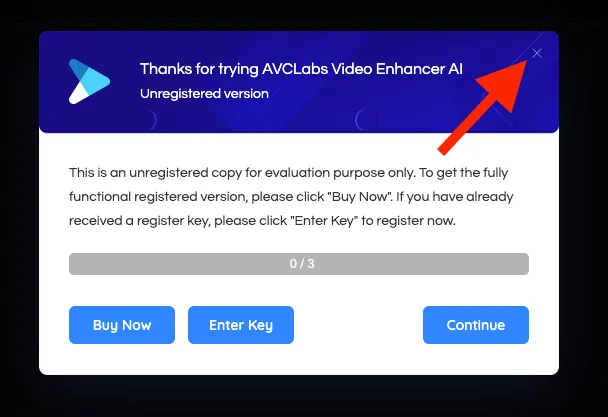
    While the website suggests purchasing, you can test it for free. (This just adds watermarks to videos.)

    I recommend giving it a shot to see what it can do before buying. If prompted to purchase, just click “X” to close the window.

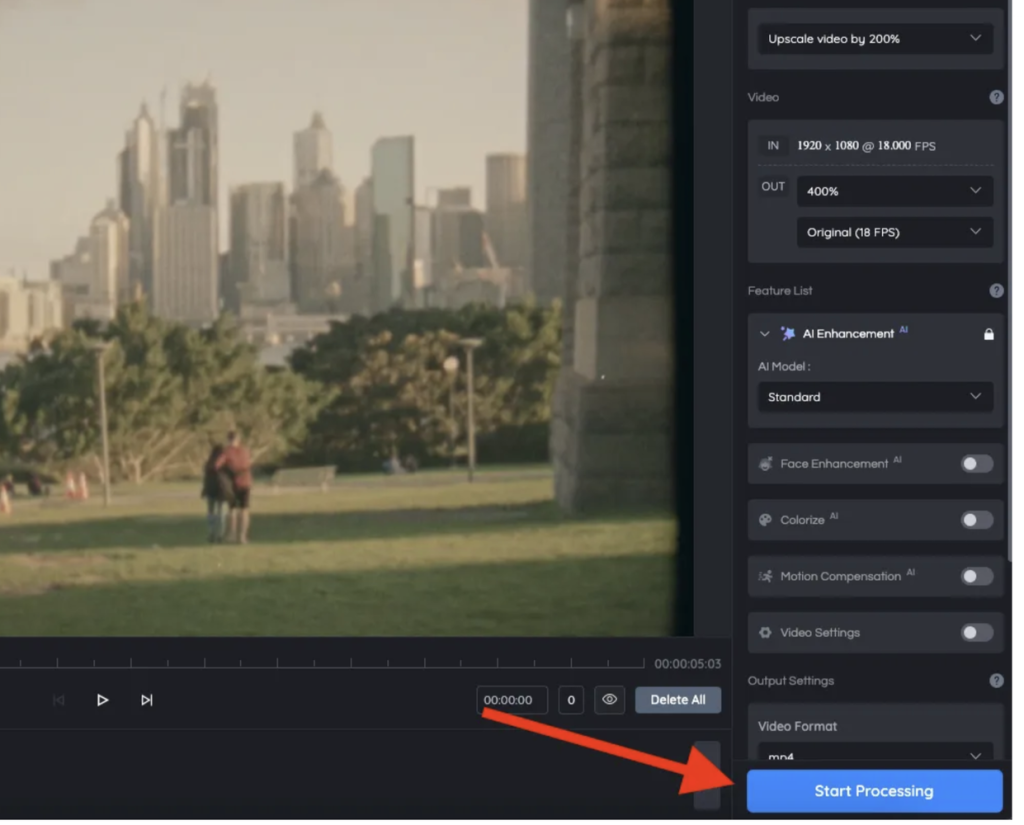
    Once you’ve done this, you can start using the tool. Just drag and drop a video into the view and start processing it.

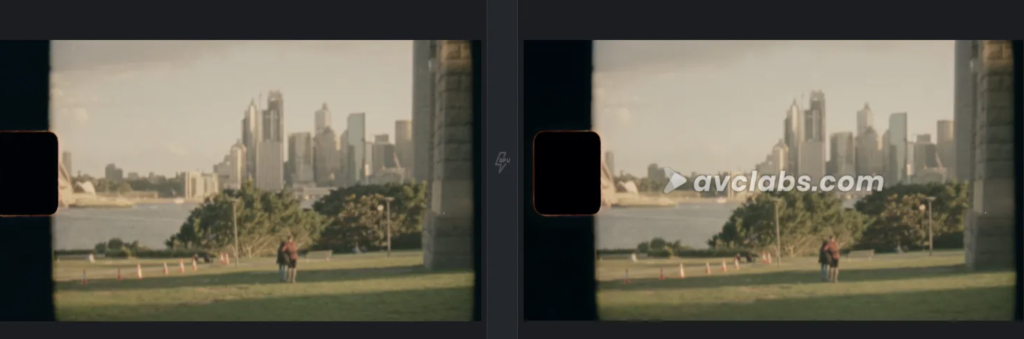
    For example, here’s a side-by-side comparison of the above video and the upscaled one (I’m using screenshots here, though.)

    I think the AI-processed video looks great. While it’s not perfect, it’s a noticeable improvement over what other tools produce.

    Let’s zoom in to take a closer look at some details:

    In this example, the difference is clearer (although it’s a bit hard to see from these blurred screenshots…)

    The image on the right is a bit blurry but much smoother than the original on the left.

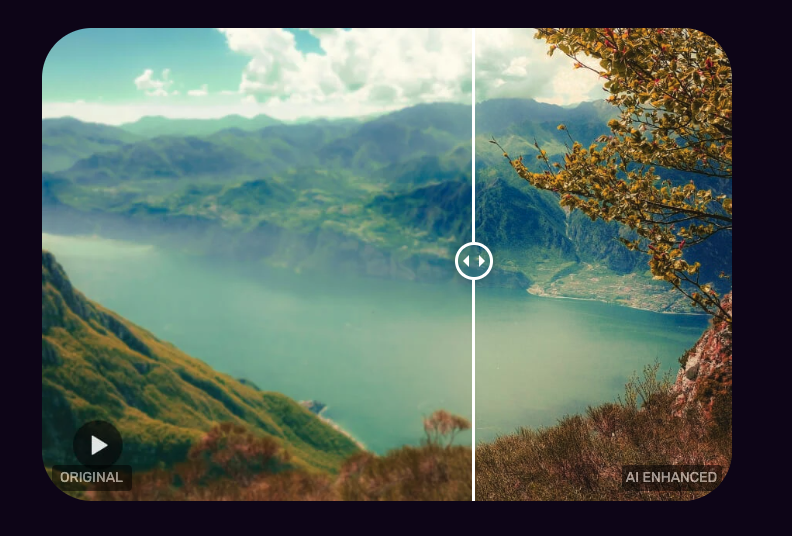
    I’d say this is impressive, although not quite as good as with the first tool. Also, I expected a bit more based on the homepage images—but it’s cool nonetheless.

    Also, you’ve got to keep in mind that the images I’ve used here don’t do justice because screenshots are always blurry.

    Pros

    • Delivers high-quality video upscaling to 4K/8K.
    • User-friendly interface, perfect for beginners.
    • Automated process with minimal manual effort.
    • Precise enhancement through frame-by-frame analysis.
    • Offers a trial version to test the features.

    Cons

    • Requires a high-end graphics card with at least 4GB GPU memory.
    • The free trial version adds watermarks to videos.
    • Can be demanding on computer hardware, requiring robust specifications.

    Pricing

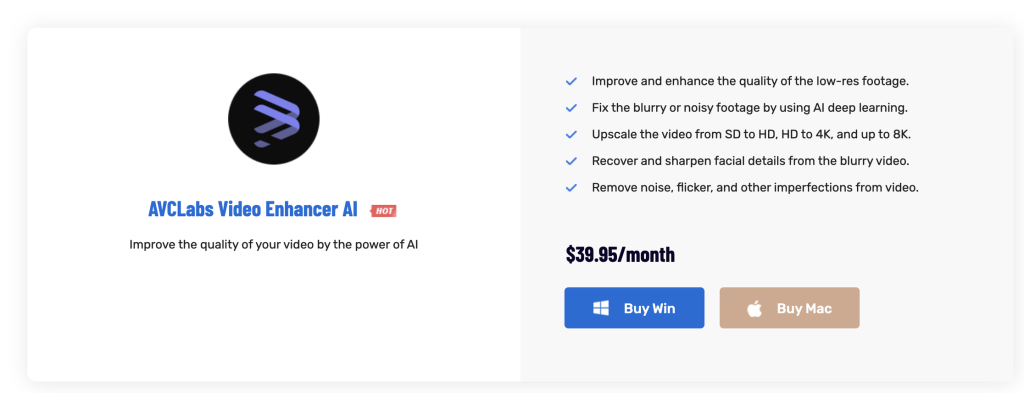
    • AI video enhancer: $39.95/month

    To Take Home

    While most AI tools are web-based, AVCLabs offers a powerful downloadable AI video upscaler.

    Its versatile features make it is the best available software.

    Despite the high system requirements, the flexible pricing and user-friendly interface make it a great option for both pros and casual users.

    Give it a try—it’s free!

    👉 Try AVCLabs Free


    3. Tensorpix AI

    👉 Try free here

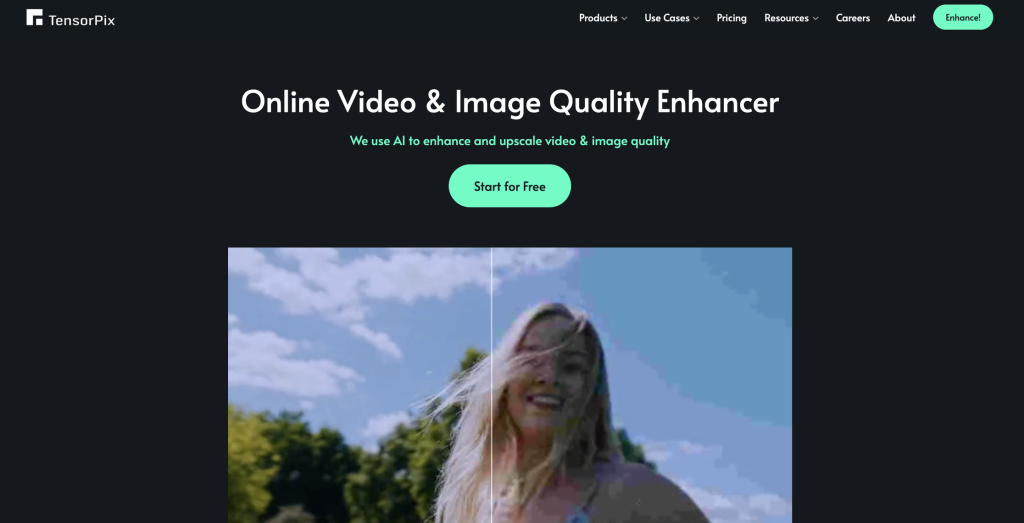
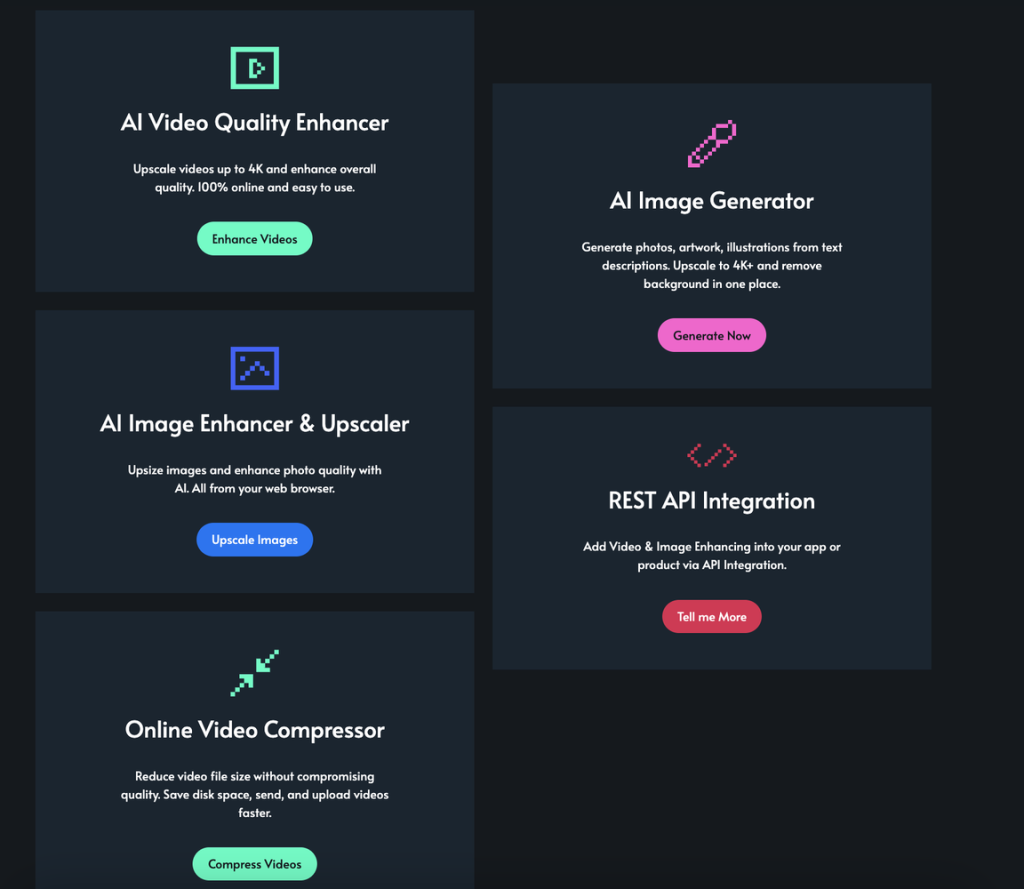
    TensorPix AI is a powerful online tool that uses advanced AI to enhance and upscale videos and images.

    You can use it to remove artifacts, restore old films, resize videos, and more.

    What usually takes film professionals days, this tool handles in just a minute or two.

    But before I call you to action to test it and spend time with it, let me show you what it’s capable of.

    Features

    • AI Filters: TensorPix lets you choose AI filters to boost video quality.
    • Ease of Use: The platform is user-friendly, allowing you to upload and enhance videos from any device in just a few steps.
    • File Storage: With specific plans, your enhanced files are stored indefinitely.
    • Free Previews: Provides free previews of enhancements, with length and resolution depending on your subscription plan.

    My Experience

    The user experience is straightforward to navigate. Just sign up and start using the tool.

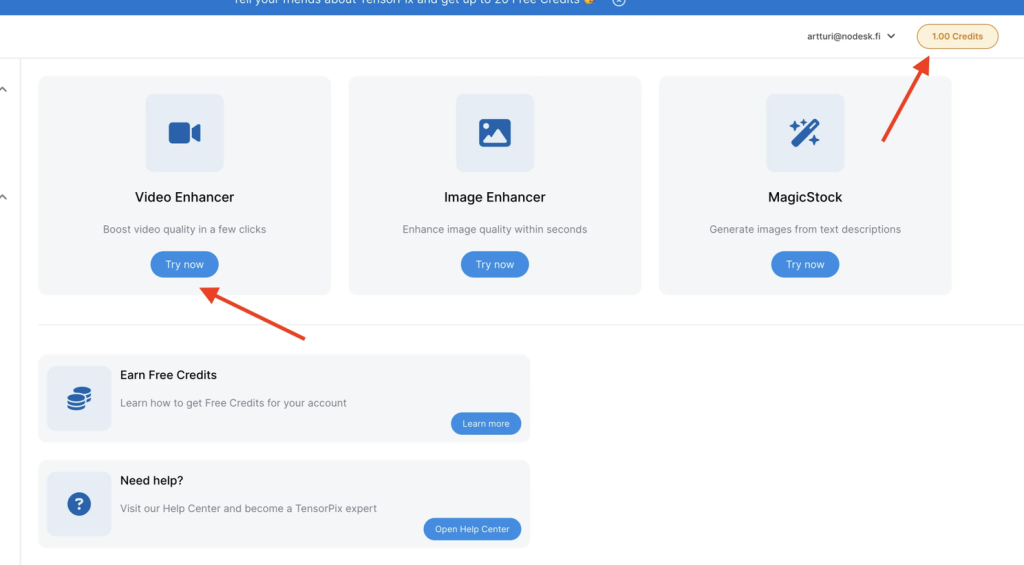
    Then you can activate your video enhancer by clicking the icon as follows:

    If (and probably as) you’re on a free trial, you’ll notice that you only have 1.00 credits. That sounds like a small amount because it gives you the impression that it’s exactly 1. But in fact, you can use this amount to upscale quite a bit of video.

    Just drag and drop a video into the view to start:

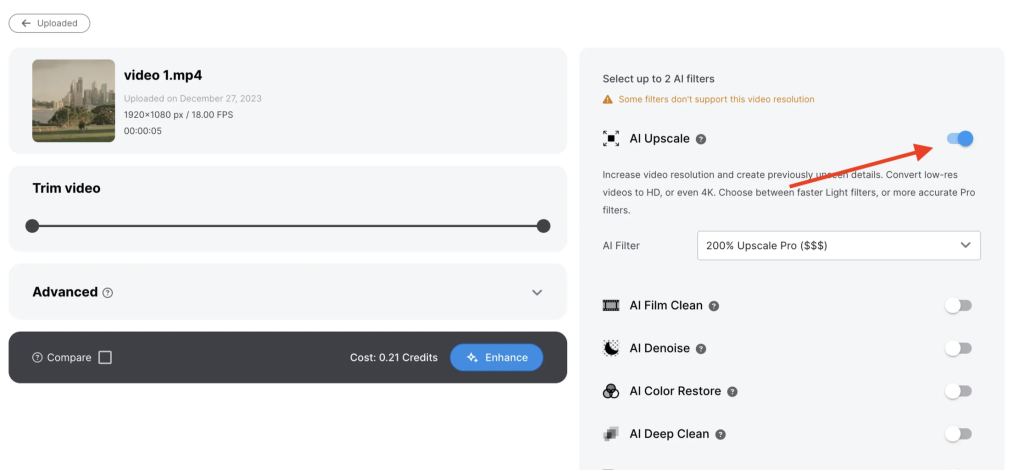
    Remember to tweak the “AI Upscale” slider so that it knows to improve the video quality.

    Then click “Enhance” and wait.

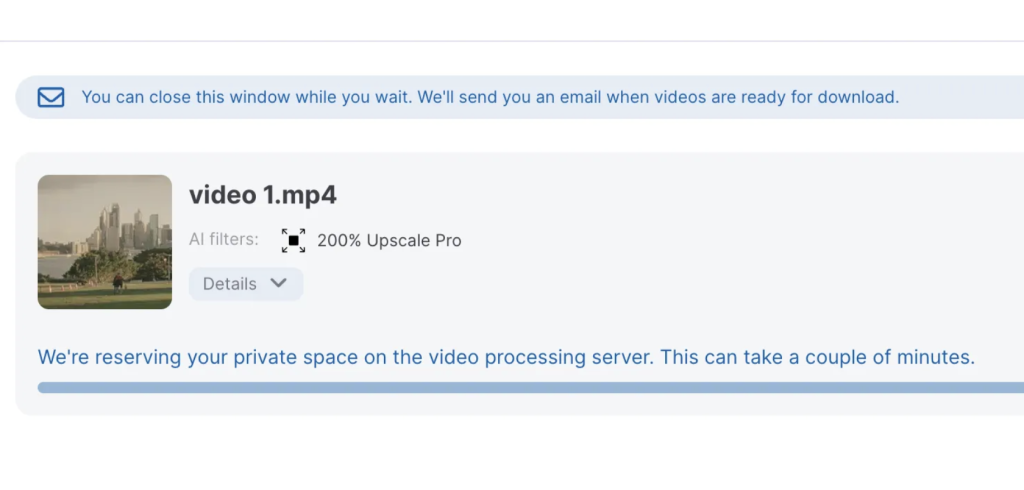
    I had to wait 5 minutes and my clip was just 5 seconds. I’m not sure if it’s the free plan but this suggests that longer videos might take hours or even an entire day to process.

    Be prepared to wait!

    But you can close your window at this point. Once the video processing is completed, you will receive an email that lets you know the process has been completed! That’s actually convenient—you don’t have to wait there or come back to check if it’s done already.

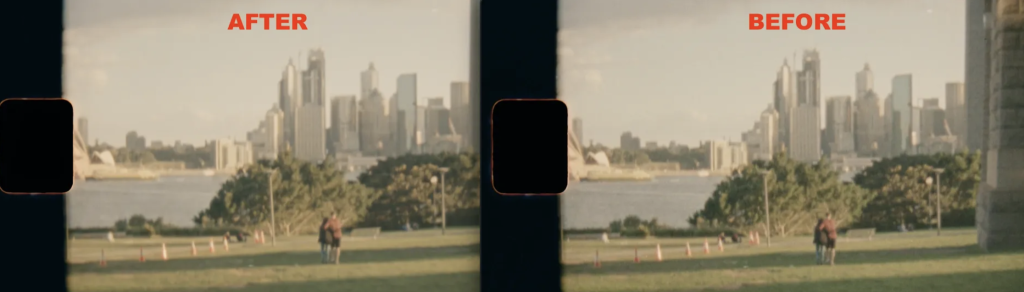
    Let me show you my results with the first upscaling attempt:

    It seems nothing really changed, huh?

    Even though this is just a screenshot you’re seeing right here, I can confirm that it looks similar to my eyes when I watch the whole clip.

    That’s a bummer…

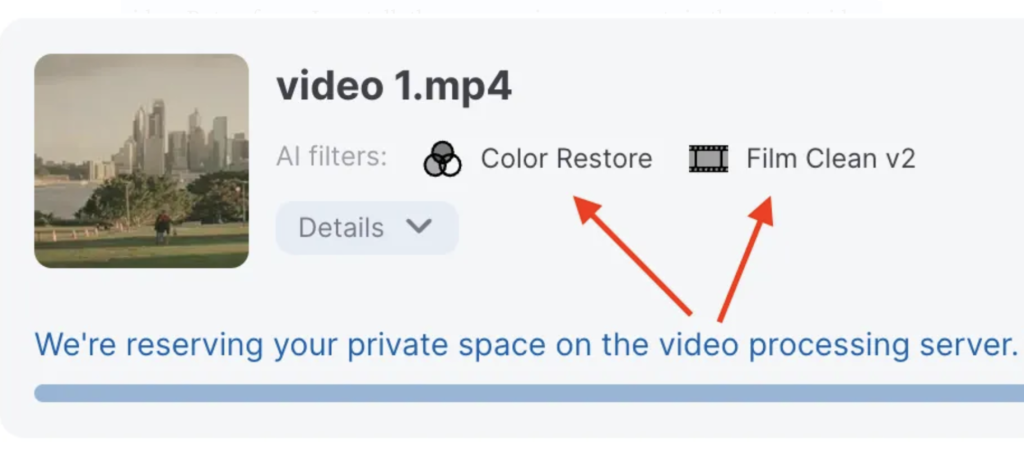
    But then I realized that “Upscale” might not be the best option for this particular video. So, I tried a different approach, using the “Film Clean v2” and “Color Restore” features instead.

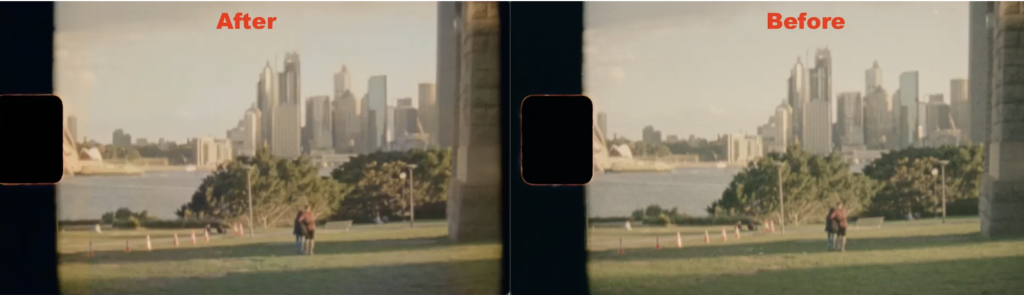
    After a while, here’s the result:

    In the screenshot above, it’s not too impressive, but the video itself looked much smoother in real life.

    The tool removed some random noise artifacts, making the old, grainy video look better. It didn’t do it as much as I wished but this is already a lot better.

    It’s for sure worth trying—especially because there’s a free trial.

    Also, you’ve got to remember that these tools work differently on different types of videos. If my results aren’t pleasing, that doesn’t mean your video would perform the same. So make sure to give it a shot.

    Pros

    • Web-Based: No installation required; easily accessible from any web browser.
    • Simplicity: User-friendly process suitable for all skill levels.
    • Flexibility: Offers both subscription plans and a pay-as-you-go option.
    • Rollover Credits: Subscription credits roll over each month and remain valid for 12 months.

    Cons

    • Limited Free Plan: Basic features with significant limitations in the free version.
    • Upscaling Limitations: While effective, there’s still room for improvement in video quality.

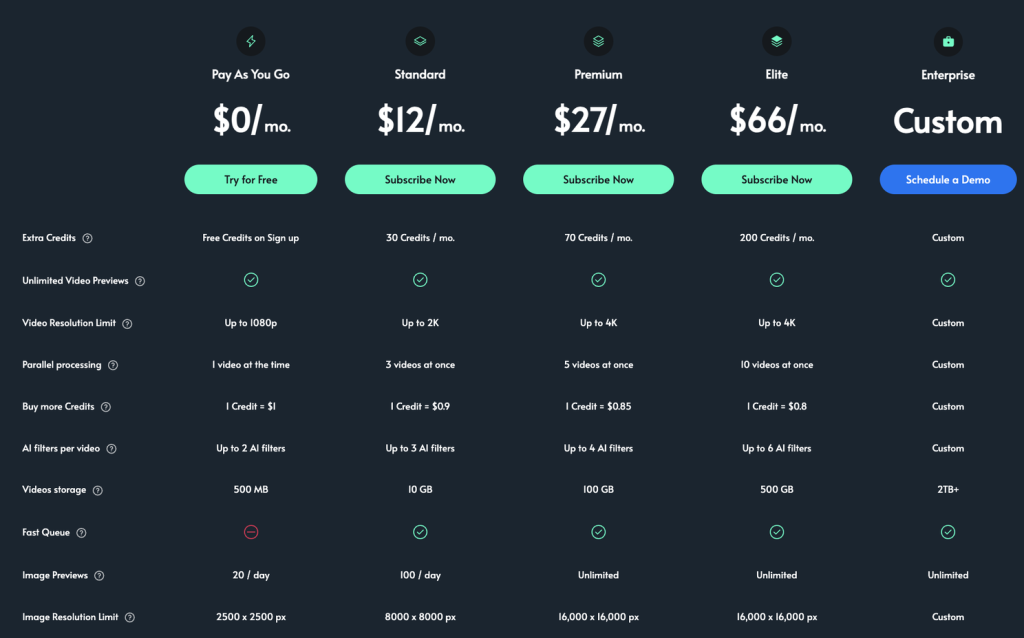
    Pricing

    • Pay As You Go: $0/month – Free credits on signup, up to 1080p resolution, 1 video at a time, 2 AI filters max.
    • Standard Plan: $12/month – 30 credits/month, up to 2K resolution, 3 videos at a time, 3 AI filters max.
    • Premium Plan: $27/month – 70 credits/month, up to 4K resolution, 5 videos at a time, 4 AI filters max.
    • Elite Plan: $66/month – 200 credits/month, up to 4K resolution, 10 videos at a time, 6 AI filters max.
    • Enterprise Plan: Custom pricing – Tailored credits, resolution, and features based on needs.

    To Take Home

    TensorPix AI offers a simple and effective web-based platform for enhancing videos and images.

    It’s an impressive tool, especially since you can try it for free.

    Beyond just upscaling, it also includes additional enhancement features worth exploring.

    👉 Try free here


    4. CapCut AI Enhancer

    👉 Try CapCut enhancer for free

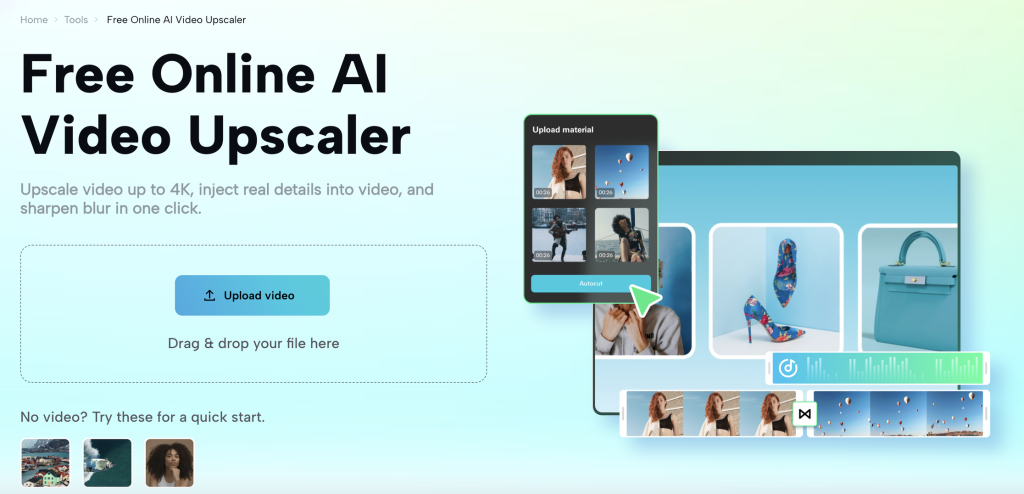
    CapCut’s free AI video upscaler is an online tool designed to enhance video quality by upscaling to 4K resolution.

    This feature is part of CapCut’s extensive video editing suite, known for its user-friendly interface and AI-driven functionality.

    Let’s take a closer look at how it performs.

    By the way, don’t get me wrong. CapCut is a complete video editing package and this AI enhancer is just one of the hundreds of features. But I’ll assess it as a separate tool for this post.

    Features

    • 4K Upscaling: CapCut uses AI to upscale videos to 4K resolution, enhancing each frame with added detail and clarity.
    • Deblurring and Detail Enhancement: It reduces blur and restores original details, significantly improving video quality.
    • Versatile Video Processing: CapCut handles various video formats and resolutions, making it adaptable for different projects.
    • User-Friendly Interface: The tool provides a simple, step-by-step process for upscaling videos.
    • Complete Video Editor: Outside of just upscaling, this tool provides a huge library of video editing tools and features.

    My Experience

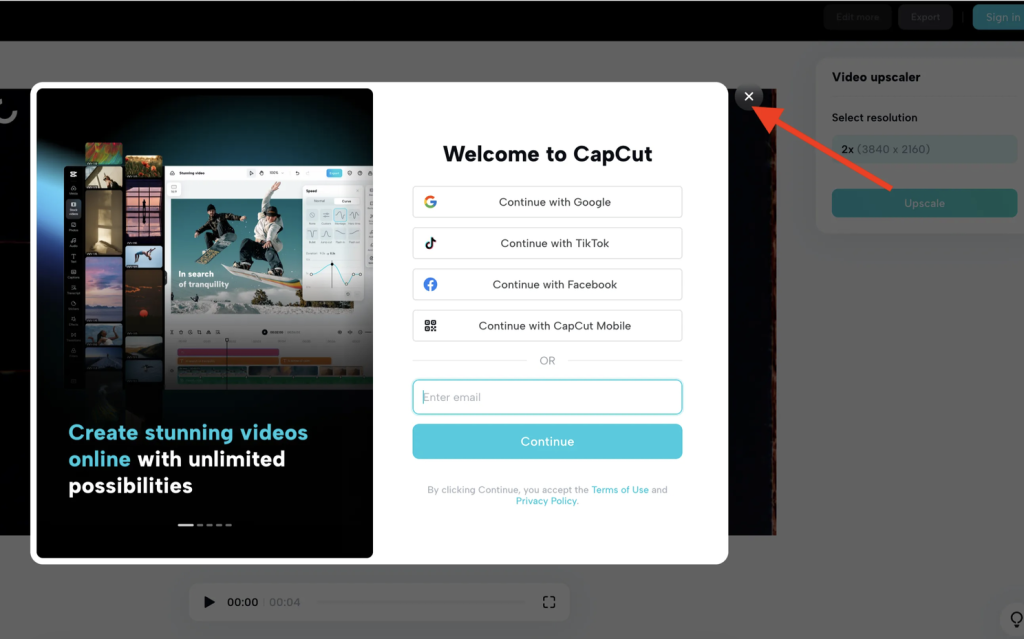
    What I love most about this tool is that it’s free and you can use it even without signing up (just click the “X” to skip creating an account.)

    So this one doesn’t care if you’re on a Mac or Windows. Also, you don’t need to install anything.

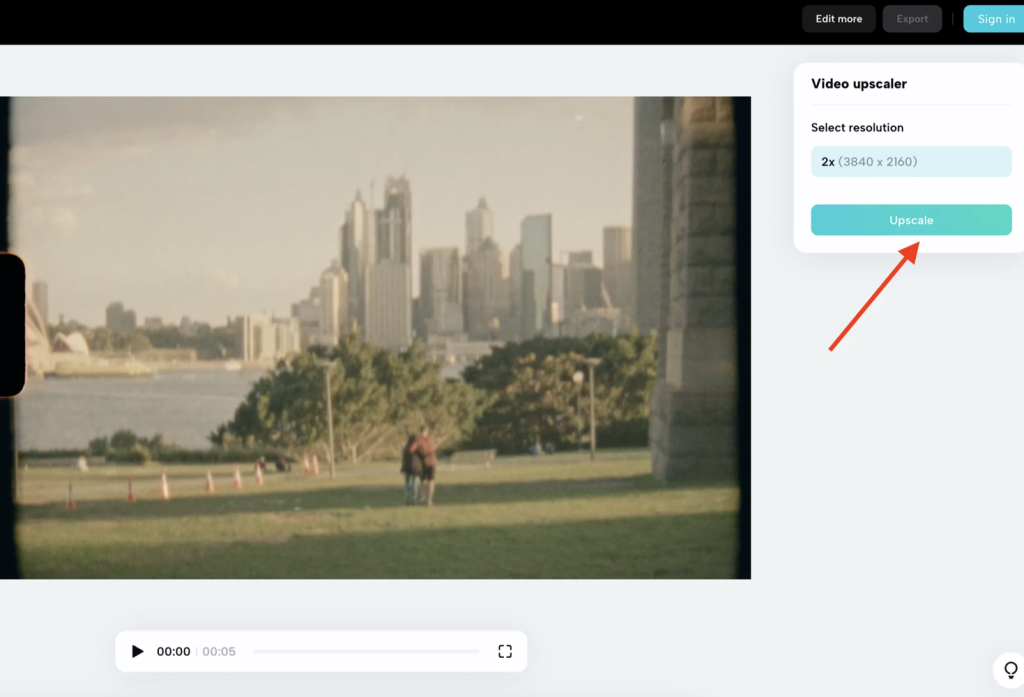
    Next, just drag and drop a video into the view. I’ve done this for the same clip I’ve used before for the other upscaler tools.

    The upscaling process takes a bit of time, but in my case, the same 5-second clip was processed much faster than with Tensorpix.

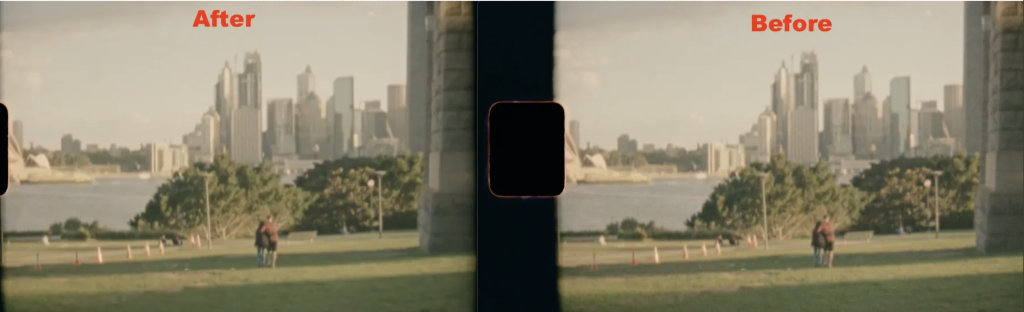
    Here’s a screenshot of the result:

    The upscaled version looks almost identical at first glance.

    But the closer you look at it on a bigger screen, you can see that it has more pixels and appears smoother (which is hard to capture in this small screenshot).

    I’m happy with these results—especially considering it’s a free feature you can use online.

    Just remember that this is only one of the features of CapCut. Make sure to try the video-editing features as well!

    Pros

    • Quality Enhancement: CapCut is great at improving video resolution. Experiment with different videos to see the best results!
    • Ease of Use: The intuitive interface makes it easy for users of all experience levels to navigate.
    • Additional Editing Tools: Beyond upscaling, CapCut offers a multi-track video editor with effects, filters, text, and more.
    • Free Access: Available online at no cost, making it accessible to users.

    Cons

    • Limited Advanced Features: While it’s excellent for basic editing, CapCut lacks the advanced features in professional-grade video enhancement tools.
    • Lots of Features: If you’re just looking to upscale a video, it makes no sense to buy a full suite of video editing tools.

    Pricing

    • Free

    CapCut is entirely free when it comes to upscaling videos. (Also, the video editor is partly free and some consider it the best free video editor online.)

    To Take Home

    CapCut’s free AI video upscaler is impressive, especially because it’s free.

    It’s a great choice if you’re looking to boost video quality, particularly when upscaling to 4K.

    This tool is perfect for content creators and hobbyists who need a quick solution for enhancing video resolution.

    Plus, even without the AI features, CapCut is a fantastic video editor, so if you’re looking to elevate your edits, definitely give it a try!

    👉 Try CapCut enhancer for free


    5. Vmake AI Upscaler

    👉 Try Vmake for free

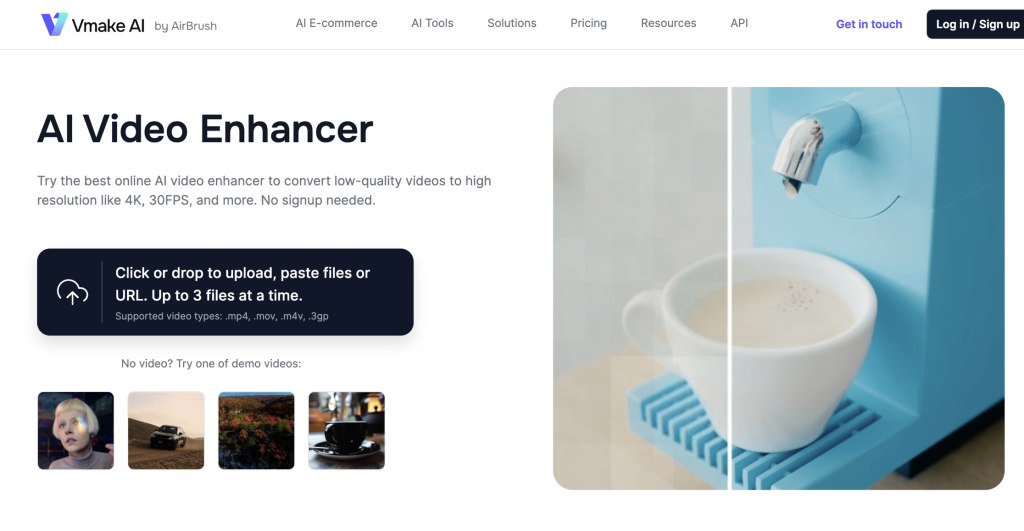
    Vmake AI Video Enhancer is another online tool for boosting the quality of videos (and images.)

    This one is also something you can use just by heading to their website instead of having to download software.

    But let’s take a closer look at how it works and performs in my experience.

    Features

    • AI Video Enhancer: Boosts video quality, delivering clear, high-definition footage.
    • Video Background Remover: Easily removes unwanted backgrounds from videos.
    • Video Object Eraser: Seamlessly erases unwanted objects from your videos.
    • Video Stabilizer: Eliminates shaky footage, ensuring smooth and stable videos.
    • Video Ad Generator: Simplifies the creation of engaging video ads.
    • AI Image Editor: Offers tools like AI Fashion Model, Image Background Changer, and Image Quality Enhancer.
    • Image Uncrop and Object Remover: Restores missing details in images and removes unwanted elements.

    My Experience

    Let me show you my results with Vmake AI video upscaler.

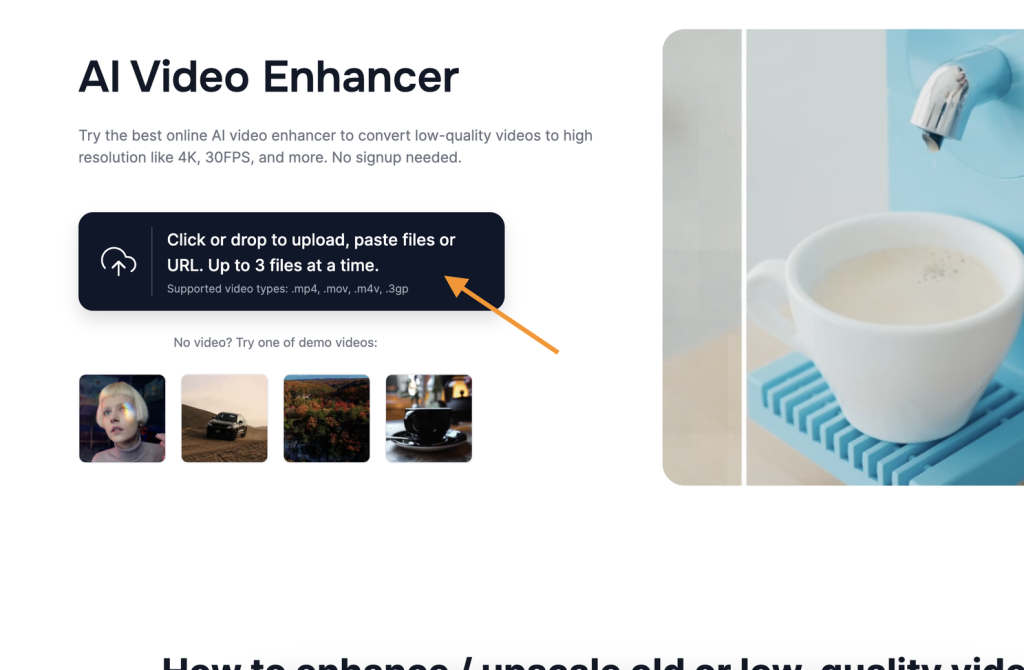
    To start, just head over to their website and drop a video into the view.

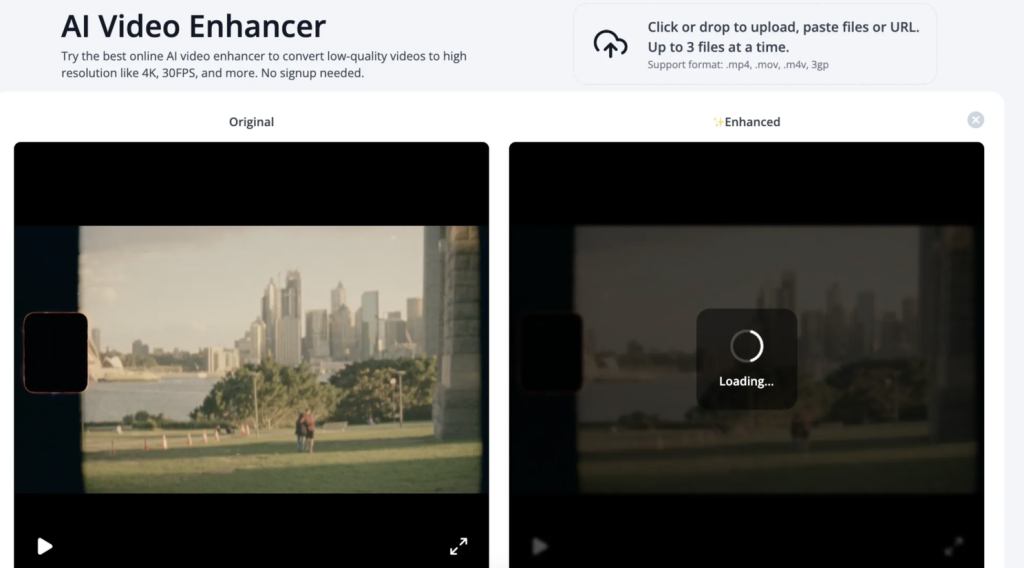
    I’ve done this with the same clip you saw earlier:

    This was one of the quickest upscalers I’ve tried, processing my 5-second video in just 20–30 seconds.

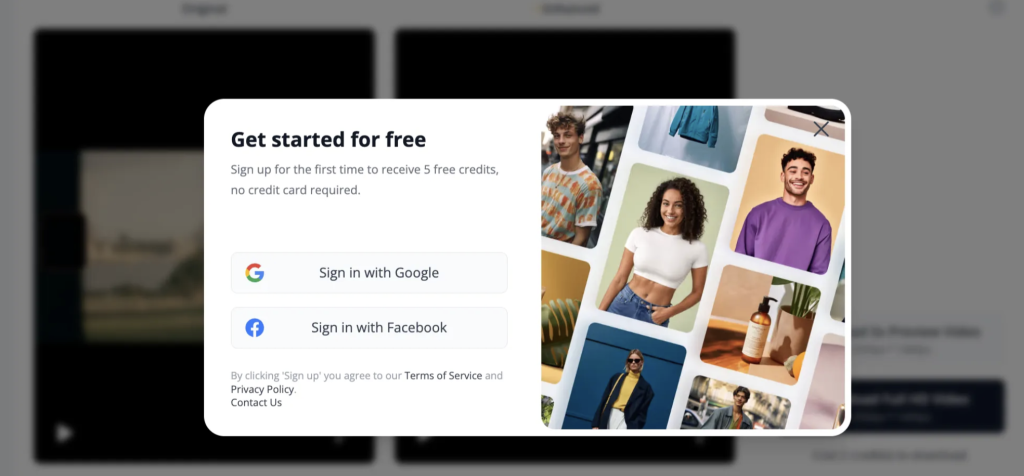
    The only drawback was that I couldn’t download the video without signing up.

    After signing up, I could access my upscaled video. Here are the results:

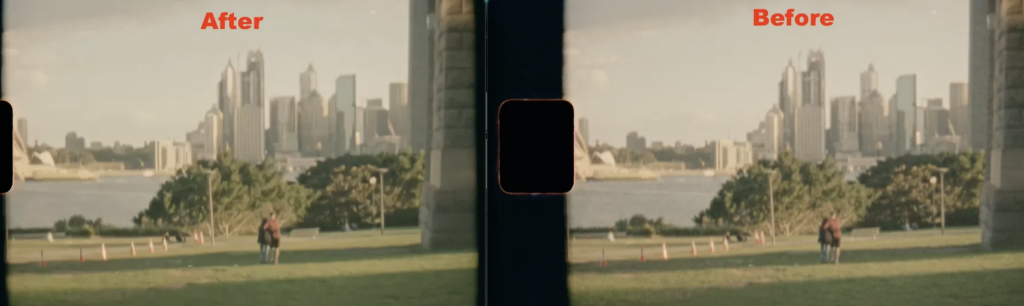
    I have to admit, on this small screen, the AI processing does make the video look better.

    But to be honest, when you zoom in, the quality really falls short.

    Let’s take a closer look to demonstrate this—here’s a screenshot of the video after AI processing:

    To compare this, here’s a screenshot of the original video before the AI:

    To be brutally honest, it’s tough to say which version is better.

    The AI-processed video looks smoother, but also blurrier and less detailed, which is odd. It should have more detail if the upscaling worked properly.

    Of course, this is just one type of video I’m testing. AI upscalers can work wonders with some videos and fall short with others.

    Pros

    • Ease of Use: Vmake’s user-friendly interface makes it accessible to users of all experience levels.
    • High-Quality Results: Advanced AI algorithms deliver top-notch image and video enhancements.
    • Versatile Applications: Ideal for various industries, including eCommerce and social media marketing.
    • Cost-Effective: Pay only for the tools you use. This makes it a budget-friendly choice.

    Cons

    • Limited Pricing Information: The website doesn’t clearly outline the pricing structure for Vmake’s tools.
    • Sign-Up Requirement: You must sign up or log in to access Vmake’s tools.

    Pricing

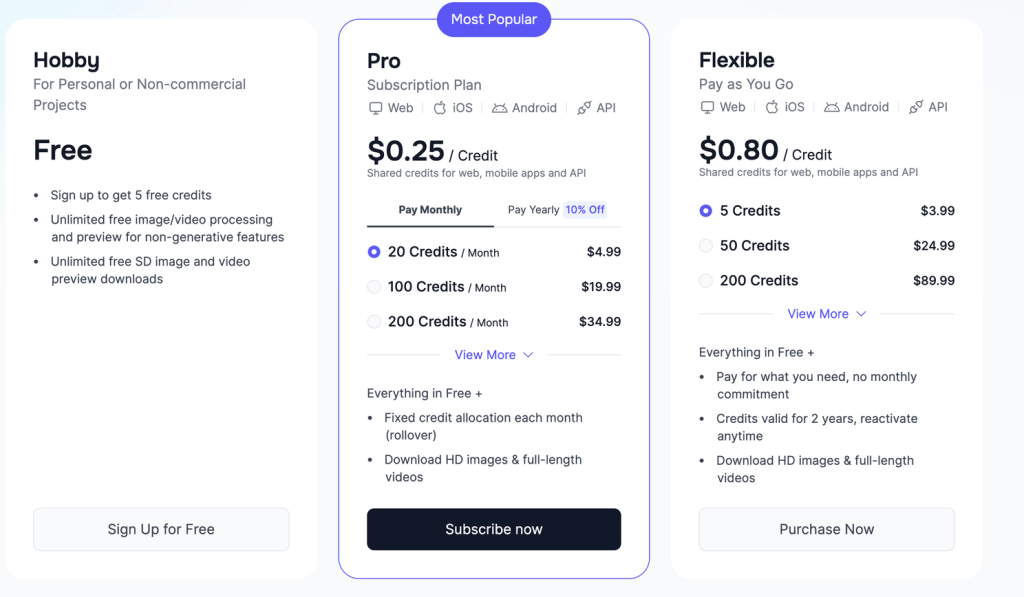
    • Hobby (Free): 5 free credits, unlimited SD image/video processing and downloads.
    • Pro (Subscription): $0.25/credit; plans start at $4.99/month, including HD downloads, and monthly credits with rollover.
    • Flexible (Pay As You Go): $0.80/credit; no monthly commitment, credits valid for 2 years, includes HD downloads.

    To Take Home

    Vmake is a great free tool for video upscaling. I think it delivers ok quality improvements. However, there are better alternatives available.

    Although I think you’ll find better options above, your mileage may vary based on your video content and quality.

    👉 Try Vmake for free


    7. Media.io AI Video Upscaler

    👉 Try Media.io Upscaler

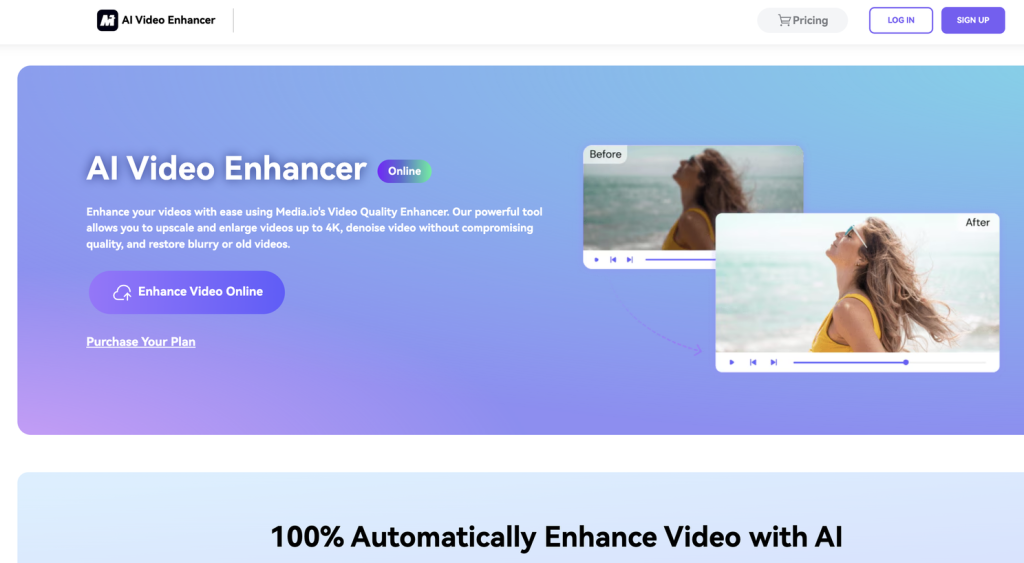
    Media.io AI Video Enhancer is a multimedia file enhancer with a video upscaler feature.

    It’s one of the last items on our list today but this doesn’t mean it wouldn’t be worth a shot.

    Let’s see how it performs in my hands.

    Features

    • Video Upscaler: Improves video quality and removes artifacts and noise.
    • Video Compressor: Easily compresses video files in any format.
    • Image Compressor: Efficiently compresses PNG/JPEG/JPG images.
    • GIF Maker: Allows the creation of GIFs from pictures or videos.

    My Experience

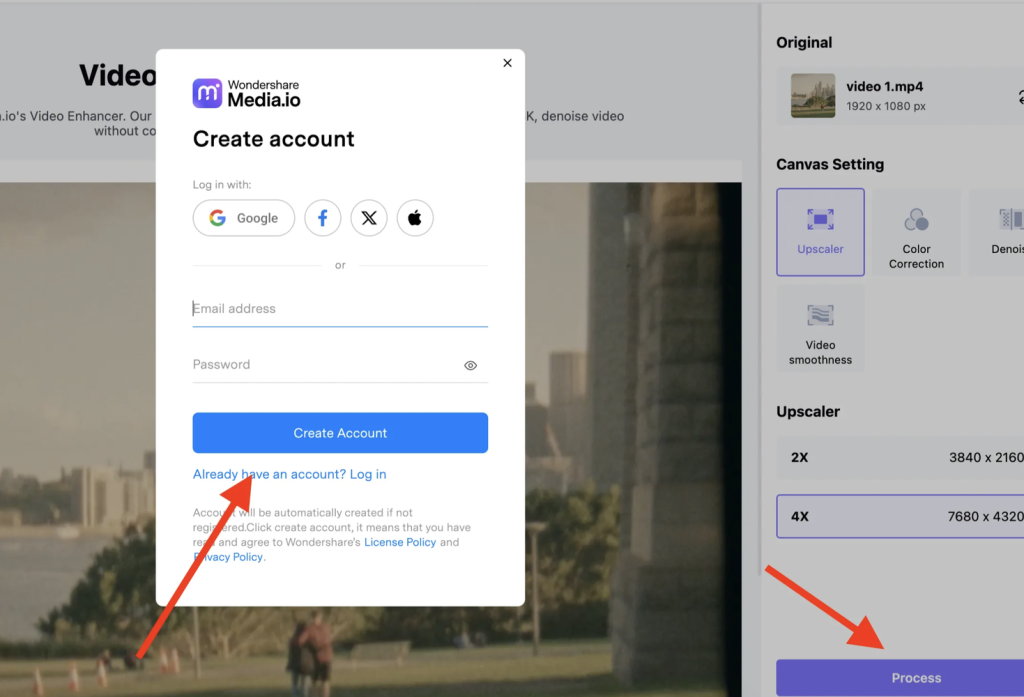
    To use Media.io upscaler, open up their website and drag and drop it into the view.

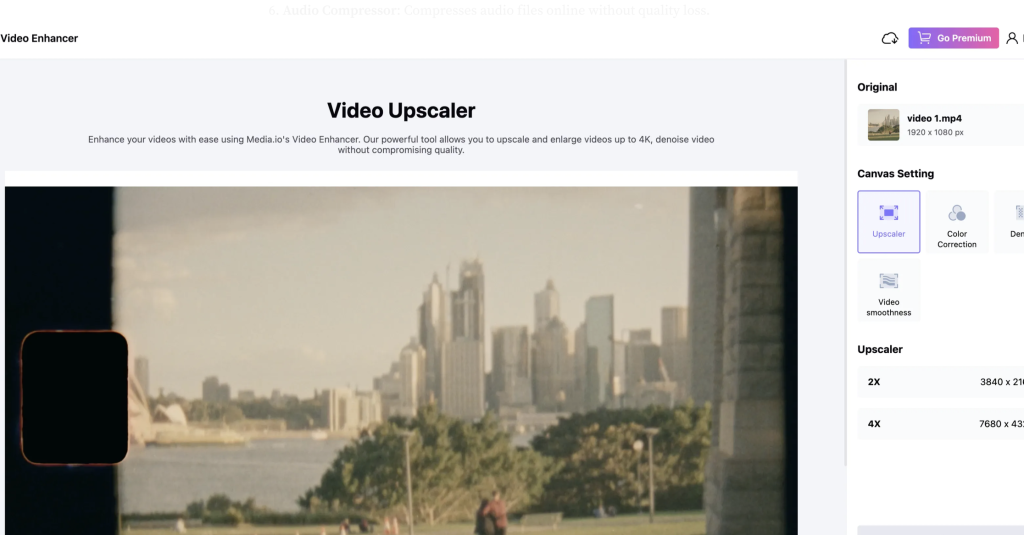
    You can find the “Process” button below the video at the bottom of the screen. Make sure to select the “Upscaler” feature first, though.

    At this point, the service asks you to sign up.

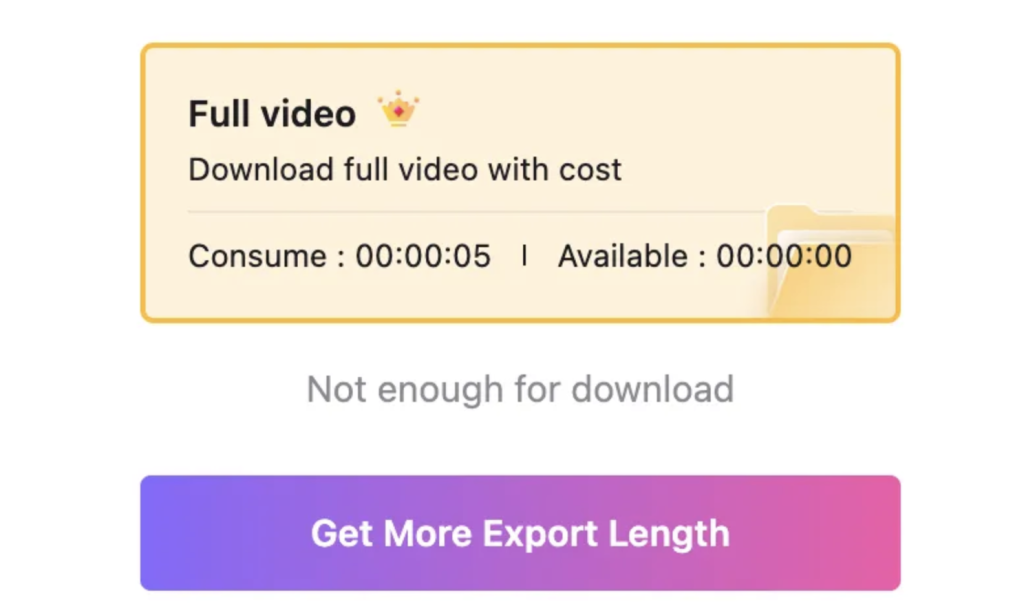
    Then I paid attention to the fact that the 4x upscaling is a paid feature.

    I don’t want to pay for it first so let’s see if the 2x version does anything. This feature took about 2 minutes to upscale a 5-second video so it might take time on longer ones!

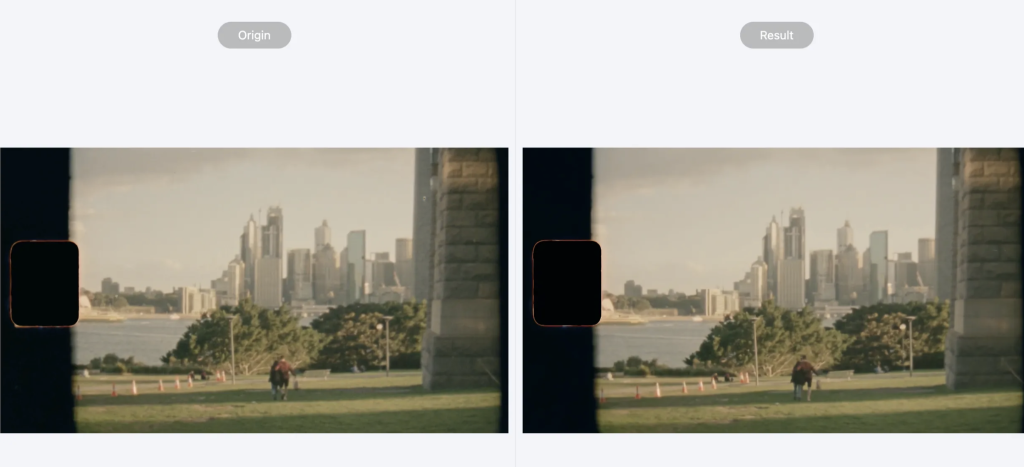
    Here are my results with the 2x upscaler:

    Judging by the screenshots, it’s very hard to tell the difference.

    But here’s the thing. Not all video upscalers are meant to improve the sharpness or remove noise. In fact, most upscalers won’t do anything to the video quality if you look at it on a smaller screen. The effect kicks in once you 4x the screen size and still get a similar resolution. That’s the point of these upscalers.

    So I think this one does that. It’s not improving or enhancing the video but it makes the video bigger.

    This time, I will skip testing the other paid features.

    Pros

    • Easy to Use: Just drag and drop to upscale and then wait.
    • Versatility: Offers a wide range of multimedia processing tools.
    • Privacy: Deletes uploaded files from servers after processing.

    Cons

    • Slow Processing: It takes a long time to upscale just a short video.
    • Very Limited Free Trial: It only offers you a basic short 2x upscaling as a free trial.

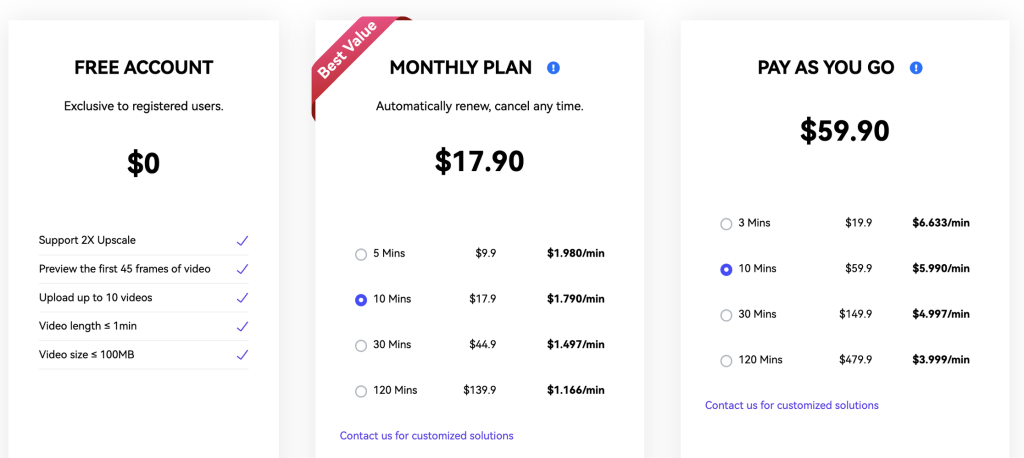
    Pricing

    • Free: $0/month
    • Monthly: $17.90/month
    • Pay as you go: $59.90 one-time

    To Take Home

    Media.io is a basic video enhancer online. There are lots of features that were supposed to be free but they weren’t.

    You can try the 2x upscaler for free! But be prepared: It’s just going to upscale the video but not necessarily enhance the quality or remove noise etc.

    👉 Try Media.io Upscaler


    I think that’s it for the list of the best AI video upscaler tools. I hope you found the perfect one for your use case. 🙂

    Thanks for reading!

    Make sure to also check my video on the best AI business tools.

  • 11 Best AI Headshot Generators of 2025 (free & paid)

    This is your ultimate guide to choosing the best AI headshot generator right now.

    I’ve spent over $1,500 on AI headshots. Let me show you what tools got the best results for me.


    Top 3 Picks

    For your convenience, here are my top 3 picks that gave the best results:

    👉 1. BetterPic AI

    👉 2. HeadshotsByAI

    👉 3. ProPhotos AI

    Now, let me show you what kinds of results I got.

    Disclaimer: This post has affiliate links at no cost to you.


    1. BetterPic AI

    Get a 10% discount with code JALLI10

    BetterPic is my favorite AI headshot generator.

    Just upload a set of selfies to the tool and it will create realistic images.

    Also, if there are issues with your photos, you can request a human edit directly from the tool. This way you (or your team) will get at least one image per person that they’re 100% satisfied with.

    Let me share my results.

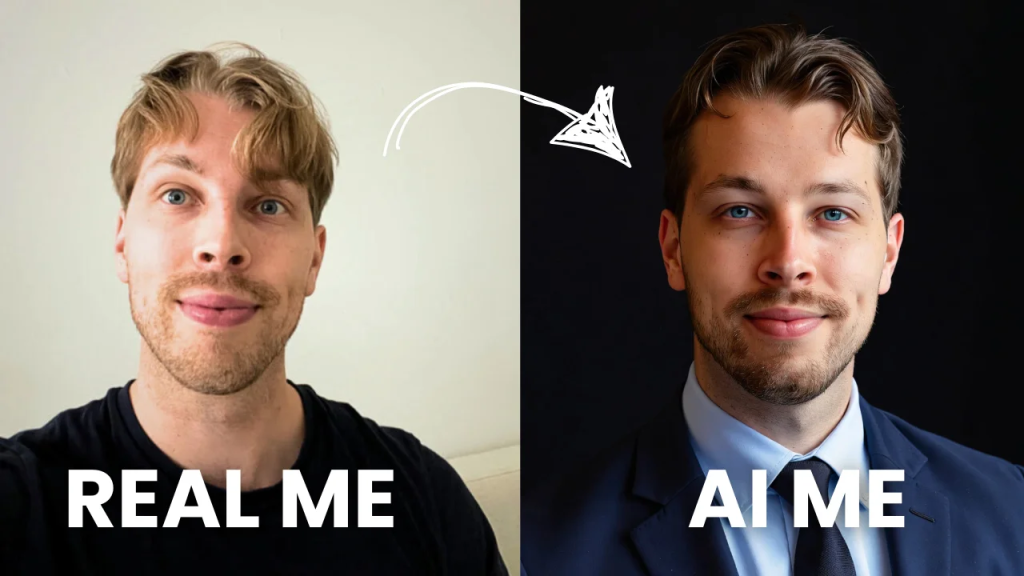
    Before vs. After

    Here’s what the AI created for me:

    That one right there is my favorite image and I actually use it as my LinkedIn photo.

    Speaking of LinkedIn headshots, here’s a complete post about those.

    It’s so close to what I look like that none of my mates believed me when I told it’s not me but AI. That’s how far we’ve come! And it’s no more than 2-3 years ago when nobody would have believed in technology like this.

    Let me show you some more results, though.

    More Results

    But it’s not just one image that you get.

    This tool gives you a lot of images that would take forever to take in real life because of changing the environments and clothes.

    Here are some more AI headshots that I got from BetterPic:

    In all of these, I look very close to what I look like. There’s no way to tell it’s not me pretty much.

    You can also use the like/dislike button handily to filter out the blemished images that you don’t like that much. Yes, you got it right: not all images are perfect replicas! Just be careful to understand that before investing to not get disappointed.

    Noteworthy

    Notice that you can edit your images with a human editor from the BetterPic team! This is something that’s not available in any other AI headshot generators.

    To do this, pick an image and click on “BP AI Edit.” Then choose “Human Edit” on the left-hand side.

    Then describe what you want to do with your image.

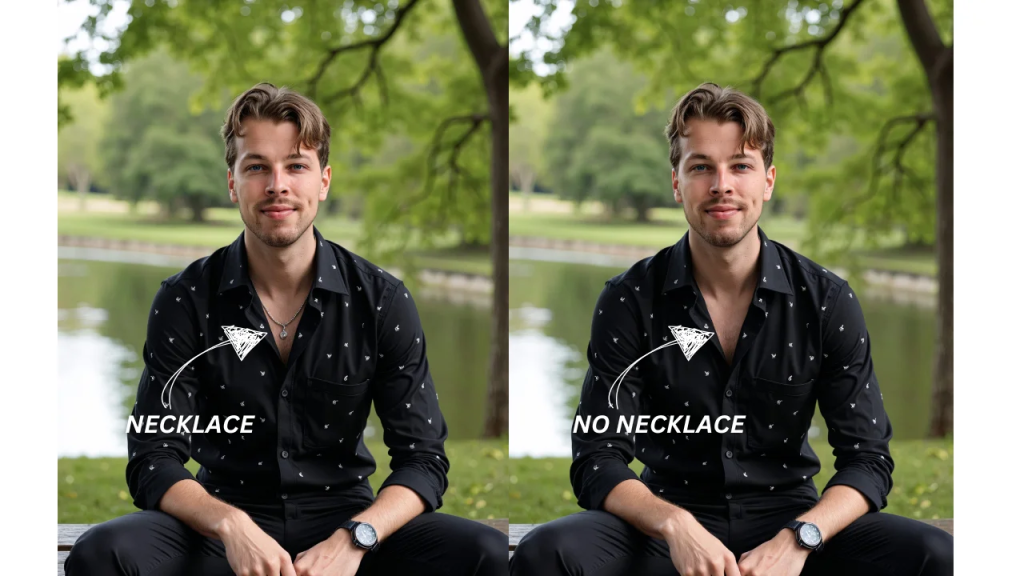
    For example, I told the team to remove a necklace from one of the images.

    That’s flawless and smooth. Also, the delivery was pretty fast in my case.

    If you want to find more information about BetterPic, check my complete review of it.

    Pricing

    • Basic: $35
    • Pro: $39
    • Expert: $79

    Discount

    Get 10% off with JALLI10

    PS. BetterPic allows for AI customizations to your photos. I have made a complete 13-minute guide on how to use it. You can check it here.

    👉 Try BetterPic AI


    2. HeadshotsByAI

    For the highest-quality AI headshots, I recommend HeadshotsByAI. While this tool doesn’t allow you to customize your images at all, it creates the sharpest images in my experience.

    Let me show you my results.

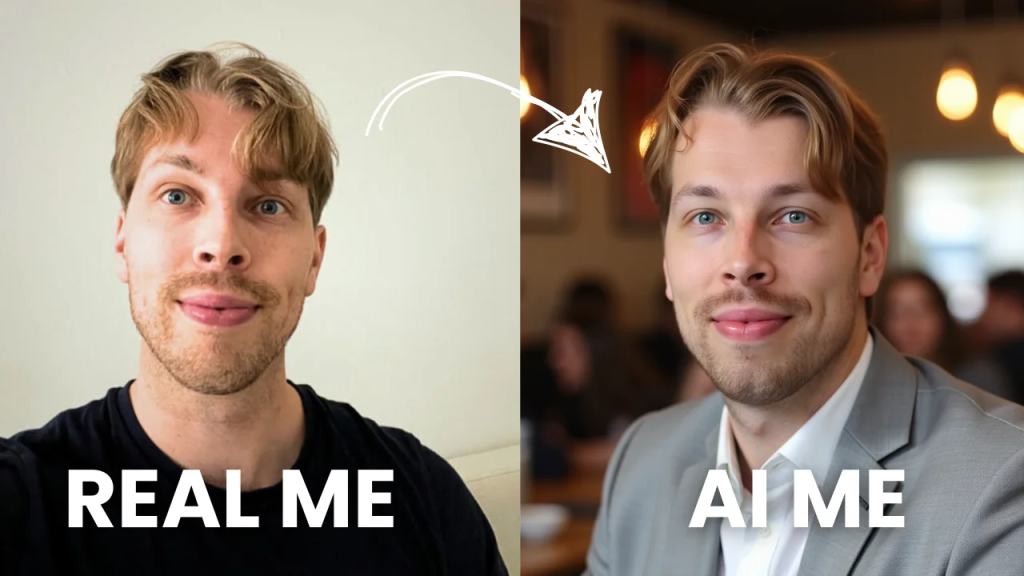
    Before vs. After

    That’s so close to what I look like. Perhaps a touch too much artificial smoothness in the image but other than that I’m really happy with the results.

    More Results

    Here are more results with HeadshotsByAI:

    I like these because they are sharp, the lighting is bright, and the images look realistic. Also, there are very few artifacts.

    Noteworthy

    Notice that you can’t edit the images made by HeadshotsByAI. That’s a bit of a bummer because, at the end of the day, AI images are always a bit of a dice roll.

    Anyway, I was happy with the results so there’s not much to complain about.

    Pricing

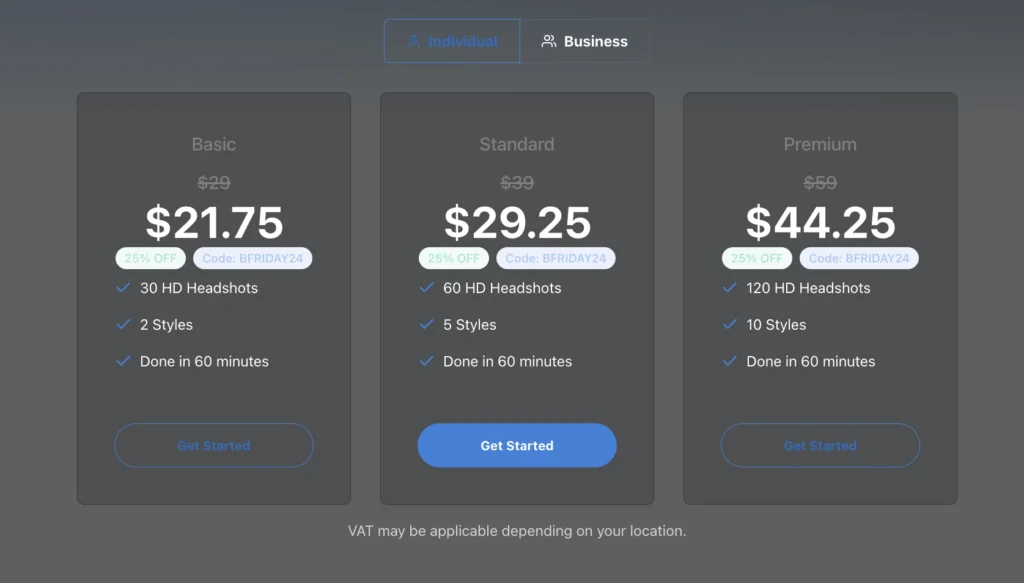
    • Basic: $21.75
    • Standard: $29.25
    • Premium: $44.25

    Discount

    25% off with code BFRIDAY24 (ends around Black Friday 2024)

    👉 Try HeadshotsByAI


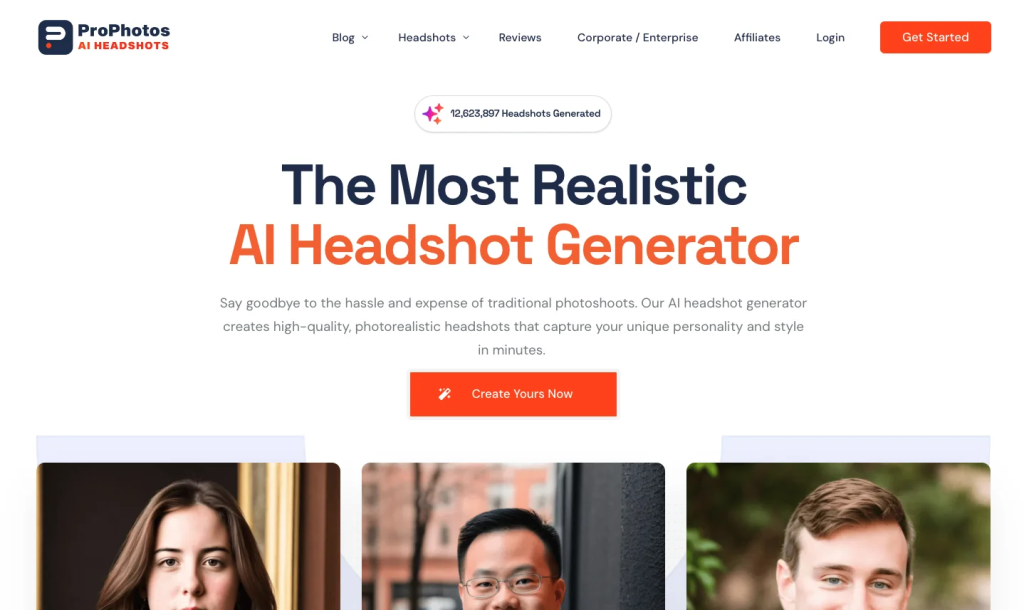
    3. ProPhotos AI

    For a touch of artistic flair, I recommend ProPhotos AI.

    The images maintain a professional quality but offer a variety of unique styles not seen in the other tools mentioned. You’ll find options like coffee shop-themed shots and other creative settings, perfect for standout social media profile pictures.

    Let me show you what I got.

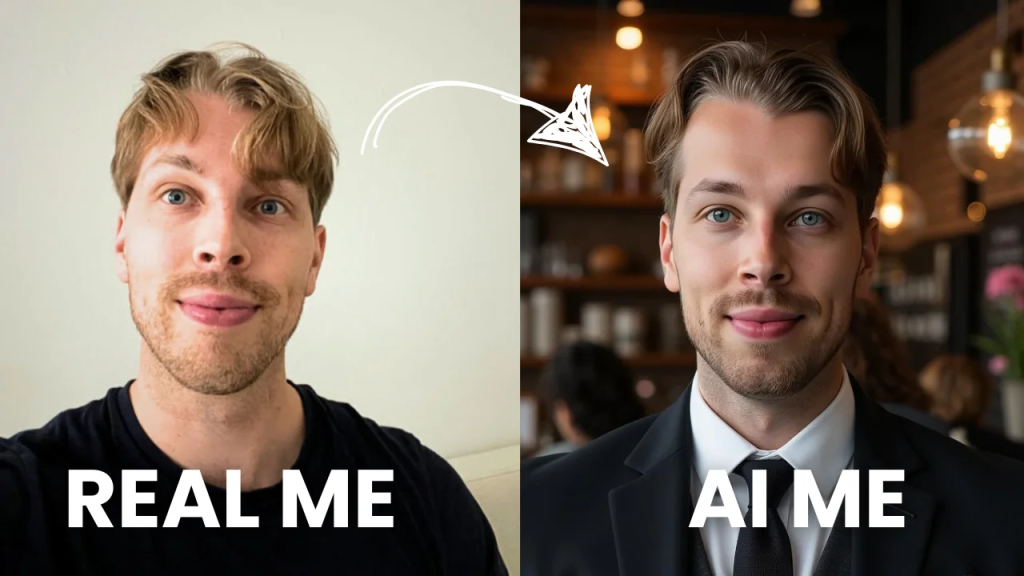
    Before vs. After

    Here’s a before-after shot with one of my favorite images I got from ProPhotos AI:

    That is so realistic and close to what I look like.

    More Results

    I like it. There are a bunch of coffee-shop images but also studio images that I need for my LinkedIn and other professional networking purposes.

    Noteworthy

    Similar to most of the AI headshot generators on the list, you can’t edit your ProPhotos images.

    That’s one of the reasons it’s not at the top of the list. The images are good but there are certainly small things I’d need to fix on a closer look that I could do with BetterPic, for example.

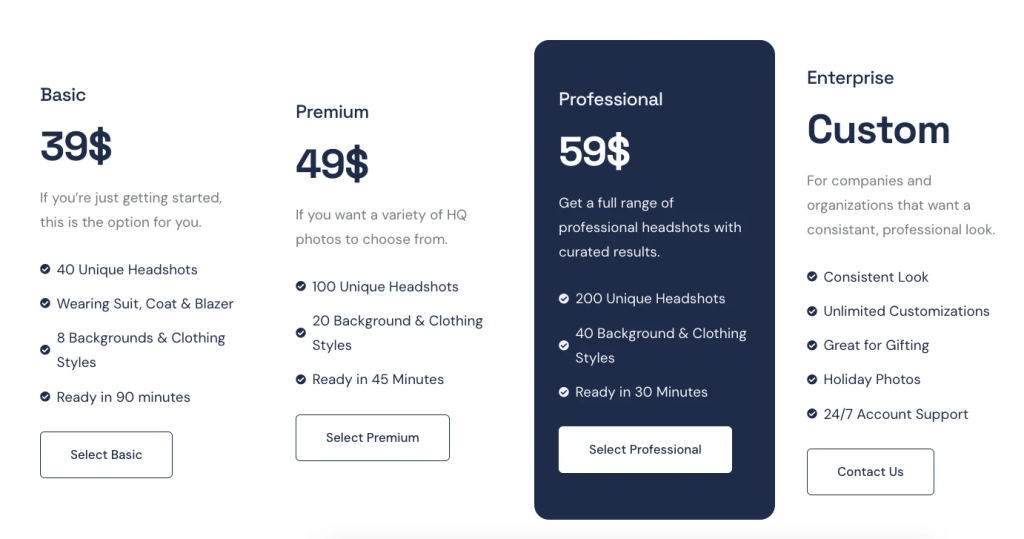
    Pricing

    • Basic: $39
    • Premium: $49
    • Professional: $59
    • Enterprise: Custom

    Discount

    Not available.

    👉 Try ProPhotos AI


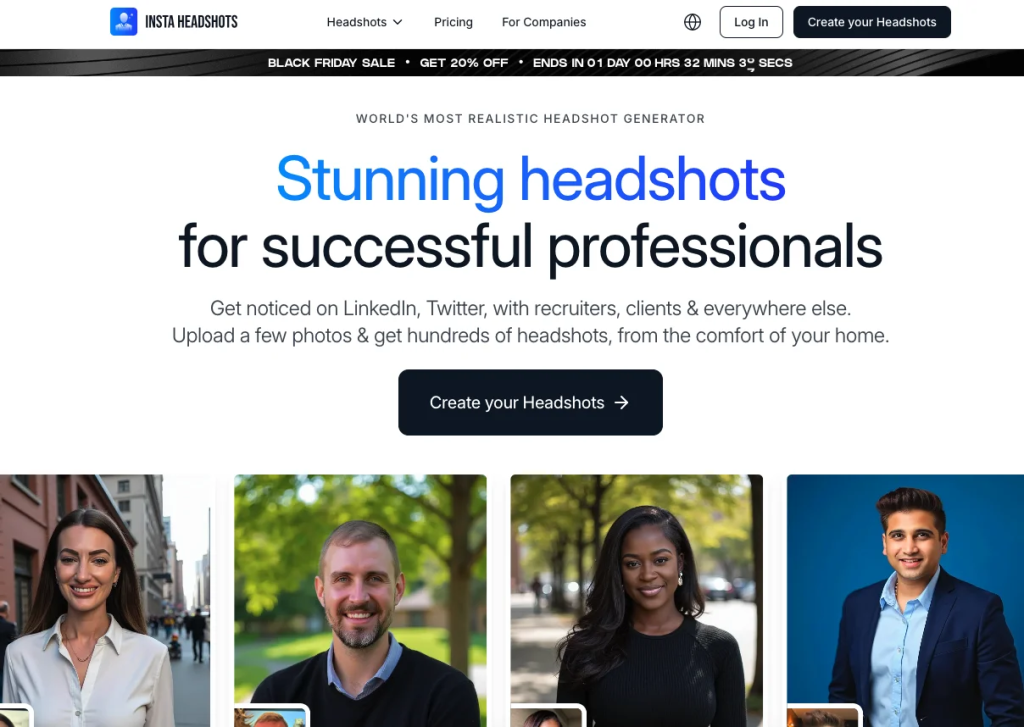
    4. InstaHeadshots AI

    If you’re after an epic selfie generator, give InstaHeadshots a try. It’s perfect for creating classic Instagram-style photos with professional outfits and backgrounds.

    Simply upload a bunch of traditional selfies, and the tool will deliver AI-created versions.

    Before vs. After

    Here’s the before-after shot:

    More Results

    Here are more selfies from the AI:

    These look super cool to me. I wish I could send these back in the day when I was still using Instagram.

    The images look realistic and resemble me very closely. Only upon zooming in do you notice minor differences or artificial details.

    Noteworthy

    Sadly, InstaHeadshots also doesn’t allow you to edit your images. You can only download them.

    When previewing your images, you’ll notice watermarks, but don’t worry—they won’t appear on the downloaded files. The watermarks are there to ensure your satisfaction. If you’re unhappy with the previews, you can request a refund. However, downloading the images indicates that you’re satisfied with the results, so refunds won’t be available after that point.

    Pricing

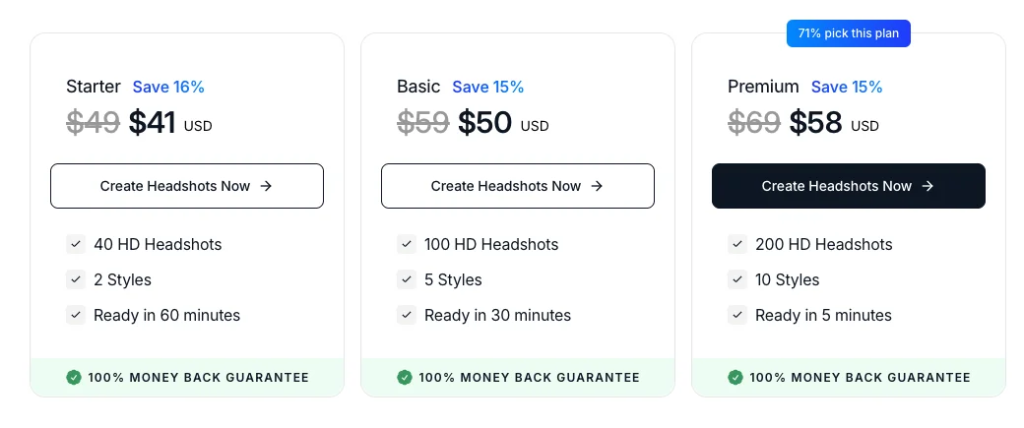
    • Starter: $41
    • Basic: $50
    • Premium: $58

    Discount

    Not available.

    👉 Try InstaHeadshots AI


    5. Aragon AI

    Looking for professional office-style photos? Aragon is a must-try.

    Simply upload a set of selfies, and it will generate polished, professional images you can customize directly on the platform.

    Let me show you what I got.

    Before vs. After

    Here’s the before-after image:

    More Results

    Here are some more results:

    These look decent. But to be honest, I think I got a bad dice roll with these. It seems that my images are too dramatic and “try-hard.”

    Compared to the previously mentioned tools, these are not quite up there. But then again, you have the AI editing options that can make a bit of a difference that most tools don’t offer.

    Noteworthy

    This tool allows you to edit your images.

    Just click the “Edit” button to start doing them.

    The edits are pretty basic, though, so you cannot do anything crazy there. But at least you get to fix some shortcomings or minor details.

    Pricing

    • Starter: $35
    • Basic: $45
    • Premium: $75

    Discount

    Get 10% off with code ARTTURI

    👉 Try Aragon AI


    6. PortraitPal AI

    If you want more casual, artistic, and slightly vintage-looking images, give PortraitPal a try. It’s faster than most other tools. Just upload some selfies and wait for the results.

    Here’s what I got.

    Before vs. After

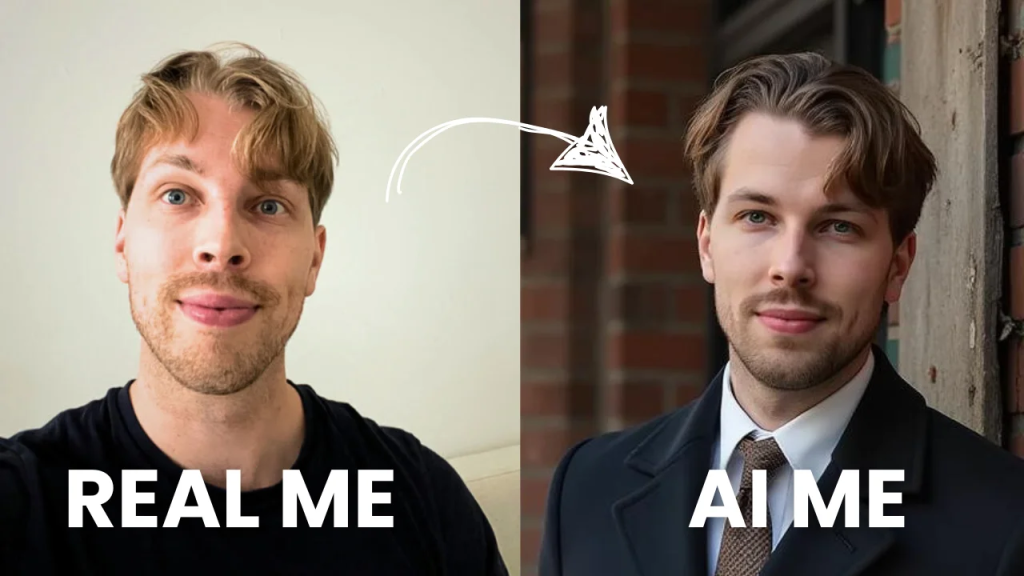
    Here’s a before-after view with my favorite headshot from PortraitPal:

    More Results

    Here are some more images I got with PortraitPal:

    I think I got over 200 of those so I won’t show them all here.

    The results look amazing.

    They have that cozy, old-school coffee shop vibe. The only thing you might not notice from the small images is that the photos look a bit too smooth. They have a heavily edited or filtered look, lacking the natural, uneven skin texture you’d expect.

    Noteworthy

    PortraitPal sadly allows you to just download and view images with no customization options. This is a bit of a bummer, because most of the best AI tools also let you edit your images (or even offer a real human editor such as BetterPic.)

    Pricing

    • Starter: $35
    • Basic: $45
    • Premium: $75

    Discount

    Not available.

    👉 Try PortraitPal AI


    7. DreamWave AI

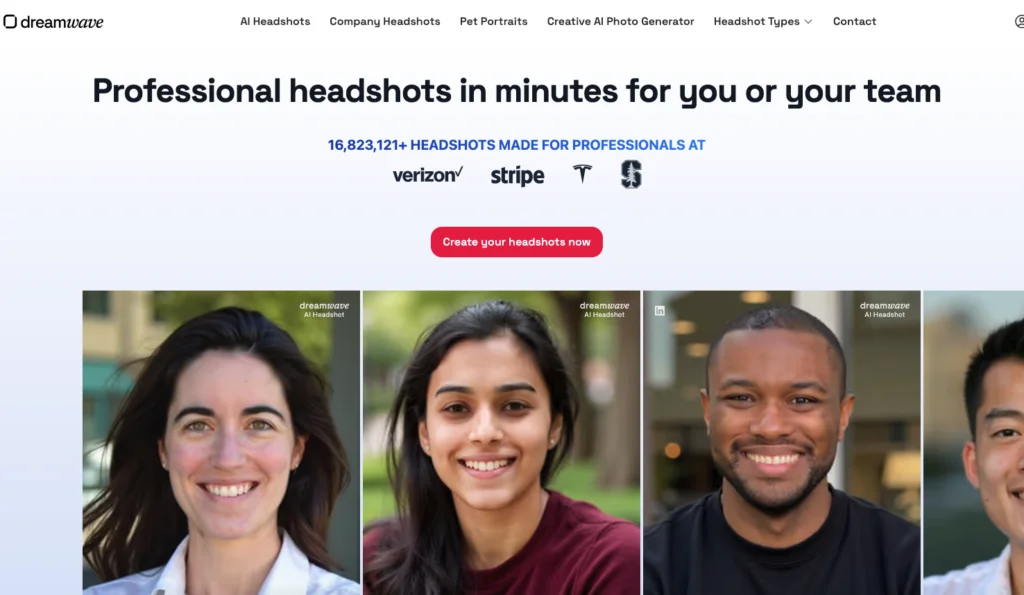
    Then, I had to include DreamWave because it’s one of the most well-known tools on the market.

    This tool is a great option for both casual and professional images for your social media or professional network. Simply upload some regular photos of yourself, and let the tool do the rest—just like the other tools on this list.

    But as you probably can already tell from the position on the list, this tool isn’t quite as good as the best tools out there.

    Let me show you what I got.

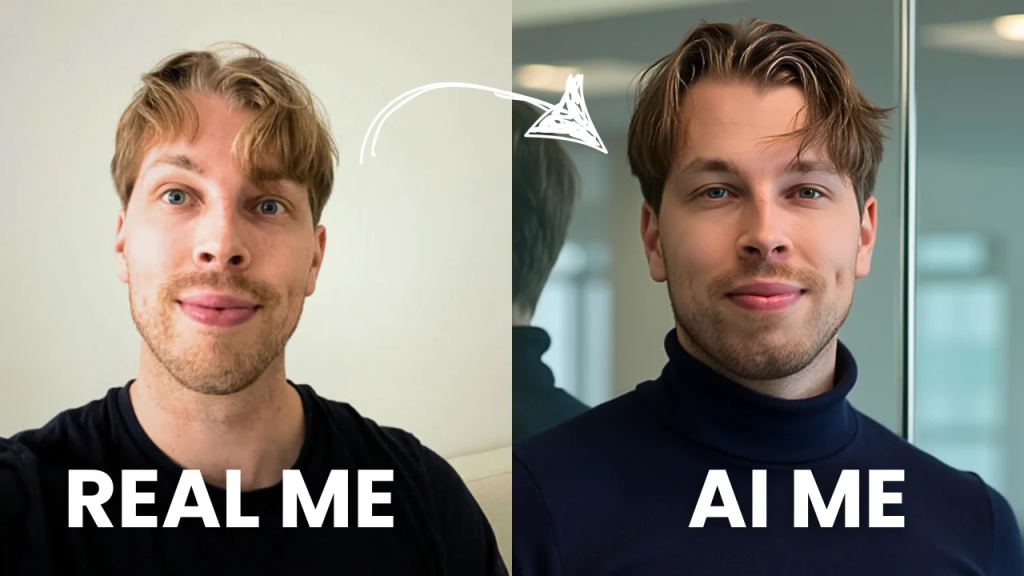
    Before vs. After

    Here’s a before-after view of one of the best headshots I got from it:

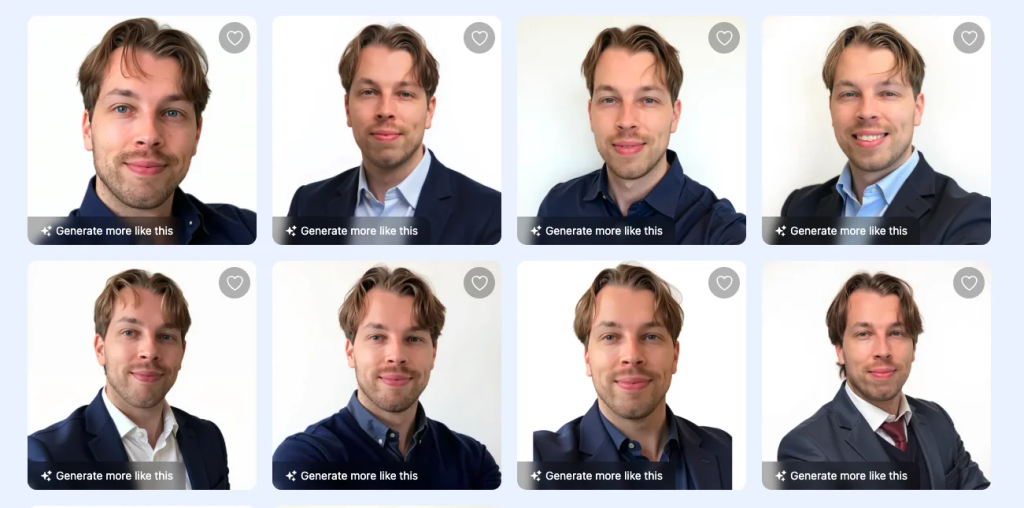
    More Results

    I think DreamWave created more pictures than any other tool I tested. There must be closer to 300 headshots.

    DreamWave images look good from a distance, at least.

    There’s a lot of variability, and you can customize the images as well. However, for some reason, I look unusually tired in the photos. Plus, like PortraitPal, the results are quite smooth, which gives them an artificial feel.

    Noteworthy

    You can do AI edits on your images. Just click on the magic edit button on one of your images and you will see a lot of editing options:

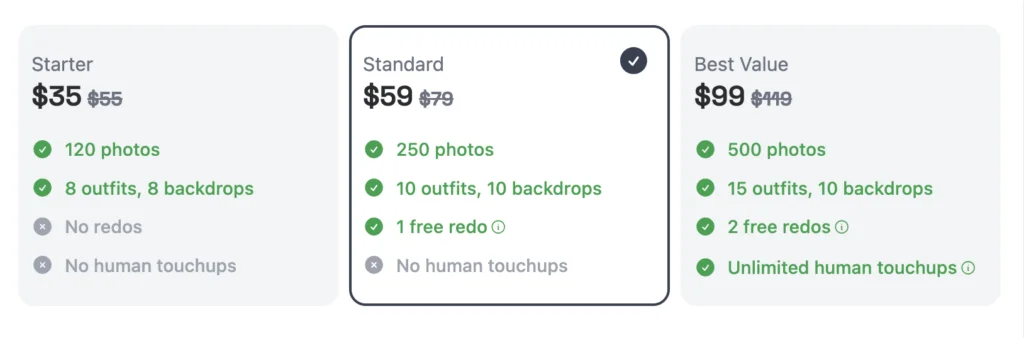
    • Starter: $35
    • Standard: $59
    • Best Value: $99

    Pricing

    • Starter: $35
    • Standard: $59
    • Best Value: $99

    Discount

    Not available.

    👉 Try Dreamwave AI


    8. The Multiverse AI

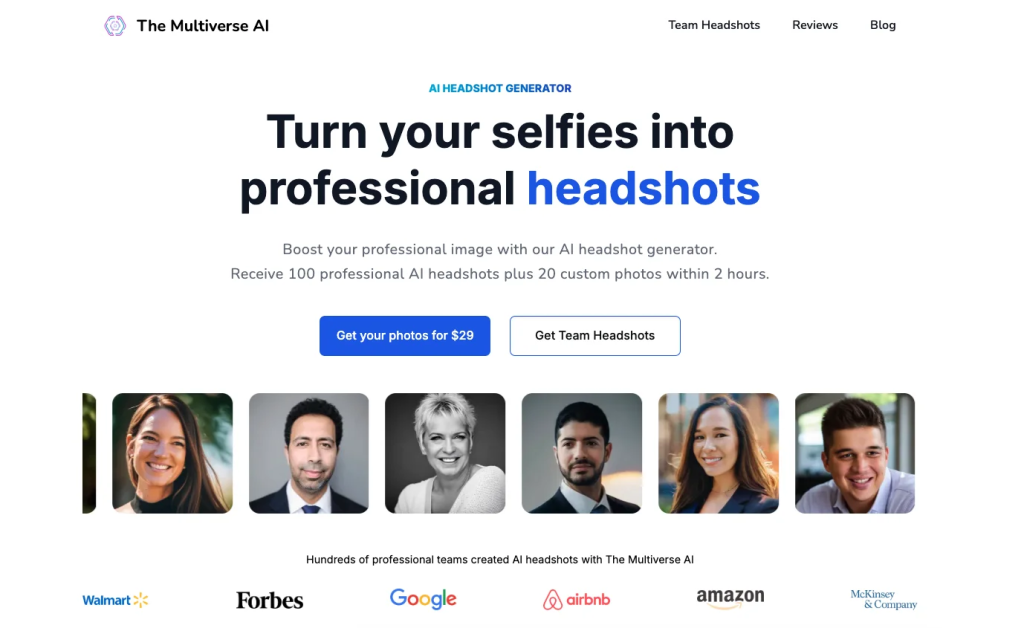
    I wanted to include The Multiverse AI on this list because it offers something unique: a text-to-image feature.

    Similar to the other tools, it allows you to create images, but with Multiverse AI, you can use custom prompts to generate personalized images based on your specific requests.

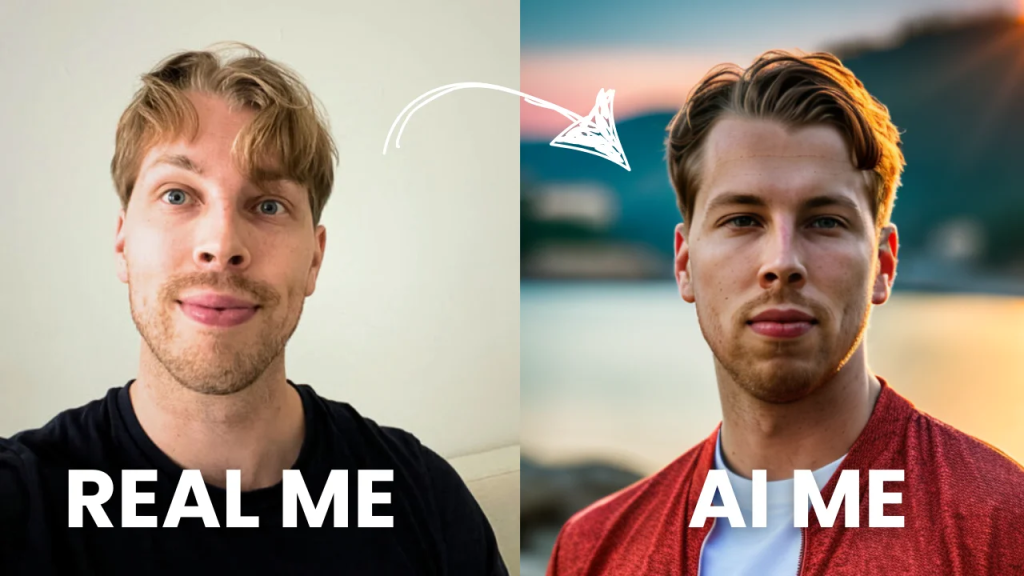
    Before vs. After

    Here’s a custom AI headshot I created by telling the AI that I want to place myself in a sunset in Spain:

    That is crazy!

    If you can describe the images you want to see and the AI is this accurate already, who can imagine what these are like in 5 years?

    More Results

    Here are some other results I got:

    These are the default AI headshots that The Multiverse AI created for me. Those look epic but at the same time a bit artificial.

    However, I think they updated their models to be more accurate and lifelike, so perhaps I should give it another shot soon.

    Noteworthy

    Customization is epic with The Multiverse AI. The tool lets you tell the AI what you want to see and it will create an image for that.

    It’s literally like you were talking to a real photographer, except for you can be sitting in front of a computer and not having to stress about what you look like or how you should smile, etc.

    Pricing

    There’s just one plan, that is:

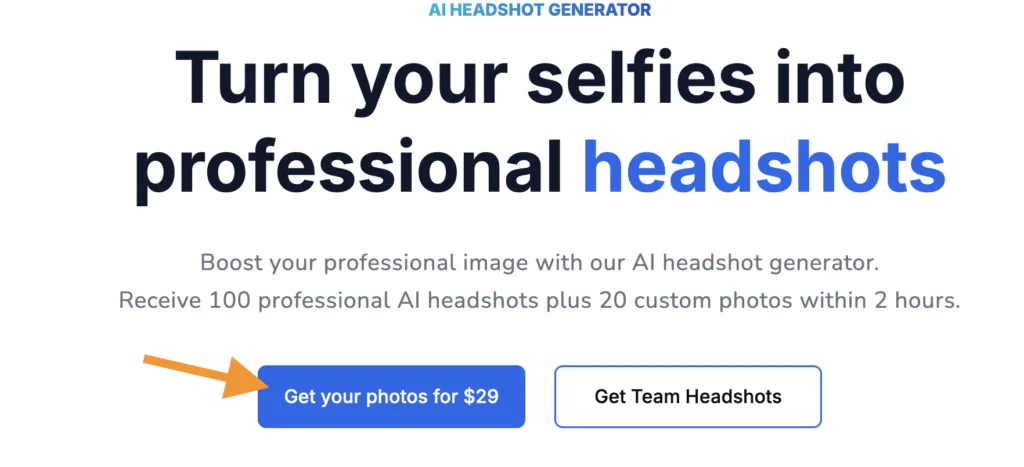
    • $29 for 100 AI headshots and 20 custom images

    Discount

    Get 10% off with code ARTTURI

    👉 Try The Multiverse AI


    9. SupaWork AI (FREE)

    Then last but not least, we have a free AI headshot generator on the list. Out of the ones I tested, this is the best free one.

    However, as a little spoiler, I can tell that this is nowhere near what the paid ones can do. But it’s still cool and might give varying results too. So I’d give it a shot.

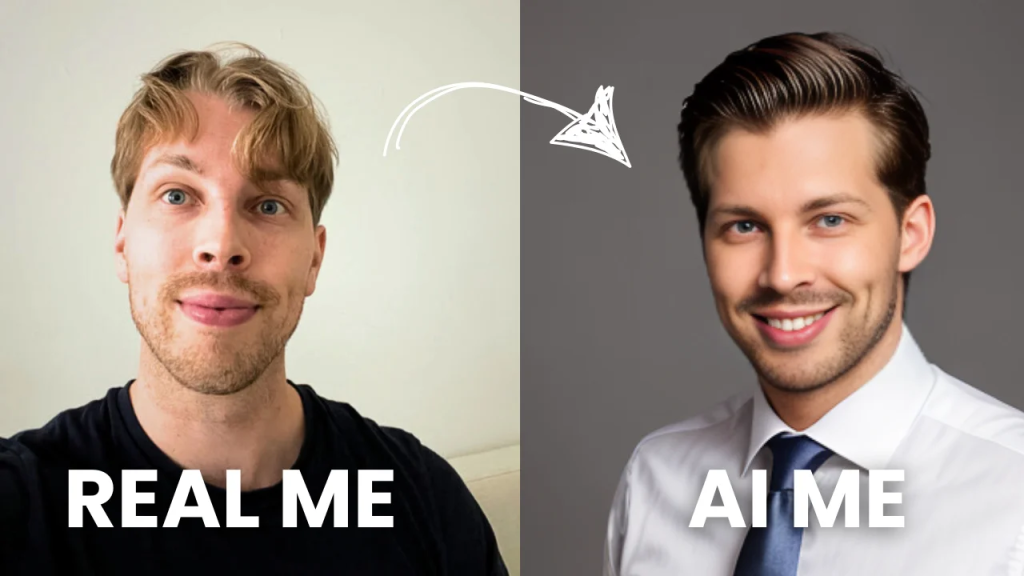
    Before vs. After

    Here’s the best image I got:

    More Results

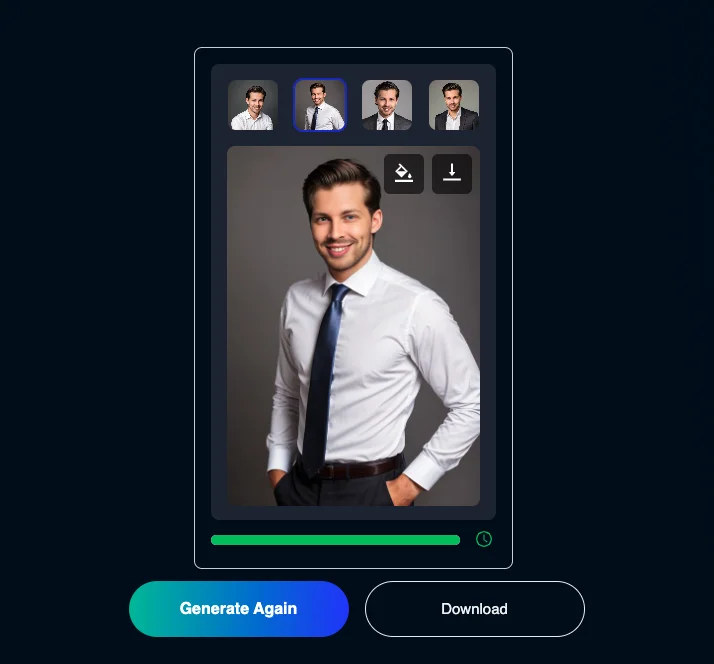
    In total, it creates four images:

    But the images are not looking like me at all. That’s probably because it’s free and it uses only a very limited amount of resources to render the images (which is also why it’s so fast.)

    Noteworthy

    This tool is free! Also, it’s a lot faster than the paid tools. But the results are bad compared to the paid ones.

    Pricing

    Free!

    Thanks for reading! 🙂


    10. PFPMaker (Free)

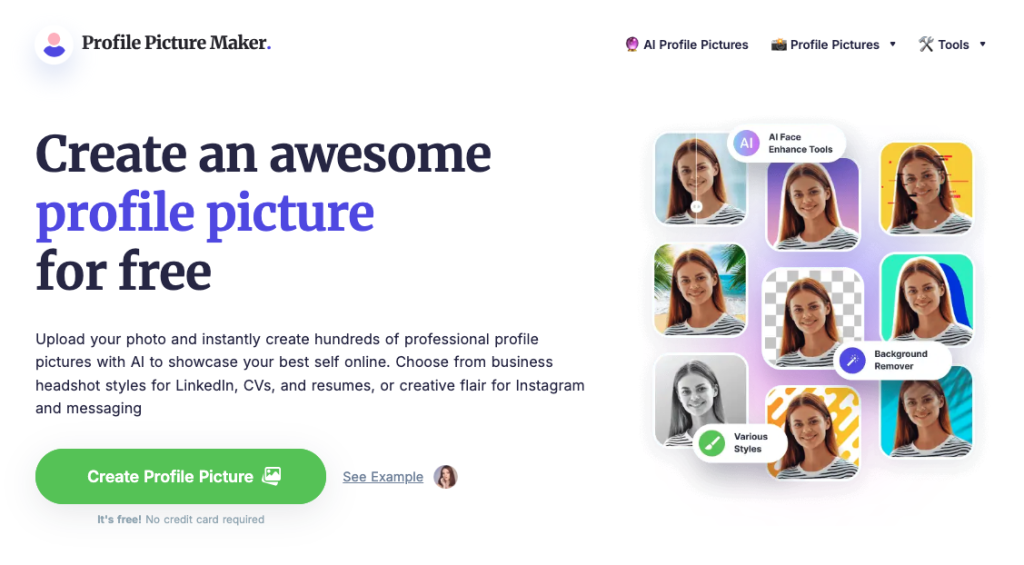
    Then as the next tool on this list, we have an AI-powered profile picture generator called PFPMaker.

    Upload your photo, and it creates hundreds of options instantly.

    Whether you need a professional headshot for LinkedIn or a creative look for Instagram, it offers styles for any purpose. It’s fast, and simple, and makes creating polished profile pictures effortless.

    However, this is not necessarily creating a face—instead, it’s using the uploaded photo as a base image.

    So this tool is essentially a background swapper!

    Before vs. After

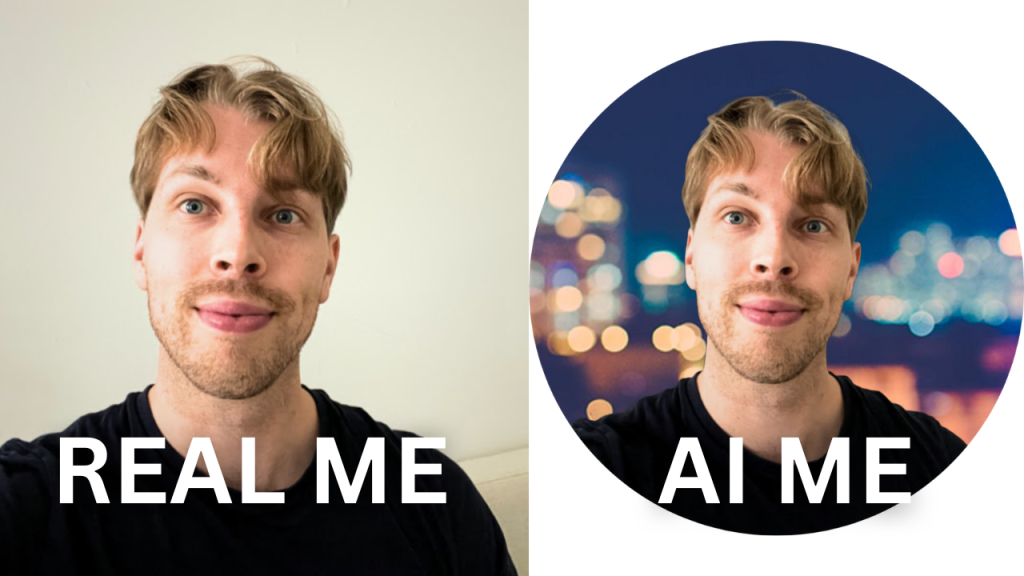
    Here’s the before-after image I liked the most:

    More Results

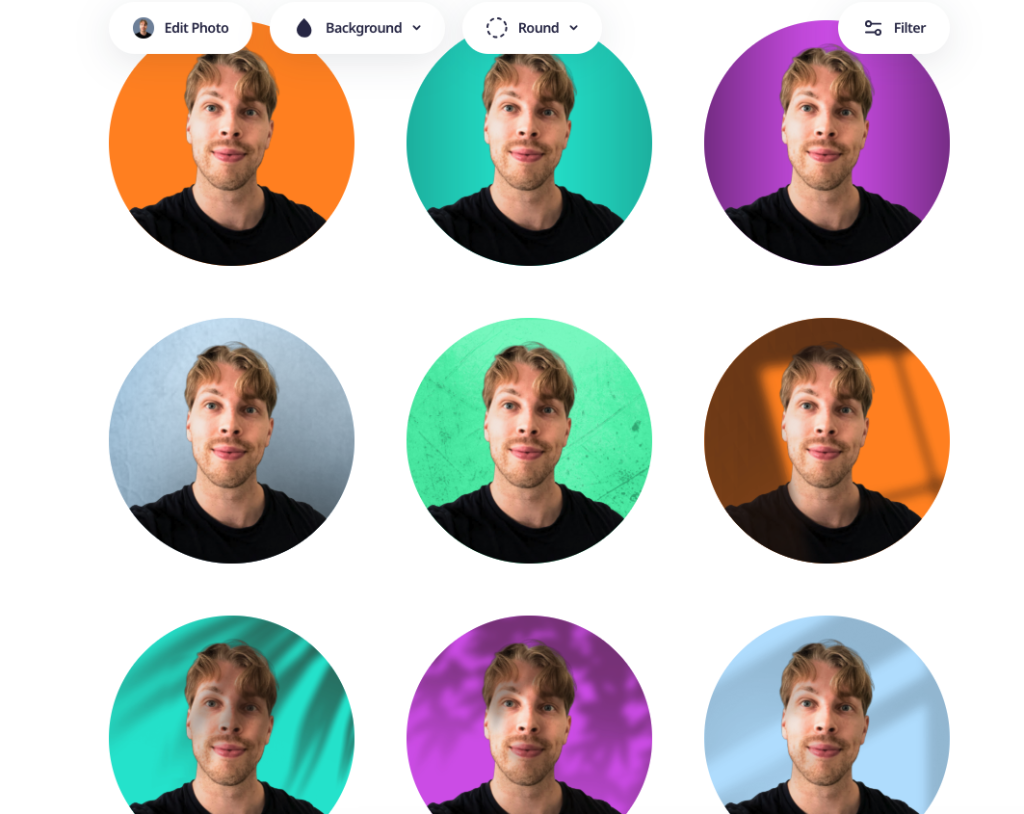
    Here are some more images I got from PFPmaker:

    Some of them are out of place because it’s all about the background matching with my face lighting by chance.

    However, because there are so many options to choose from, chances are there are good ones too!

    Noteworthy

    However, as I said before, this tool just removed the background and changed it with something else.

    So this doesn’t really count as a proper AI headshot generator (hence it’s position on the list too!)

    Nonetheless, there are lots of backgrounds to choose from, so you might find really good results with this strategy too.

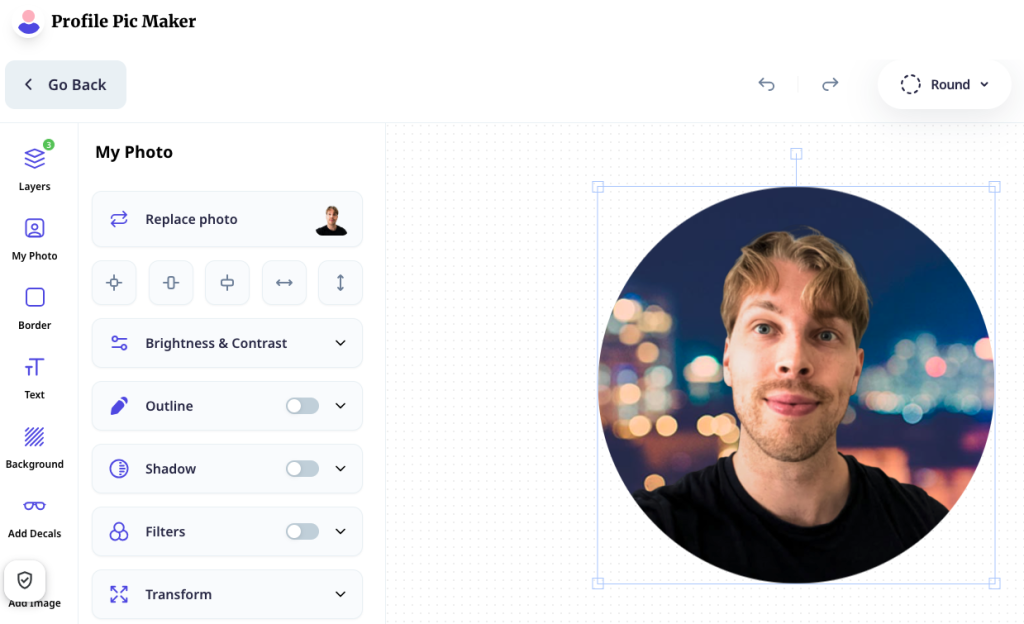
    Notice also that you can customize your photos:

    Pricing

    Free!


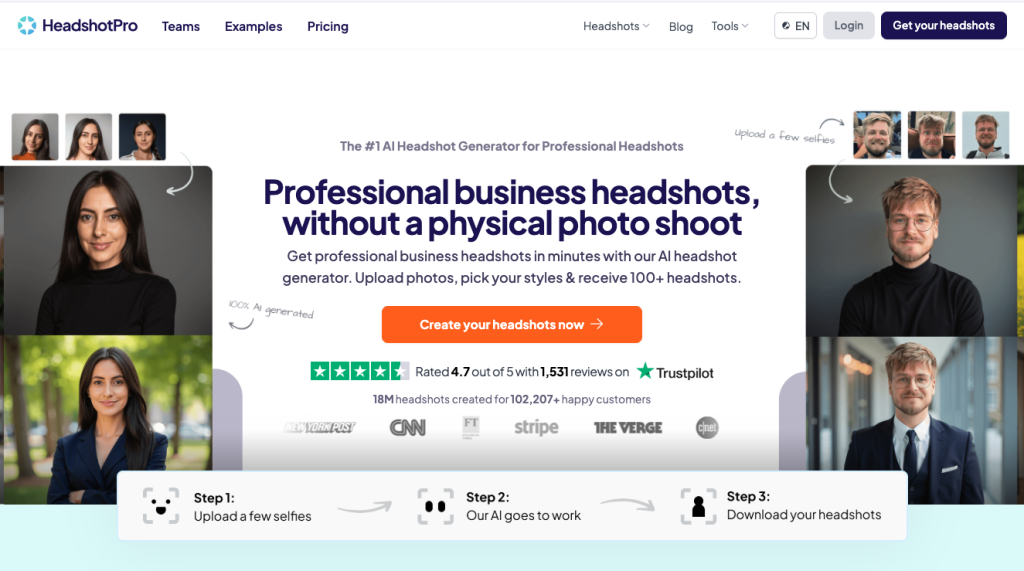
    11. HeadshotPro

    Next up, we have HeadshotPro, a tool similar to PFPMaker in being a clever background swapper for profile photos.

    With HeadshotPro, you upload your photo, and it transforms it into dozens of professional-looking headshots instantly.

    Whether you’re polishing up your LinkedIn profile or need a clean, polished shot for your company website, it offers a variety of modern, corporate-style backgrounds to match your goals. It’s straightforward, and efficient, and ensures your headshots look sharp and on-brand.

    Keep in mind, like PFPMaker, this isn’t generating a new face—it works by enhancing your existing photo with different professional backdrops. A quick and easy way to upgrade your image.

    Let me show you my results.

    Before vs. After

    Here’s my favorite before-after shot it created:

    That’s cool! The lighting is accurate and looks realistic. But this is all luck. The AI didn’t modify my face lighting, it just happened to be a good background in the catalog.

    More Results

    You can get more similar results by choosing the background from this view:

    Noteworthy

    Once again, this is not a headshot generator in the sense that it doesn’t create your face. But instead, it uses AI to remove the background and swap it with something else.

    But thanks to the ready-made backgrounds, this process is fast. You can test different background views and one of them will surely match your image well.

    One thing I don’t like about this is that the backgrounds are pre-built. That is, the AI doesn’t create new ones as you hit generate. This means it’s essentially just a good old background remover/changer and nothing else.

    But as I showed you, if you have a good initial image, the background might be surprizingly good!

    Pricing

    Free!


    One Thing Before You Go!
    AI headshot generators are pretty cool, but let’s break down how they work and set some expectations, so you don’t feel bummed if the results aren’t Insta-perfect right out of the gate.

    Here’s the deal: these tools use AI models trained on gazillions of photos to create headshots based on the photos you upload. They’re fast, efficient, and kind of magical—but they’re not perfect. A lot of the time, the images can look a little off. Maybe your smile looks just a bit too “robotic” or your features don’t match your vibe 100%. That’s because the AI is guessing, not truly understanding who you are.

    But here’s why you shouldn’t feel let down. First, most AI-generated headshots aren’t flawless. The tech is amazing, but it’s not at that “replace-a-human” level yet. And second, (this is my favorite part!) Betterpic comes in with a secret weapon: real human editors. If your headshot isn’t nailing your look, they’ll step in and fine-tune the image so it actually looks like you—your face, your style, your personality. No weird glitches or uncanny vibes. This human touch is why I think Betterpic stands out. It’s not just relying on AI alone—it’s giving you the best of both worlds: speed from AI and precision from humans.

    So, if your first AI results aren’t mind-blowing, don’t sweat it. That’s normal! Betterpic’s got your back to make sure the final product looks amazing and totally “you.”
    Thanks for reading!

    See Also

    Find more epic AI reviews on my new YouTube channel: https://www.youtube.com/@artturiexplores/videos

    Or find a complete list of the best AI LinkedIn headshot generators here: https://medium.com/@artturi-jalli/i-tried-12-ai-linkedin-headshot-generators-heres-the-best-7851d45ddc41

  • 24Labs AI Review

    What 24Labs AI is (quick overview)

    24Labs isn’t a single AI product — it’s more like a startup studio that builds multiple AI tools.

    Based on what’s publicly available, their approach is to rapidly create, launch, and test AI-powered products across different areas such as content creation, automation, SEO, and even music. Instead of focusing on one core product, they experiment with many ideas and scale the ones that gain traction.

    In simple terms, 24Labs is trying to act as a “production hub” for AI tools, constantly shipping new apps.


    My experience using it

    From my experience, 24Labs AI doesn’t really deliver on its promise.

    Most of the tools feel unfinished or rushed, and there’s a noticeable lack of depth in what they offer. A lot of features seem like thin layers on top of existing AI models, without much added value.

    Another issue is consistency. Since they have multiple tools, the quality varies a lot, and none of them really stand out as something you’d want to rely on regularly. Overall, it gives the impression that the focus is on shipping quickly rather than building something solid and refined.


    What I’d recommend instead

    If you’re looking for dependable AI tools, there are better options out there:

    • ChatGPT (OpenAI) – strong all-around performance for writing, coding, and general tasks
    • Claude (Anthropic) – great for structured thinking and long-form content
    • ElevenLabs – excellent for realistic voice generation
    • Canva AI – easy-to-use tools for design and content
    • Notion AI – useful for productivity and organizing workflows

    These tools are generally more reliable, better designed, and more consistent in everyday use.


    Final thoughts

    24Labs AI is an interesting concept in theory, but in practice it feels like:

    a collection of average tools instead of one truly great product

    If they focused more on improving quality instead of releasing many tools quickly, it could become something much more compelling. But as it stands, there are clearly stronger and more polished alternatives available.