Be ready to spend up to two hours to get your headshots.
For me, the hardest part was picking 8–16 good photos. That took about 30 minutes. The AI then needed at least another 30 minutes to render, sometimes longer.
You don’t need to keep the window open. BetterPic will email you when your headshots are ready.
Pricing & Value for Money
BetterPic offers three pricing plans:
Basic: $35
Pro: $39
Expert: $79
These are one-time payments, no subscription.
The pricing feels fair for the quality. Other tools cost about the same but don’t offer customization or refunds.
I recommend the Expert plan. It gives you more headshots, which matters since AI results can be hit or miss. Out of 100 images, you’re almost guaranteed to get a handful of great ones.
No hidden fees, but editing does cost credits you can buy when needed.
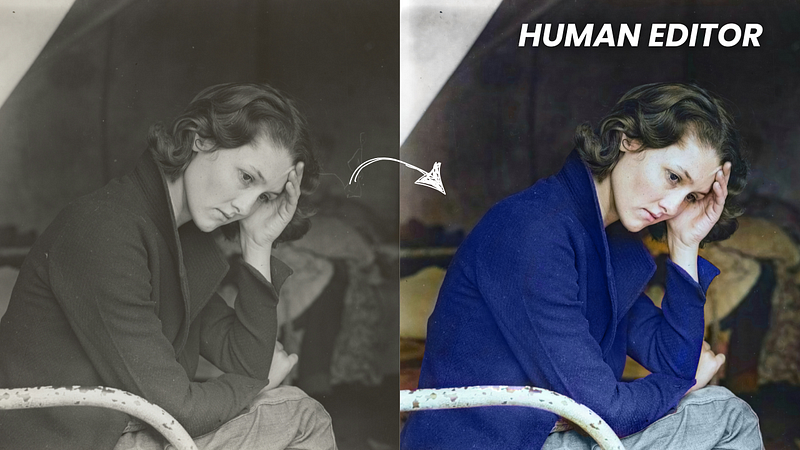
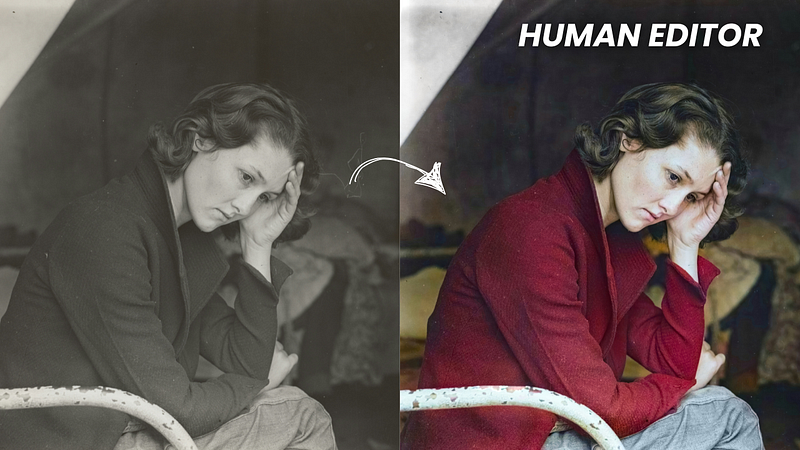
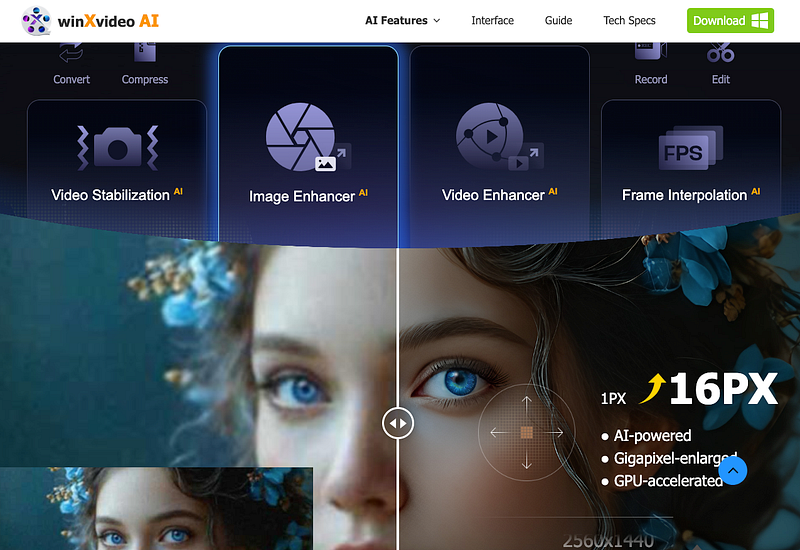
Winxvideo AI excels in colorizing black-and-white photos by Using advanced AI technology, Winxvideo AI can bring black-and-white photos to life with realistic colors.
To use it:
Install the software on your computer
Click “Image AI” and upload a black-and-white photo
Select “AI model” and “Colorizing Monochrome Image”
Preview and export the colorized image
Winxvideo AI takes a few extra steps, but the results are worth it. It doesn’t just add realistic colors — it also improves the image quality by removing scratches, stains, spots, and smudges from old photos.
My Experience with Winxvideo AI
I tested the colorization feature, and here are the results.
Here’s the input:
Here’s the image after being colorized with AI:
The colorizing process only takes a few seconds. The trees, grass, and sky all look natural and realistic. The sky is a clear blue, just like in real life.
Another great thing is how much the image quality improves. All the original details stay intact, and any blurry branches or grass are fixed, making the whole photo sharper.
Key Features:
AI-powered prediction and analysis
Fast black-and-white to color conversion
Realistic photo colorization
Preserves authentic details
Colorize multiple images at once
Pricing
Winxvideo AI is free to try. You can test up to 5 images with the trial version.
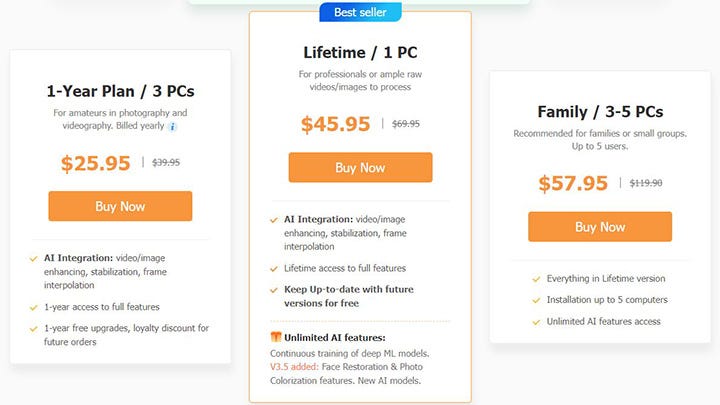
The full version has three plans:
1-year plan for 3 PCs: $25.95
Lifetime plan for 1 PC: $45.95
Family plan for 3–5 PCs: $57.95
For a limited time, there are special deals on both the 1-year and lifetime plans.
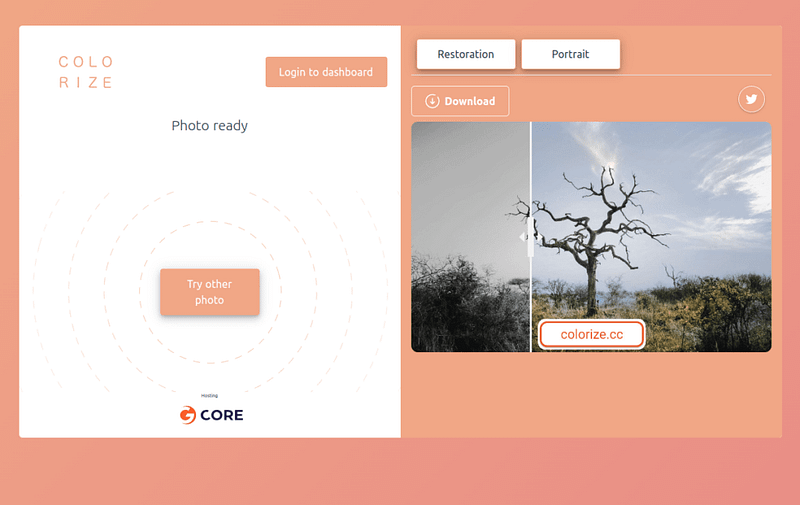
Colorize.cc is an easy-to-use AI image colorizer. You don’t need to download anything or sign up to use it. Even better, you can try it for free!
The main downside compared to most tools on this list is the watermark on the output images. Other than that, I think it’s a neat, good-looking tool, and I’m happy with the results.
To remove the watermark, you’ll need a paid plan. I’ll cover the prices later.
There are two AI engines you can use to colorize images:
Model V1 for people
Model V2 for other images like buildings, landscapes, and vehicles
To use the tool, go to the website, upload a photo, and get your colorized image. That’s it — no editors or downloads needed.
My Experience with Colorize
I ran the same test I did with the other tools, converting a black-and-white image to color.
Here’s the input image:
And here’s the result:
The process only took a few seconds, and the results look great.
This tool is definitely up there when it comes to the best options on this list. It’s hard to rank them because all of these tools give solid results, which makes sense since they use similar technology.
The only downside is the watermark, which you can remove by subscribing to a paid plan.
Key Features
Two AI engines for image colorization
Powerful AI to turn black-and-white photos into color
Image enhancement for restoring colors
Easy-to-use, simple interface
Free version includes watermarked images
Pricing
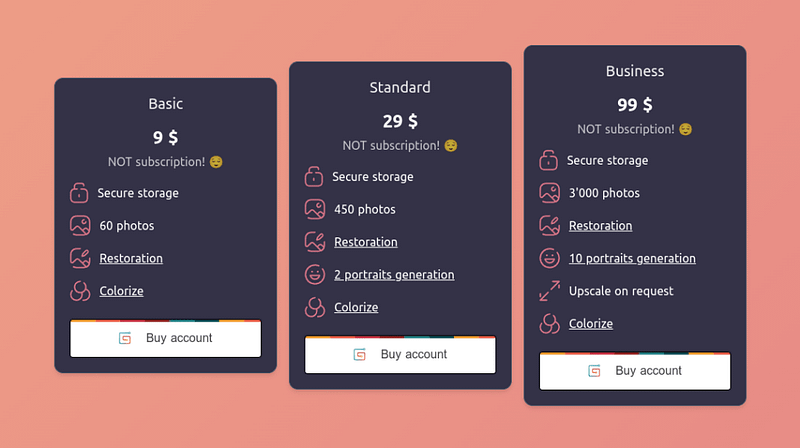
In addition to the free plan, there are three paid options. The main benefits of the paid plans are more images you can colorize and no watermarks on the output.
The plans are:
Basic: $9/month
Standard: $29/month
Business: $99/month
5. Hotpot.ai
Hotpot AI is a simple way to colorize old black-and-white photos. You can also enhance the colors in older colorized images.
The tool is very easy to use. Just go to Hotpot’s website, upload a photo, wait a few seconds, and you’ll get a nicely colorized image.
Hotpot is perfect for anyone who wants to quickly and automatically add color to black-and-white photos.
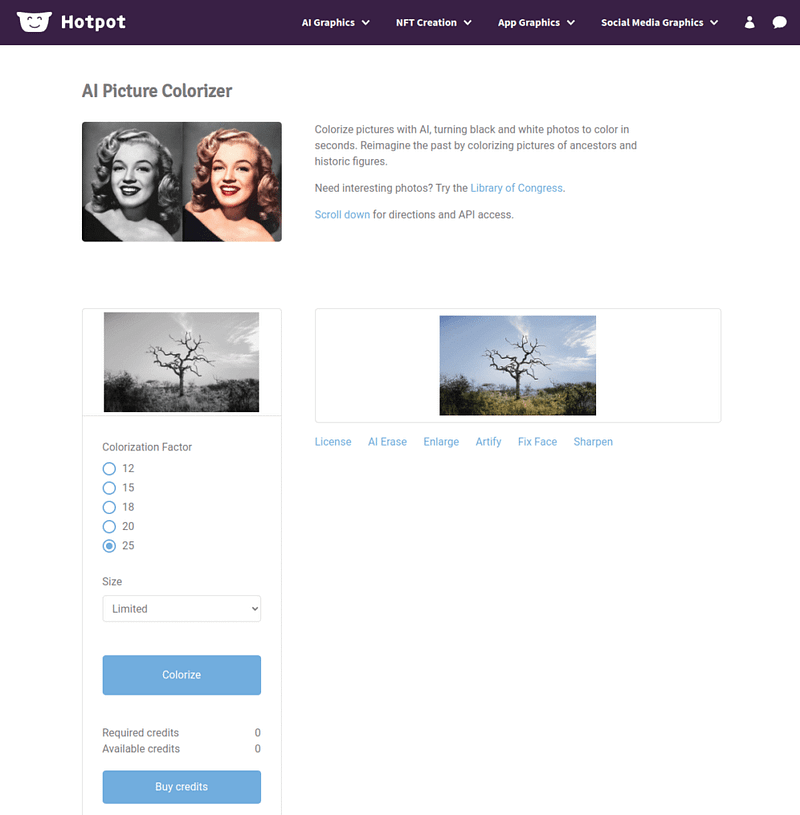
If you want to fine-tune the result, you can adjust the colorization factor from 12 to 25, which can affect the image quality.
There are also several other options for your images. You can erase, enlarge, clarify, fix faces, and sharpen them.
The best part? You can try it for free, and no technical experience is needed.
My Experience with Hotpot AI
Here’s an example of me colorizing a stock photo.
Here’s the input:
Here’s the colorized version:
The result looks really good. The AI seems to understand the image well. The only thing I noticed is that the colors aren’t very vibrant, but overall, the AI did a great job.
Key Features
Colorize black-and-white photos
Enhance images
Works in your browser
Free trial you can try easily
Pricing
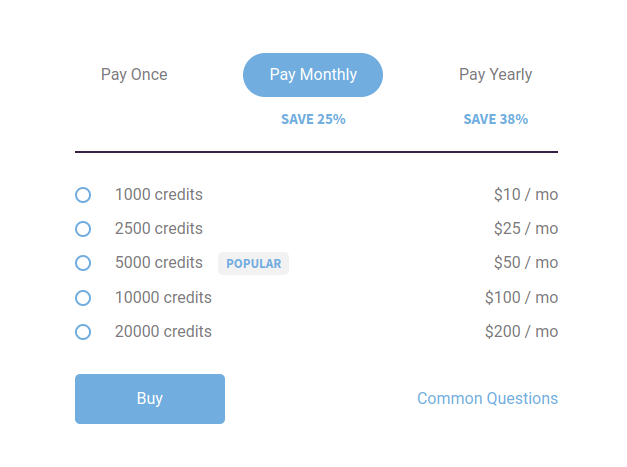
You can use Hotpot for free for personal use. If you want to use the image colorizer for commercial purposes, you need to buy credits:
1,000 credits: $10/month
2,500 credits: $25/month
5,000 credits: $50/month
10,000 credits: $100/month
20,000 credits: $200/month
6. Img2Go.com
Img2Go is a free AI tool for turning black-and-white images into color with realistic results.
It uses AI and deep learning to bring your photos to life.
Like the other tools on this list, you just go to the website, upload an image, and wait a few seconds to get a colorized version.
You can also use Img2Go to enhance the colors of older colorized photos.
My Experience with Img2Go
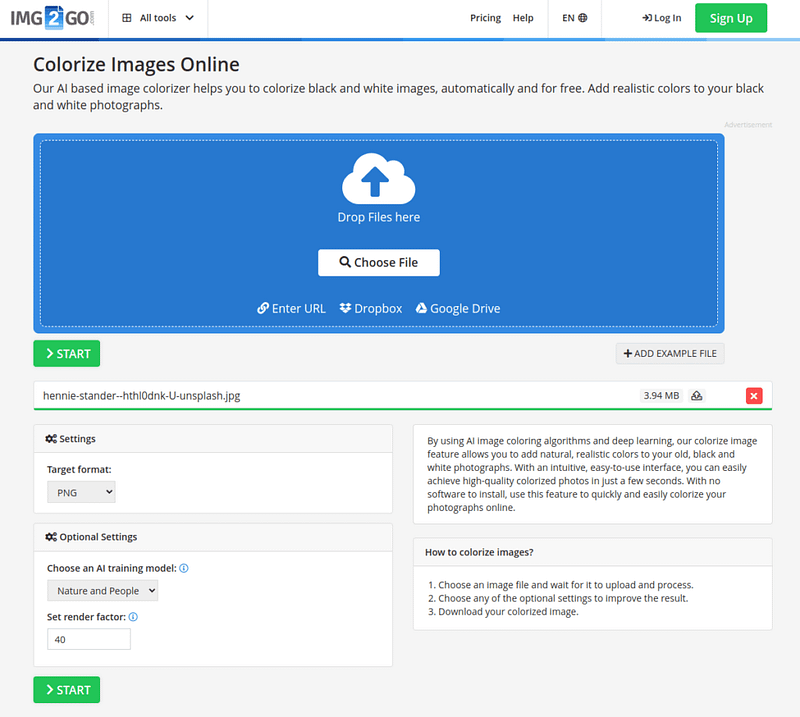
Here’s the result when I converted a black-and-white image to color.
Here’s the original black-and-white image:
And here’s the colorized version:
To test this tool, I set the rendering factor to 40. It was a bit slower, but the image quality came out great.
To me, the result looks very natural — you wouldn’t guess it started as a black-and-white photo!
As you can see, the results are pretty similar to the other tools so far. 🙂
Key Features
Works online, no downloads needed
Add color to black-and-white images
Enhance colorized images easily
Very easy to use, with results in seconds
Pricing
This tool is completely free!
7. Playback.fm
Playback.fm is an AI image colorizer that makes it easy to turn black-and-white photos into color.
You can use it for free, with no limitations. It’s simple to use — just upload a photo and wait a few seconds. The AI will create a colorized version quickly.
You can also use Playback.fm to improve the colors of photos that are already colorized but look faded or off.
The AI behind this tool recognizes objects in the image and colors them accordingly. It’s trained on millions of images using deep learning and neural networks.
My Experience with Playback
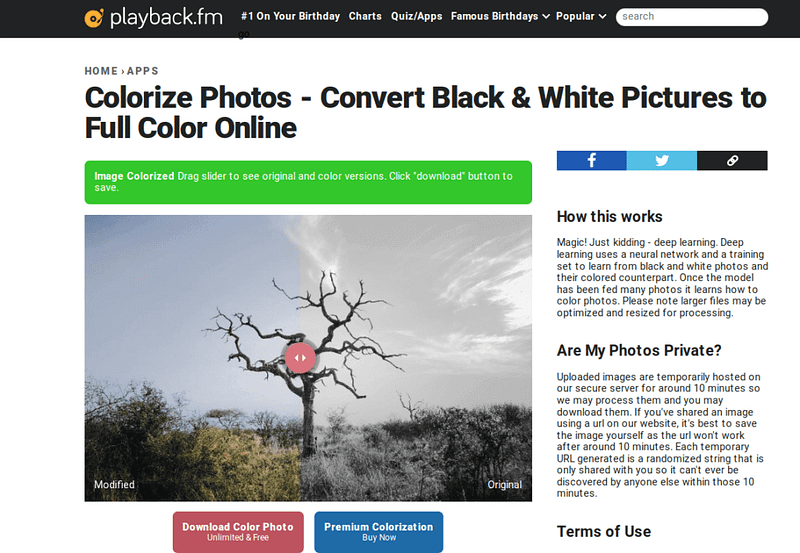
I tested the tool to colorize a black-and-white photo. The results look good and are similar to what the other tools on this list produced.
Here’s the original black-and-white image:
Here’s the colorized version:
Key Features
Online tool that is easy and free to use
Add color to black-and-white images in seconds
Uses advanced AI to colorize and enhance photos
Pricing
You can use this tool for free!
If you want even better colorization, there’s a premium version. You can see the price by colorizing an image and clicking the “Premium Colorization” button.
8. Picwish.com
Looking for an easy way to turn black-and-white photos into realistic, natural-looking color images?
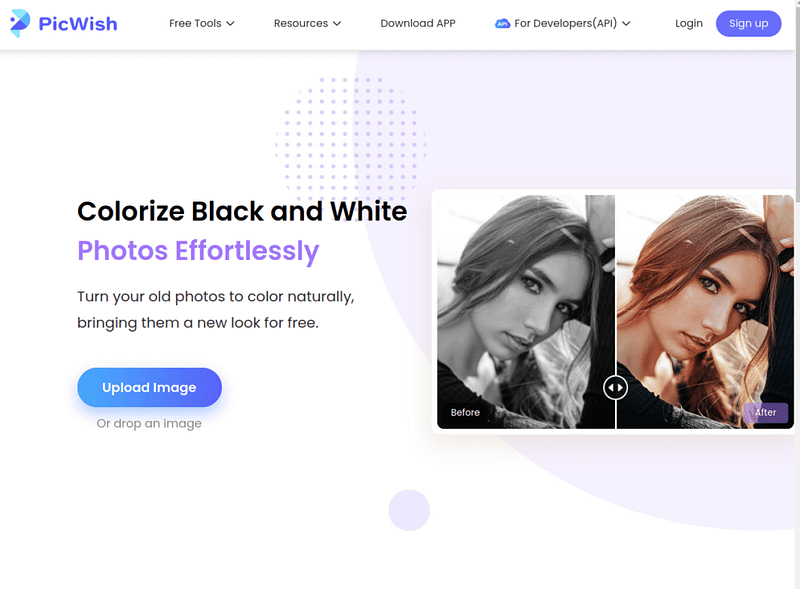
Picwish is a fast solution for bringing old photos to life with natural colors. It’s also known for its API, which developers can use to integrate the service into their apps.
Like the other tools on this list, Picwish is easy to use. Just upload an image, let the AI work, and you’ll get a colorized photo in no time.
If you’re more technical and want to use their API, you can check out the API documentation for details.
My Experience with Picwish
Here’s an example of how I used the tool on the same image I’ve been using throughout this guide.
I think the results look great. The AI seems to understand the image and colors each part correctly.
The only downside is that you need to create an account to download the colorized image.
Key Features
Uses advanced AI to colorize old images
Turn black-and-white photos into realistic, colorful images
Free to try
Easy-to-use interface with quick results, no technical skills needed
API available for developers to integrate into their apps
Pricing
The demo version is free — you just need to create an account to download the colorized images.
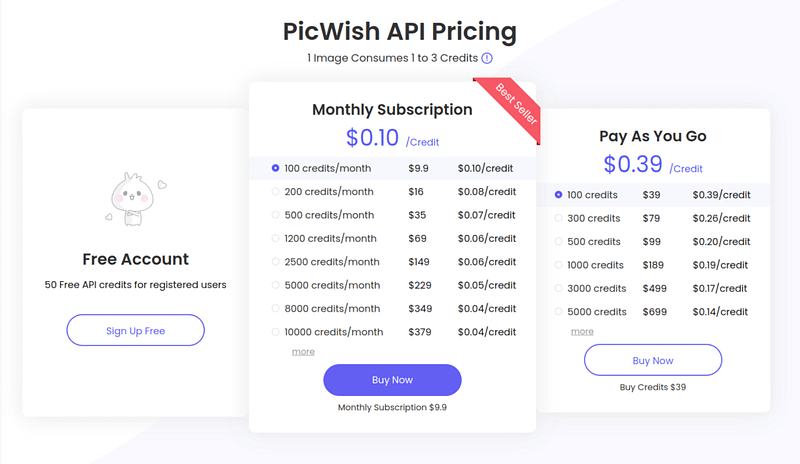
For developers who want to use the API more, here is the pricing:
The API is for anyone who wants to integrate this service into their apps or websites.
9. Vance.ai
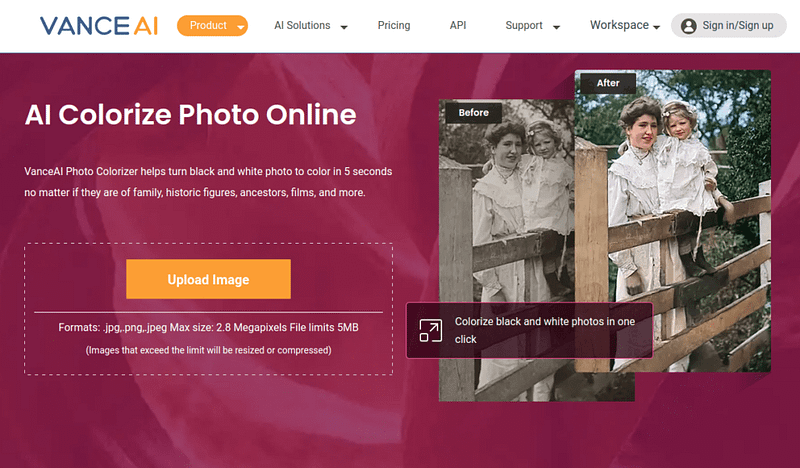
Vance uses advanced AI to turn black-and-white images into colorful photos.
It’s a quick and easy tool if you want to colorize images fast. You don’t need to sign up or download anything — it works right in your browser with a simple interface.
To colorize an image with Vance:
Open their website
Drag and drop your image
Wait about 5 seconds for the AI
Preview and enjoy the result
My Experience with Vance
Here’s an example where I turned a black-and-white image into a colorized scenery photo.
Here’s the original black-and-white image I used:
And here’s the colorized version:
I think the result looks pretty good. The colors are a bit muted, more on the black-and-white side compared to other tools, but the AI still understands the image and colors it well.
Key Features
Online photo colorizer — no need to install anything
Free trial for image colorization
Data-safe uploads — images are deleted within 24 hours so they don’t stay on the server
Pricing
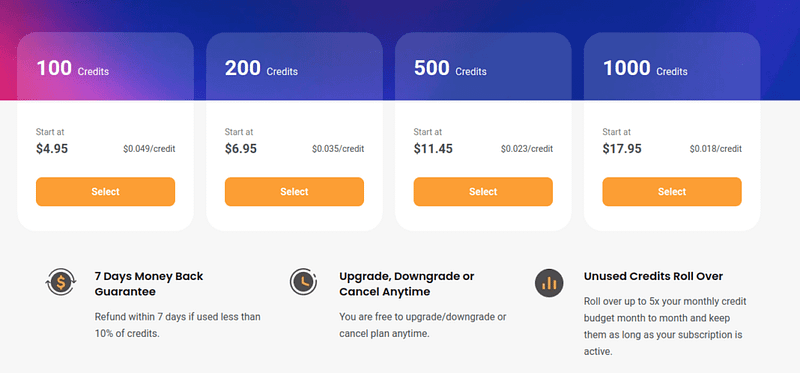
Besides the free plan, Vance AI has a credit-based payment system for power users:
I tested Walter Writes AI humanizer to save your time and money.
In this post, I will show you my results, experience, and whether it’s worth it or not.
Let’s start!
Disclaimer: This post has affiliate links at no cost to you.
Core Features
Here’s a sneak peek at the core features.
Converts AI text into natural, human-like writing
Adjusts tone (casual, academic, professional, etc.)
Passes AI detectors like Turnitin and GPTZero
Fixes grammar, flow, and awkward phrasing
Fast processing (under 30 seconds)
Works in 50+ languages
Built-in AI detection preview
Handles long texts (paid plans)
Batch processing available
Now, let’s move on to my experience and results with this AI humanizer.
My Experience
How to Use It
First, before I share the results, let me quickly show you what it’s like to use this tool and how to do it yourself.
I found out that this tool is easy to use. Just sign up.
You’ll then see the AI humanizer dashboard. Then copy-paste some content into the view.
Tweak the humanization settings for a better-tailored output.
Then click “humanize” to start the process.
Depending on your text chapter length, it should only take less than a minute for you to see your humanized text.
That’s pretty simple, isn’t it? Anyone can learn how to use these tools in a second.
Based on this, here’s my take on Walter AI when it comes to the usage and speed.
Feature / Criteria
Score (0–10)
Ease of Use
8
Speed of Processing
9
Output Quality
6
Maintains Original Meaning
7
Tone Naturalness
7
Customization Options
8
Pricing Transparency
7
Free Usage Availability
4
UI
7
Overall Score
7
That’s decent!
However, thus far, everything could be just hype. The tool could look cool, they could have a big budget on ads, but the performance is still a question mark.
Let’s find that out next!
Results
I ran the humanized output through a few popular AI detectors to see how well it holds up.
A score of 0% means the detector thinks the content is still fully AI-written.
A score of 100% means it’s human-written.
Here’s what came back:
Content Type
Winston AI
Originality AI
QuillBot Detector
Undetectable.ai Detector
Formal Essay
7%
100%
100%
49%
Casual Blog
83%
100%
100%
50%
Creative Writing
0%
100%
100%
36%
Technical Expl.
1%
100%
100%
99%
Total Average
22.5%
100%
100%
58.5%
Based on this, the average AI detector score for Walter Writes AI was just 70.31%.
That means 7 out of 10 times Walter AI was able to humanize the text, but 3 times out of 10 the AI detectors could still tell it’s AI content.
That’s way too unreliable.
Other Observations
Is the Text Actually Good?
Walter Writes AI was able to fool the detectors most of the time. However, that doesn’t say much if the content is garbage.
Let me give my honest opinion of the tool’s output quality.
To give you an example, here’s a short section of a Walter AI humanized piece of text:
Neural networks are an important aspect of modern artificial intelligence. Neural networks resemble, in some loose way, how neurons act in the human brain. Neural networks are composed of interconnected nodes in many layers. Nodes accept inputs, apply an activation function, and send outputs to the next layer. If someone had to choose a particular network structure, feedforward neural network is the predominant form. Neural networks are used for classification, regression, and different forms of pattern recognition. Training a neural network utilizes the backpropagation process. An error is achieved based on the models prediction and the actual value. The backpropagation process will optimize the weights of the network using an optimization algorithm called gradient descent, to minimize the loss.
To me, this seems hard-to-read text that is designed to trick AI detectors. It still sounds like AI, but it just lacks the typical AI jargonized patterns.
It has those repetitive high-schooler writing patterns that are super hard and annoying to read.
I noticed this in almost all of the samples I tested it with.
Free Trial Limits
A good software has a free trial.
If the team is confident that the users will love the product, they’ll surely offer it for free—unless it’s like crazy expensive to run free and the results are guaranteed.
Walter Writes AI has a free trial with which you can play with.
However, it’s just 300 words. That’s a very limited free trial, but still a free trial nonetheless.
Pros
Here’s what I liked about Walter Writes AI.
Easy to use
Free trial
Fast processing
AI detector (although I had to use 3rd party ones to get reliable results)
Cons
Here’s what I didn’t like about it.
Works just 70% of the time based on my 16 random tests. This is not good at all.
The text is hard to read, the sentences are super long. It sounds like something that has been designed to trick the AI detector algorithms.
Pricing
Here’s a quick summary of the pricing of Walter Writes AI:
Instead of using Walter AI to humanize text, what if we used ChatGPT instead?
ChatGPT can just as well rewrite text, right? Especially if we use a clever prompt.
I tried this. Here’s the AI humanizer prompt I used in ChatGPT:
The Humanizer Prompt
Take the following content and rewrite it so it sounds like it was written by a human — not just any human, but one with natural quirks, opinions, emotional undertones, and stylistic imperfections.
Add:
Mild personal anecdotes, observations, or casual asides where appropriate.
Vary sentence lengths and structure — mix in fragments, rhetorical questions, even informal phrasing.
Use colloquialisms, contractions, and slight inconsistencies in tone or pacing — like a real person would.
Occasional humor, uncertainty, or opinion — avoid being perfectly neutral.
Avoid repetitive phrases, generic transitions, or robotic patterns.
The goal is to sound like a thoughtful, slightly flawed, expressive human — not a polished AI. Rewrite accordingly.
Here are the AI detection scores I got to my humanized text pieces:
Content Type
Winston AI
Originality AI
QuillBot Detector
Undetectable.ai Detector
Formal Essay
1%
70%
100%
99%
Casual Blog
19%
100%
100%
48%
Creative Writing
19%
99%
100%
99%
Technical Expl.
1%
99%
100%
99%
Total Average
10%
92%
100%
86.25%
If we sum up the AI detector scores, we get an average of 72.06%.
Let’s compare this score to Walter Writes AI, which gave an average AI detection score of 70.31%.
Walter Writes AI got an average score lower than ChatGPT.
This means ChatGPT is a better AI humanizer than Walter Writes AI.
Also, you can use ChatGPT for free much more than Walter AI.
Final Verdict
Walter Writes AI is not a reliable AI humanizer tool.
In fact, you get better human scores by just rewriting your text using ChatGPT.
Whether it’s ChatGPT or Walter Writes AI, I don’t recommend using either one for humanization. Those simply aren’t reliable enough.
My Test Data
To test the AI detectors, I generated four text samples with ChatGPT AI.
I then entered the text samples to the AI humanizers to get the humanized results.
Then I entered those into AI detectors again.
Here are the four text chapter I tested the humanizers with:
📄 1. Formal Essay (Topic: Climate Change Policy)
Climate change represents one of the most critical challenges facing humanity today. Rising global temperatures, melting ice caps, and extreme weather events are no longer distant threats but daily realities. Governments around the world must act swiftly and decisively to implement effective climate policies. These may include carbon pricing mechanisms such as taxes or cap-and-trade systems, increased investment in renewable energy sources, and stricter regulations on emissions from transportation and industry. Public awareness campaigns can also play a vital role in shifting societal behavior. Equally important is international cooperation, as climate change transcends national borders and requires a unified global response. Failure to act could result in irreversible damage to ecosystems, widespread food insecurity, displacement of populations, and escalating economic costs. Therefore, climate policy must strike a balance between environmental urgency, economic sustainability, and social equity to ensure a livable future for generations to come.
📝 2. Casual Blog Post (Topic: A Trip to Lisbon)
I didn’t expect to fall in love with Lisbon, but that’s exactly what happened. From the moment I stepped off the plane, the city greeted me with warmth, charm, and ridiculously good food. I spent most of my time wandering through the winding alleyways of Alfama, where laundry hangs from balconies and the sound of Fado music drifts out of open windows. One of my favorite moments was watching the sunset from Miradouro da Senhora do Monte — the sky turning gold over terracotta rooftops. Trams rattle along narrow streets like something out of a movie, and the people are as friendly as the weather is sunny. Of course, I couldn’t leave without trying a fresh pastel de nata (or three). Lisbon has this laid-back energy that makes you feel like you’re meant to slow down. It’s definitely a place I’ll return to someday.
🎨 3. Creative Writing (Scene: Rainy City)
Rain slid off rooftops and hissed against the pavement, turning the city into a blur of glistening reflections and scattered light. Mara moved through the quiet streets, her boots splashing through shallow puddles as headlights shimmered across wet asphalt. Somewhere above, jazz spilled softly from a second-floor window, a saxophone solo bending against the rhythm of the storm. The city felt alive in its stillness — holding secrets in every alley and whispers in the fog. Under the streetlight, her silhouette stretched behind her like a forgotten memory. She wasn’t sure where she was going, only that tonight wasn’t meant for staying still. With every step, the rain seemed to erase just a little more of the past, washing away the weight she hadn’t realized she was carrying. In the quiet of the storm, she finally felt something close to free.
🧠 4. Technical Explanation (Topic: How Neural Networks Work)
Neural networks are a foundational component of modern artificial intelligence, modeled loosely after the way neurons work in the human brain. At their core, they consist of layers of interconnected nodes, where each node receives input, processes it through an activation function, and passes the result to the next layer. The most common type is the feedforward neural network, which is used for tasks like classification, regression, and pattern recognition. Training involves a process called backpropagation, where the network adjusts its internal weights based on the error between its predictions and the actual outcomes. This adjustment uses an optimization algorithm known as gradient descent. Over many iterations and data samples, the network improves its performance by minimizing loss. Neural networks power a range of real-world applications — from facial recognition and voice assistants to recommendation engines and autonomous vehicles. Their ability to learn complex patterns makes them incredibly powerful, but also computationally intensive.
My Opinion in AI Humanizers
I’m testing AI humanizer for fun and to keep track of what I’m seeing—not as some kind of deep-dive research project.
The results are based on small samples, and things in the AI world change so fast that what works today might flop next week.
If you’re looking for more reliable data, you’d need to run way more tests, way more often.
Also, I don’t really buy into the whole “humanize your AI content” thing or the obsession with detection tools.
AI content isn’t automatically bad.
The real issue is when content—AI or human—just says the same stuff everyone’s already said.
For me, the only thing that matters is whether the person writing actually knows what they’re talking about.
If you’ve got no real experience or insight, you probably shouldn’t be writing it.
In fact, as a blogger, I’ve never seen any content creator see any results with “just another post” or “just another video” about a topic—whether it’s human or AI-written.
Don’t use AI to write. It just… doesn’t get you anywhere in life.
In this post, I’ll show you the best AI logo generators right now.
I’ve tested them all and only included tools for different, specific purposes — whether you want full customization, hands-off automation, or to create something from scratch.
Fiverr AI logo maker is the best overall AI logo generator that I’ve used.
Let me show you my results and how it works.
To create a logo with Fiverr’s AI logo maker, head over to their site.
Enter your brand name ot this view. For example, I’m creating a new logo for my site, softwareviews.net.
Specify your industry.
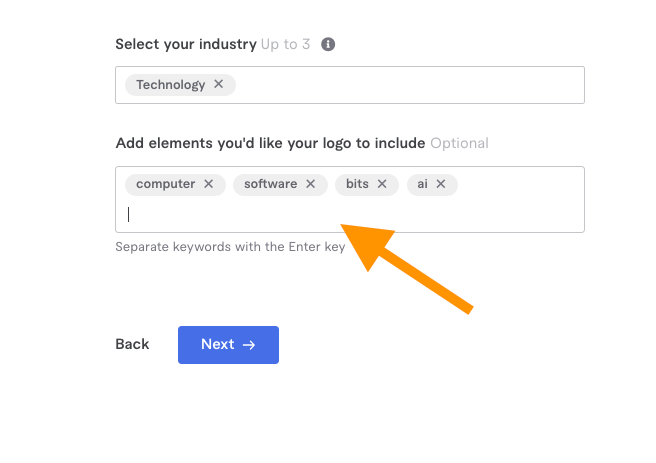
Add elements you want to see in the logo.
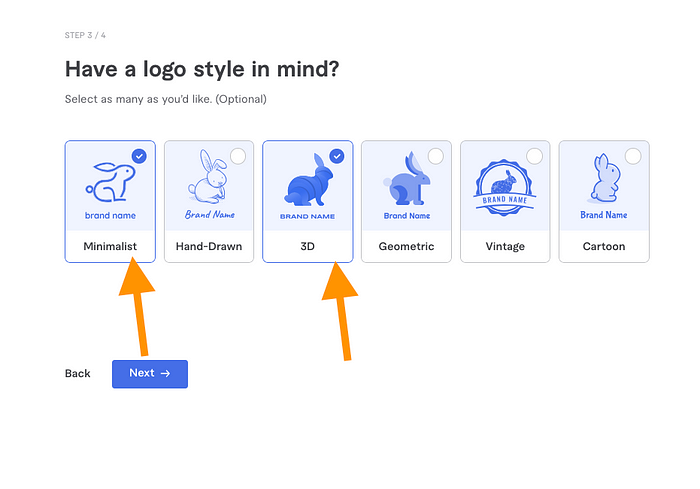
Pick your favorite logo styles.
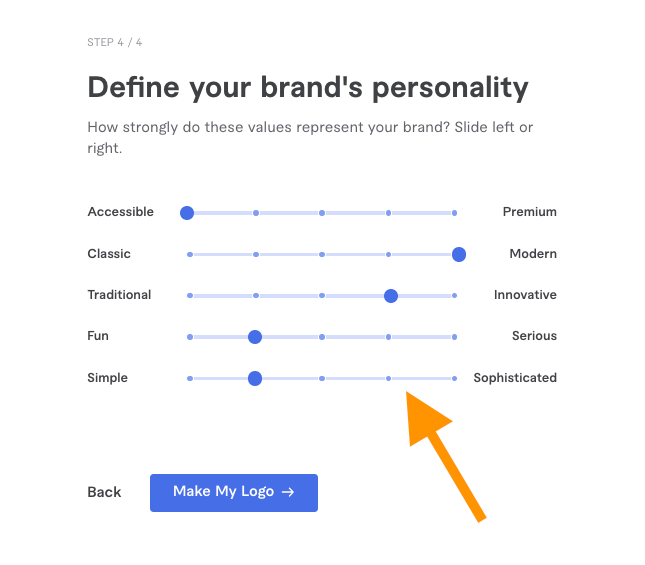
Specify your brand personality with the brand sliders. For example, I told my brand is accessible, modern, innovative, somewhat fun, and somewhat simple.
Then wait for 10 seconds for the AI to create your logo.
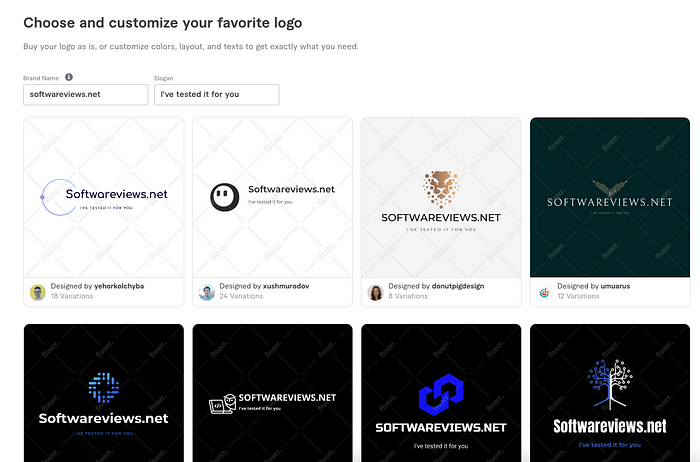
After 10 seconds, you will see your AI-generated logos.
But the journey doesn’t end here.
As the next step, you can customize any of these logos.
For example, I liked this design:
But I wanted to change some things around.
For example, I picked a blue style instead of the black that it gave me.
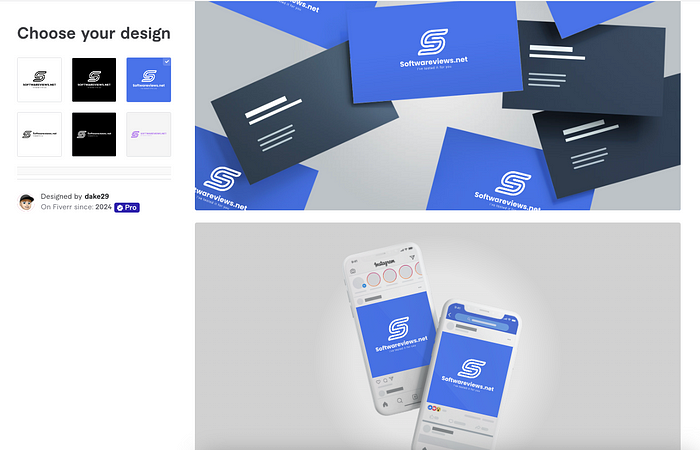
When you do this, you get to see what your logo looks like on business cards, social media, coffee mugs, and more.
If you like what you see, feel free to download it and start using your new logo.
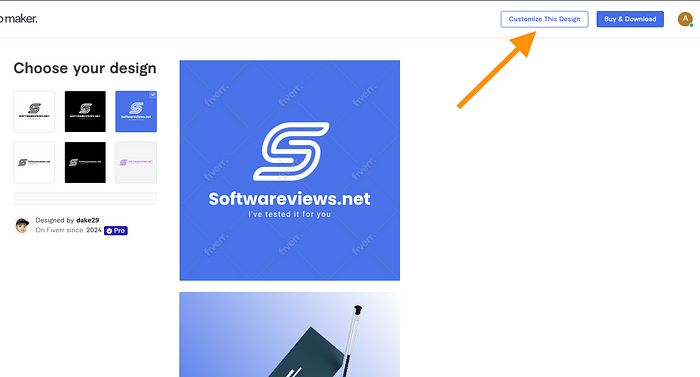
However, you can do more customizations on Fiverr too by clicking the “Customize This Design” button.
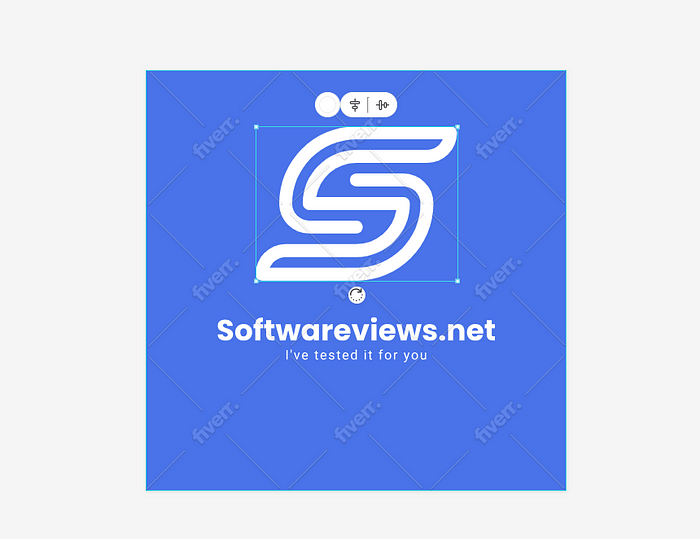
With this, you can move your elements around and resize them.
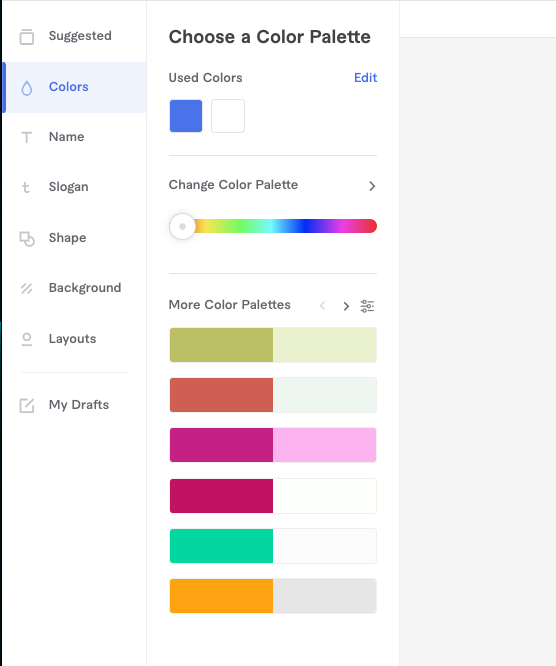
You can customize colors, name, slogan, shapes, backgrounds, and layouts.
For example, I chose a new layout for my logo where the element is not on the top, but on the left of the text instead.
Pretty cool, huh?
Then, once you’re ready, you can download your logo. This gives you a set of PNG files.
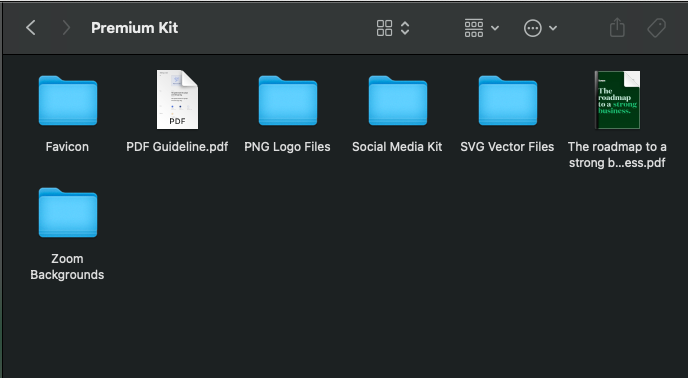
But for most, that’s not enough. That’s why Fiverr also allows you to download Favicons, Social Media Kits, SVG files, Zoom Backgrounds, and a roadmap to using your logo.
The essential package costs $30. That gets you an instant download with PNG files.
But if you need SVGs, revisions, social media kits, and more, pick either the Professional plan for $60 or the Unlimited plan for about $90.
I liked the Fiverr AI logo generator because:
It’s fast: Logos are created in seconds.
It’s free to try: You can play with it for free until you find the perfect logo for your business.
It’s not too expensive: This service is way faster and way more affordable than hiring a professional logo designer. This is crucial for smaller businesses.
Quality: The designs are surprisingly polished and professional-looking.
However, there were a couple of things that could be done better, too. For instance:
The logos aren’t too unique: Since the AI uses existing design elements, some logos might look similar to others. Technically, some people might not call this an AI logo generator because it just combines existing logos.
There’s a lack of advanced edits: For more intricate design needs, you might hit some limitations because this tool allows for basic edits only.
If you need a quick, budget-friendly logo that still looks professional, Fiverr’s AI Logo Maker is a solid choice.
However, if you want something more unique and customizable, you should continue watching.
If you’re looking to build a logo with a complete brand identity without hiring a designer, Looka is the AI logo generator you should choose.
Let me show you how it works.
First, you need to head over to the AI logo maker page.
Enter your company name.
Pick your industry.
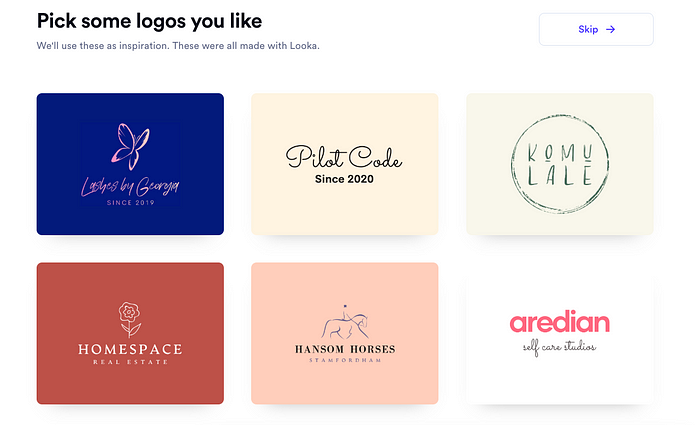
Pick logo styles that you like.
Choose colors that you prefer. As you can see, there are way more options than on the Fiverr AI logo generator already.
Then, add your company name and slogan.
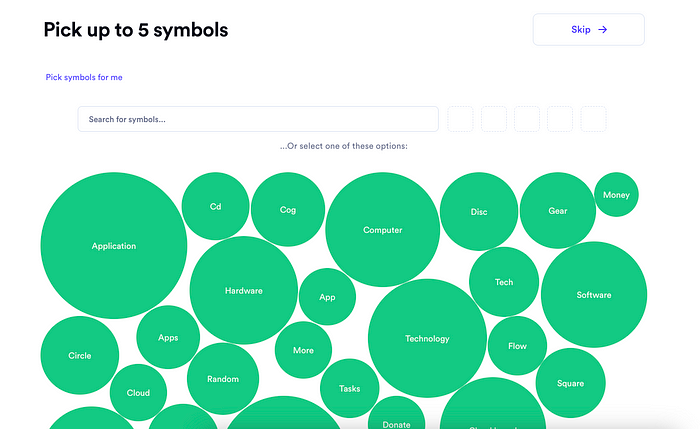
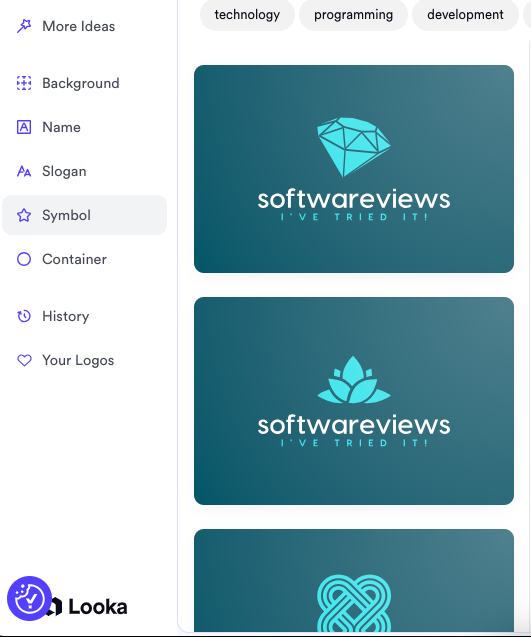
Pick the symbols you want in your logo.
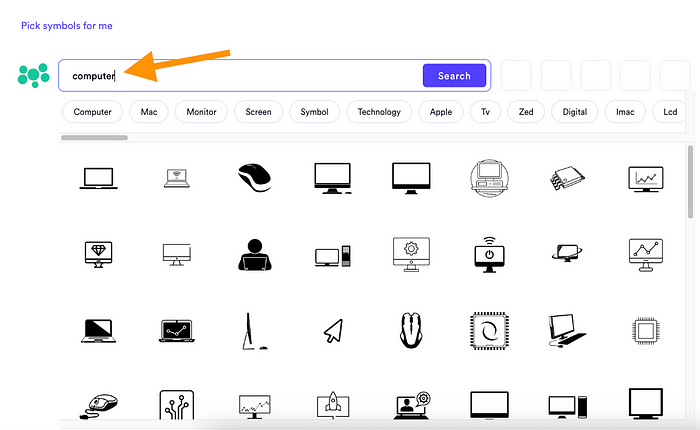
I picked a computer. As I did this, it allowed me to choose different computer elements from a list.
After this step, you will see your AI-generated logos for the first time.
Pick the one that meets your eye and hit “Customize”.
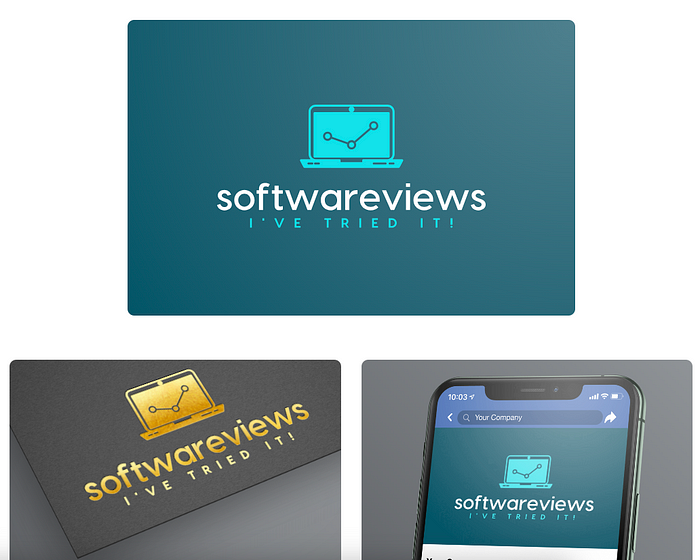
It first shows you what the logo looks like right now. It also shows you what it would look like on a social media post, e-signature, and more.
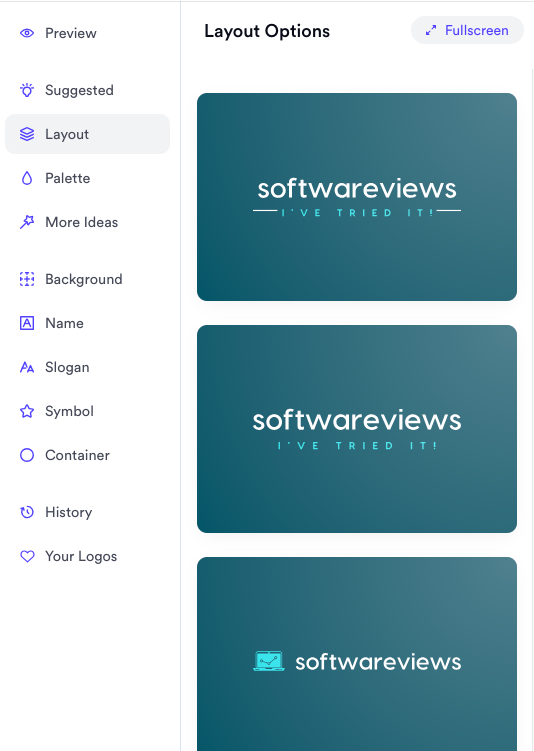
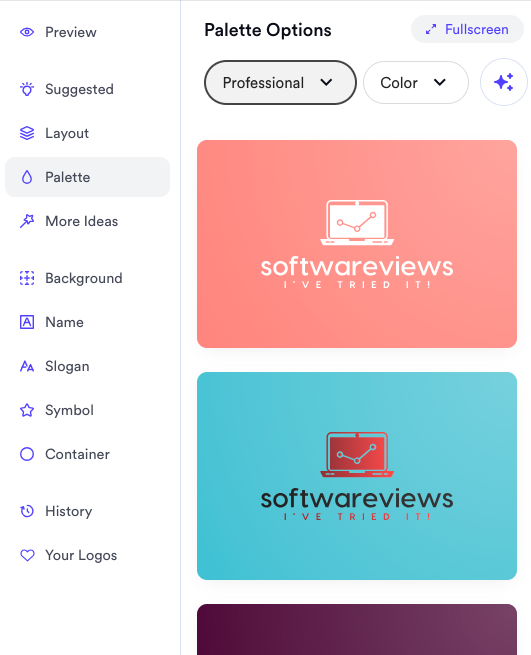
In this section, you can customize your layout, palette, backgrounds, symbols, and much more. It gives you more controls than the Fiverr AI logo maker did.
Then, obviously, you can do more than just select colors and fonts.
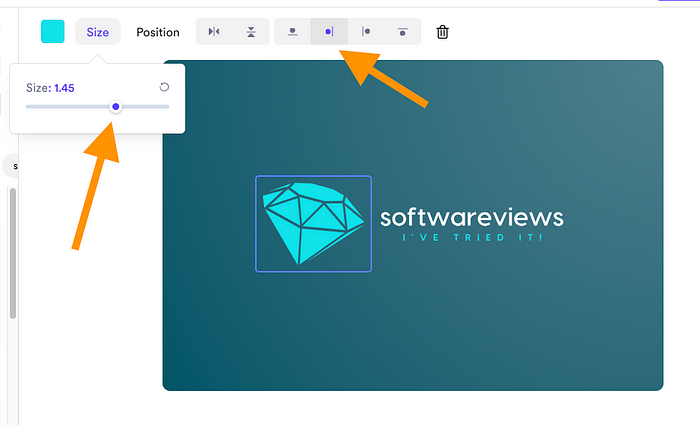
For example, by clicking the symbol, you can resize and realign it.
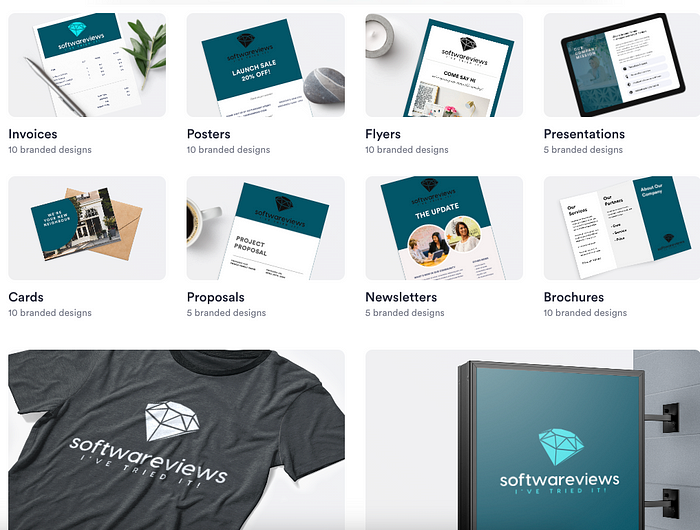
On top of these customizations, Looka doesn’t just create your logo with AI. It creates for you a Brand Essentials kit that includes everything you might ever imagine.
This kit has the logo files, social profiles, covers, business cards, letterheads, and more.
Once again, this is much more than what Fiverr AI logo maker offers. Heck, you can even get printables, such as logos on a t-shirt.
Thus far, everything I did was free. You can create unlimited logos and brand kits for free on Looka.
However, to use them, you’ll need to pay for the service. First, hit download.
Then you’ll see the pricing options.
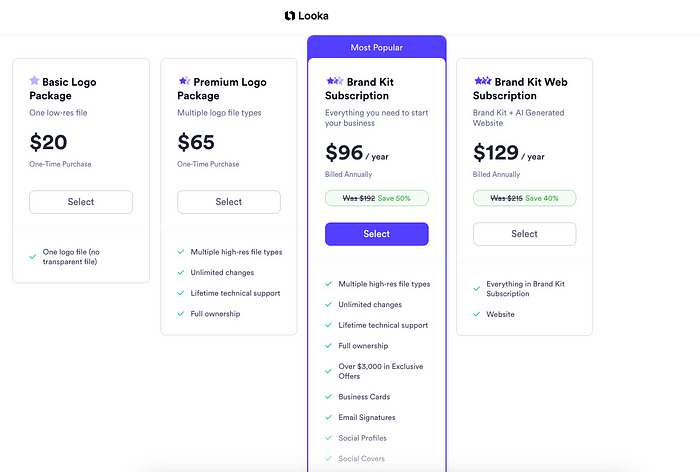
The one-logo package costs just $20. If you want unlimited customizations, support, and full ownership, you need the $65 plan, which is already more expensive than on Fiverr.
But then, here’s where it gets expensive. If you want to have those brand kits, such as business cards, social profiles, and more, you have to pick a recurring plan of either $96 or $129 per year. This can easily cost thousands in the long run.
If you’re not a relatively big company, I wouldn’t recommend this. As a small firm, it’s enough to have a logo in multiple formats and a round or two of edits.
To put it short, I liked Looka’s:
Comprehensive Branding: They offer a brand kit with business cards, social media templates, and more.
Variability in Options: There are more symbols, logo styles, brand kit options, and more than in any other AI logo maker I’ve tested.
User-Friendly Interface: The platform is very easy and intuitive, making the design process straightforward.
High-Quality Files: You get access to various file formats, including SVG, PNG, and PDF.
However, I think Looka isn’t perfect. Here are some problems I found:
Limited Post-Purchase Edits: Once you download your logo, making further edits is not possible unless you have a more expensive plan.
Recurring Payment: $96 might not sound like a lot, but once you notice it’s a recurring yearly payment, it can easily be just as pricey as hiring a real designer in the long run.
Generic Designs: Some logos felt a bit templated, lacking a unique flair, despite having a lot of elements to choose from.
I’d prefer Fiverr over Looka for most. Fiverr logos are always a one-time fee with all the brand kits and such.
However, at some point, Fiverr’s service might be too basic. There are too few logo styles, symbols, customization options, and the brand kits are also somewhat limited.
It’s technically not a full-on AI logo maker, but rather a traditional logo design tool with AI superpowers.
This is the easiest, most customizable, and most affordable AI logo maker on the list.
For example, I have a bunch of websites that are very small one-person businesses. In my use, the logo doesn’t matter, but it’s still good to have one.
That’s why I use Canva to create a logo for my sites. It usually takes less than 5 minutes, even without any design background.
Let me show you how it works and what kinds of things you can do with it.
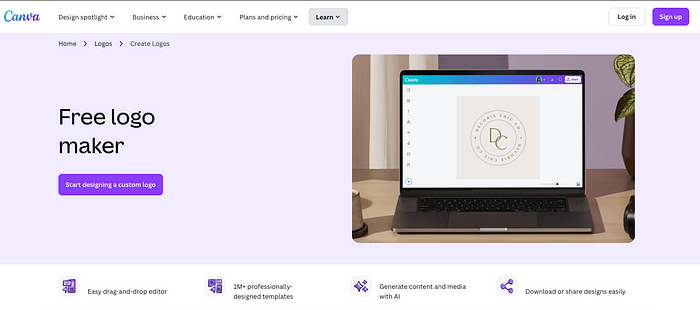
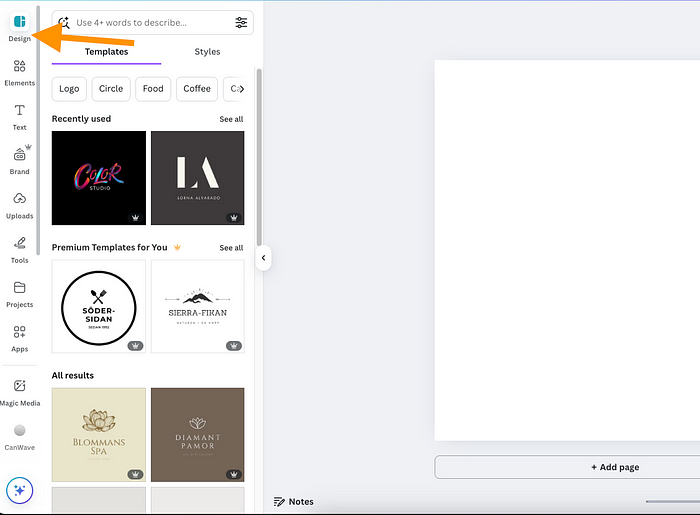
To use the Canva AI logo maker, first, head over to the Canva Logo Maker page.
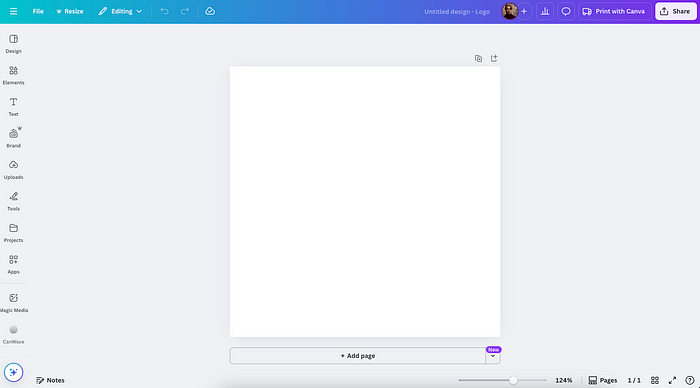
Click “Start designing a custom logo”. This opens up the Canva AI-based logo editor.
Pick from the designs in the list.
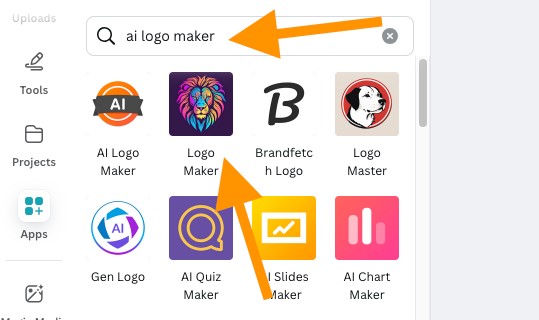
You can also create a logo with one of the AI logo maker apps in Canva.
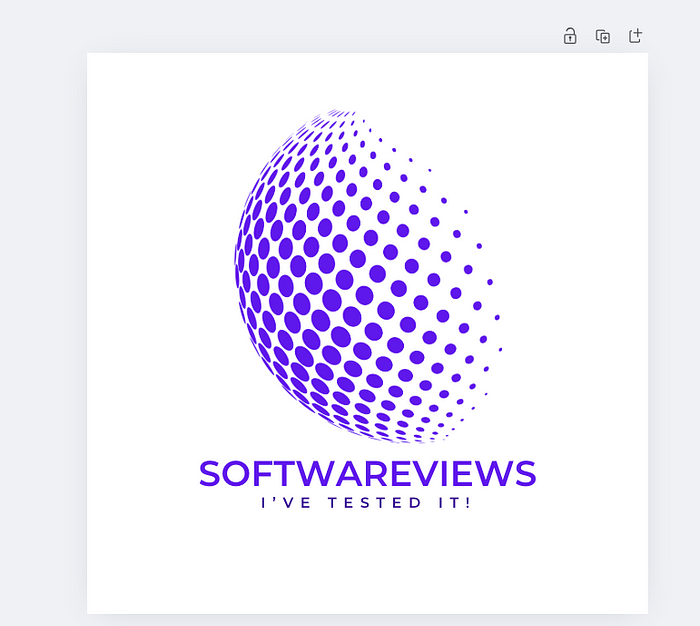
Once your logo is created, you can customize it fully. This is unlike Fiverr and Looka, since it lets you drag the elements anywhere and do literally anything in the editor. Canva is not a logo maker, but a full-on design and illustration platform instead!
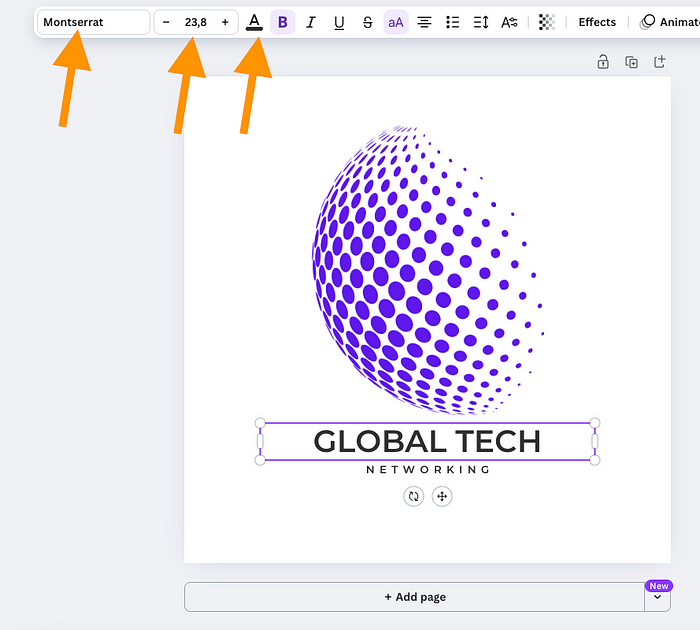
For example, you can change the color of your element.
You can tweak the fonts.
You can change the text.
If you want to find a better color scheme, you can use Canva’s AI features.
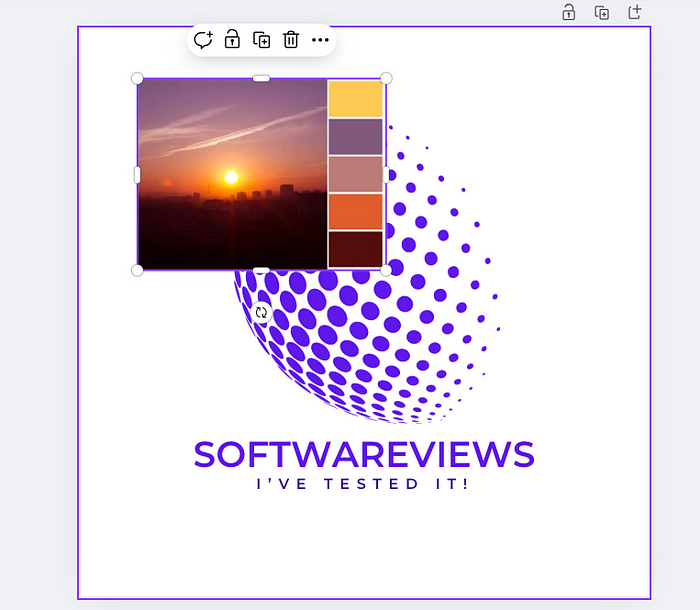
For example, you can drag and drop any image into the view. I’ve dragged a photo that represents a color palette.
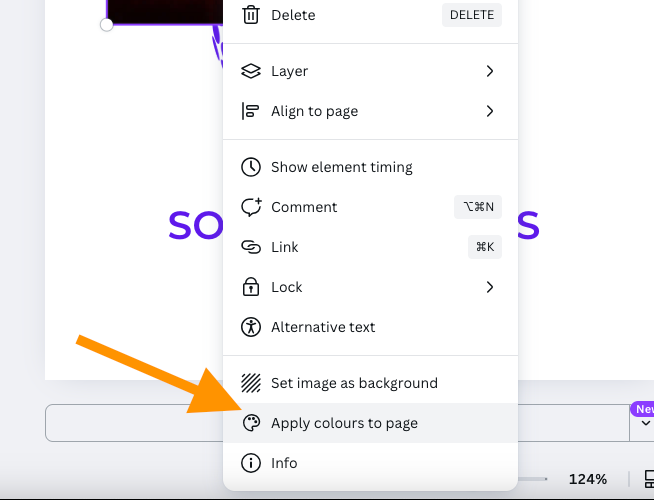
Then right-click on the image and choose “Apply colours to page”.
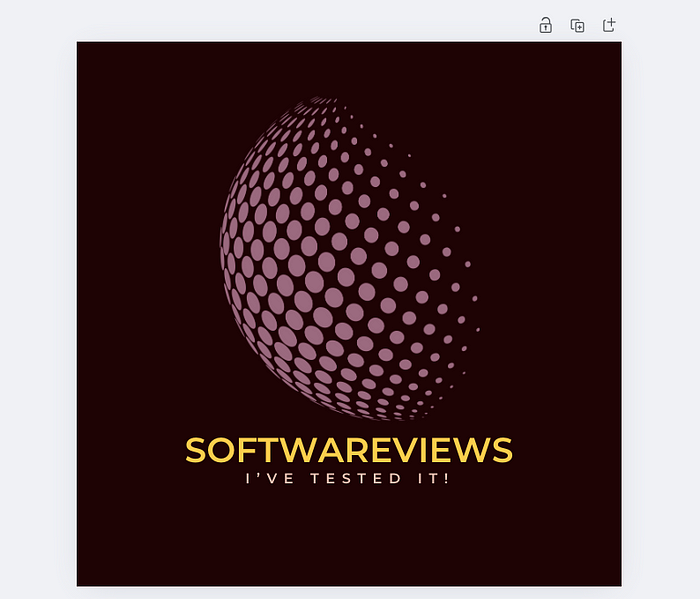
It then applies the colors from that sample image to your logo design.
You can do this as many times as you want and you will always get a different output.
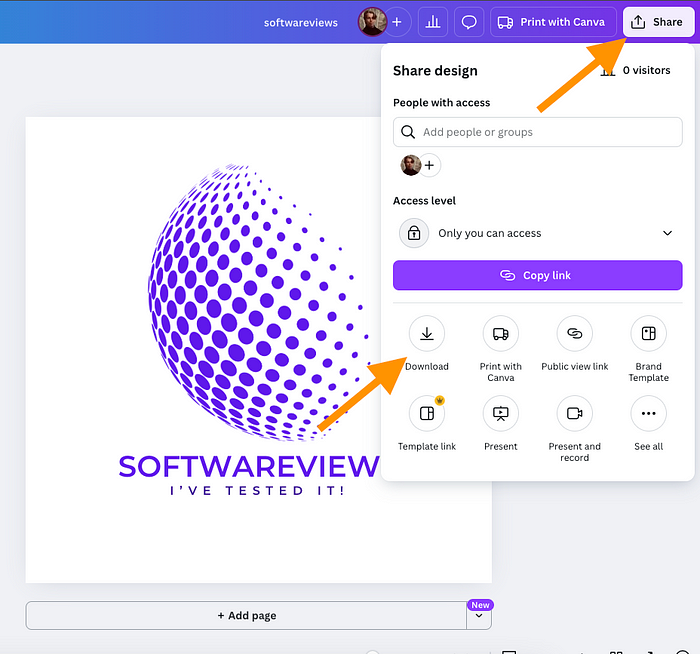
Then, at any time, you can download the logo.
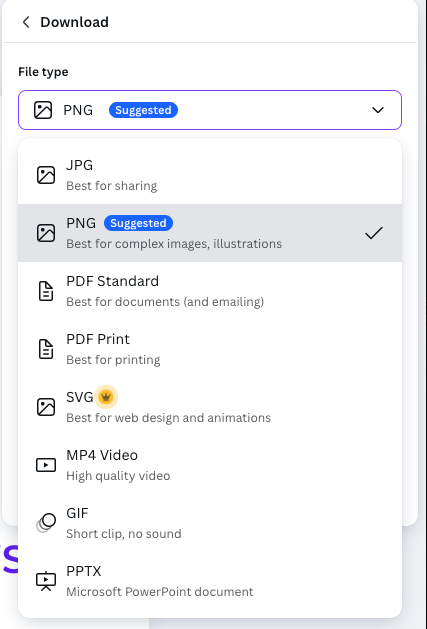
You can download it as PNG or SVG (and other formats).
If you used free assets in your logo, the logo is 100% free for you.
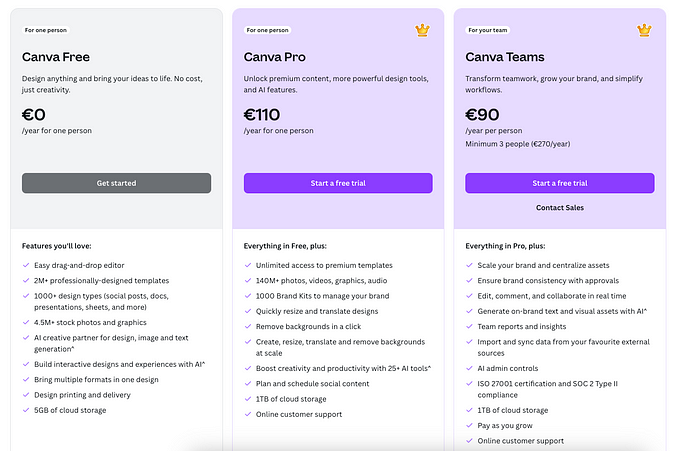
If you used a Pro design or elements, then you have to upgrade to Canva Premium, which costs $110 a year.
The fun doesn’t end there, though! Once you’ve downloaded your logo, you can upload it back to Canva as an image for AI mockups.
This lets you test the logo on a t-shirt, wallpaper, business card, and more.
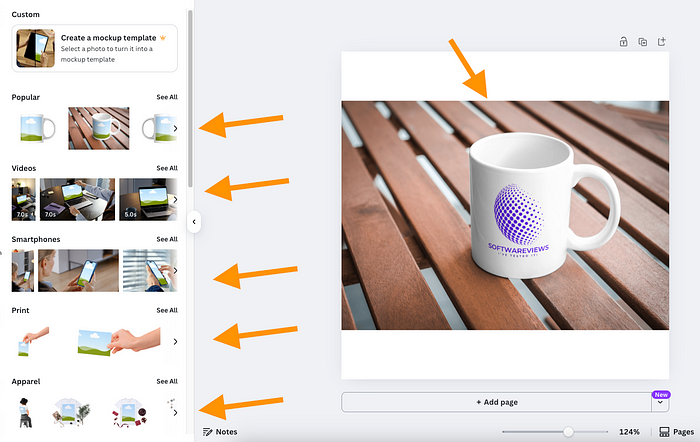
To do this, open up Canva again, click “Apps”, type in “Mockups”, and choose the “Mockups” app.
Then pick a mockup template, such as a coffee mug from the left. Then drop your logo on top of the mockup. It takes a couple of seconds for the AI to render the mockup.
Isn’t that awesome?
With the help of AI, templates, and an easy-to-use interface, you can create professional logos in no time without design skills.
Just keep in mind that the Canva Pro plan costs $110 a year.
You can get decent logos for free, though.
However, some AI features and templates only belong to the paid plan. In that case, you might want to subscribe to a monthly paid plan for a month, for example. It’s going to be a lot cheaper than $110. Just remember to cancel it once you don’t need it.
In my eyes, the Canva Pro AI logo generator is best if you’re already using Canva to begin with. However, the free version is more than enough if you have a small business that just needs a logo as a formality.
This is what I liked about Canva:
Ease of Use: The intuitive interface makes it accessible even without design experience.
Template Variety: A huge library of templates provides a good starting point for various industries.
AI Features: There are AI features and apps, such as mockups, color schemes, background removers, etc., that can be useful in logo design.
Here’s what could be better, though:
Limited AI Features: The AI features are there to support you, but you still have to do most of the work. In that sense, it’s more of a logo design tool than an AI logo maker.
Pro Features: If you want to do more customizations and use more templates, you quickly have to upgrade to a paid plan.
Learning Curve: Because Canva is a proper design platform, it takes a while to learn how to use it.
That being said, Canva’s AI Logo Generator is excellent for brainstorming and creating quick, visually appealing logos.
I create my small website business logos from start to finish with it!
However, for a unique and fully ownable brand identity, you might need to invest more time or consider other tools or a professional to do the job.
Last but not least, we have the laziest option of them all. That is, of course, ChatGPT.
If you just want the most basic, generic, and less customizable logo out there, tell ChatGPT to create it for you.
Thanks to the latest OpenAI model updates, ChatGPT is getting better and better with text.
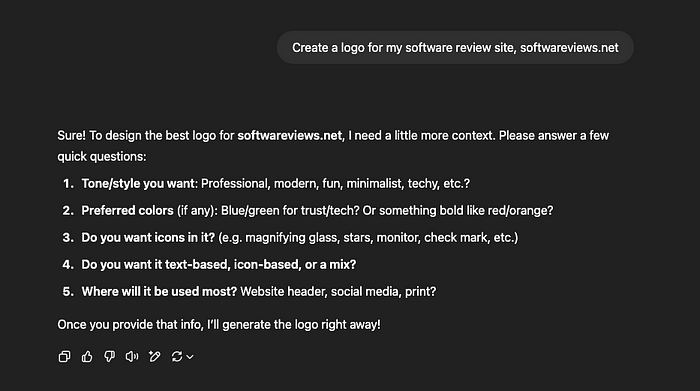
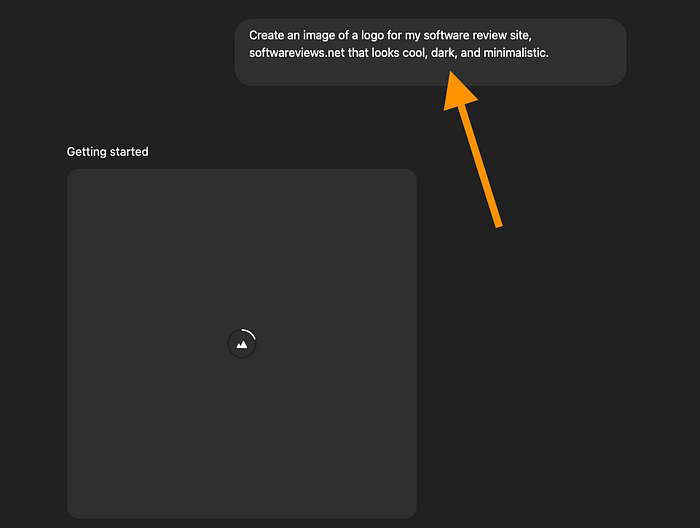
For example, here I’ve told ChatGPT to create a logo for my site, softwareviews.net:
ChatGPT was wise enough to ask me follow-up questions related to my logo. I answered those and then the AI started to create my logo.
Here’s the result I got:
I mean, it’s not that impressive, but also, it’s the first attempt.
Note that if you just have a website (like I do), this can already be enough. Just download the logo, and use it as the favicon, logo, and theme of your site.
However, I thought it would be too basic. I asked the AI to make it darker and more dramatic.
Here’s what I got back:
That’s decent!
But I wanted something else. So I told ChatGPT to create an entirely different-looking logo. I started a new chat so that it wouldn’t repeat the above style anymore.
Here’s the result:
Way better!
To make edits to the logos, the options are quite limited, though. So, if you use ChatGPT to create a logo, create an image or two, and use those as-is.
I like ChatGPT because it’s free and the easiest way to prototype logos. You can create logos for free, at least a couple of times a day.
Also, the AI is good with text these days. The ChatGPT logos look less and less like AI-generated images.
However, because the customizations are limited and uncontrollable, I wouldn’t use this if you need to make any tweaks to your designs.
Chatling lets you build AI chatbots easily with a drag-and-drop builder. You don’t need technical skills to use it.
I’ve tested it thoroughly and it works great for businesses of all sizes. It answers customer support questions based on your business data accurately.
Then create an account. (Sadly, this tool doesn’t let you create with a Google account.)
Once you’ve signed up and in, click “Create chatbot.”
Next, choose the option that best fits what you want to do.
For me, I wanted to create a simple AI chatbot for my website where I teach blogging.
Then give it a name. I named my chatbot Blog support bot:
Ignore the paid promotions you’ll see in the next view. They might be useful later, but they’re not needed right now since we’re focusing on creating a free AI chatbot.
To get started, open the chatbot builder:
Then you will see your chatbot’s main workflow, that is, what it will do once someone opens up a chat window.
You can move things around in this view as much as you like. I went with the default one that looks like this:
I think the default flow is good unless you have a very specific use case. It simply greets the user with a welcome message.
Just make sure you change the texts in the flow, though. To do that, click the text in the flow elements and type something.
I changed the welcome text to let the visitors know that they’re using my AI assistant for blogging.
Once you have changed the flow and texts in it, it’s time to tweak the AI configuration of your bot. This gives the AI a persona that’s on brand and in line with your information and style.
To do this, click on the ‘AI Configuration’ section on the left.
I restricted the AI to use my website as a resource for finding answers. That way I avoid creating made-up answers that make no sense.
But now there’s one problem. The AI doesn’t know you or your business information.
To change this, let’s add a knowledgebase for the AI to draw information from.
You can use a URL list, a document, a text file, and more as your knowledge source.
Yes, you got it right: The AI will read all the stuff you give it and then remember everything.
I want the AI to get its information from my website so I will add it as the knowledge base.
After I entered my site URL, it took about 2–3 minutes for the AI to read it through.
Then it listed my site URLs, that is, all the blog posts on my site.
After this, the bot is ready!
Click on the “Preview” to test your AI chatbot. This allows you to interact with your own bot before making it live.
For instance, I sent my Chatling AI bot a message that asks what’s realistic to earn as a blogger.
Here’s the conversation:
That answer is insane! That is exactly what it says on my website.
No generic, hype-filled answers like you get from other resources with false promises. It spoke exactly how I would, and even pointed me directly to the page or section of the knowledge base where it found the information.
When I clicked the links that the bot gave me for double-checking, I could also confirm that the answer was correct and in line with how I would say it on my site.
Once you’re happy with your Chatling chatbot, publish it with the “Publish” button on the top right corner.
Then embed it to your website or share a link for anyone to use it. This will save you a ton of time on customer support, lead generation, and more.
I’m really impressed with Chatling AI.
What I didn’t expect was how it listened to my input before responding to customers.
It even provided direct links to the sources where it found the information, showing that it truly ‘learns’ the knowledge base content.
User-Friendly: Just click a few buttons to set up your own custom ChatGPT-like AI bot for your site.
Accurate: The results are impressive — it’s highly accurate and provides answers that feel very much like mine. I have no issues believing that it will automate 80–90% of my support. It also points you to the knowledge base location where it found the information.
Global Reach: Supports over 85 languages to reach a wider audience. This is especially great since I originally thought these tools would only work in English (and honestly, not even that well just a couple of years ago).
In this post, I will show you my results and overall opinion on the tool.
Spoiler: I think Pikzels AI is epic. It’s the best thumbnail maker I’ve tested.
Grab a 50% discount with code JALLI50.
But now, let’s jump into the review.
Disclaimer: This post has affiliate links at no cost to you.
My Experience with Pikzels
I’ll also walk you through my experience with Pikzels and how it works, so you know what to expect.
Let’s start by creating a basic viral-style thumbnail. After that, I’ll show you how to add your own face, make custom adjustments, and refine it further.
Create Thumbnail
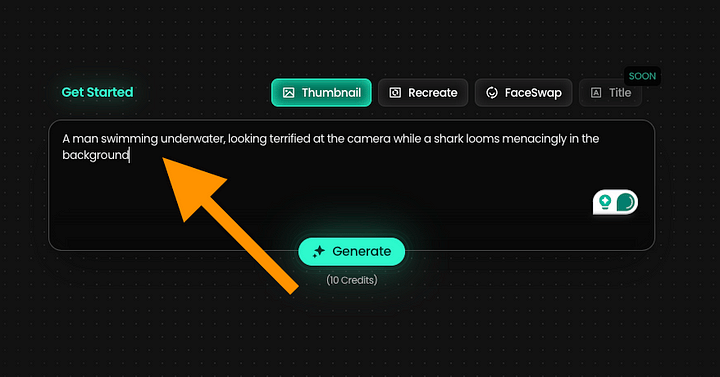
The workflow in Pikzels is straightforward—you simply describe what you want to create, and the AI generates it for you.
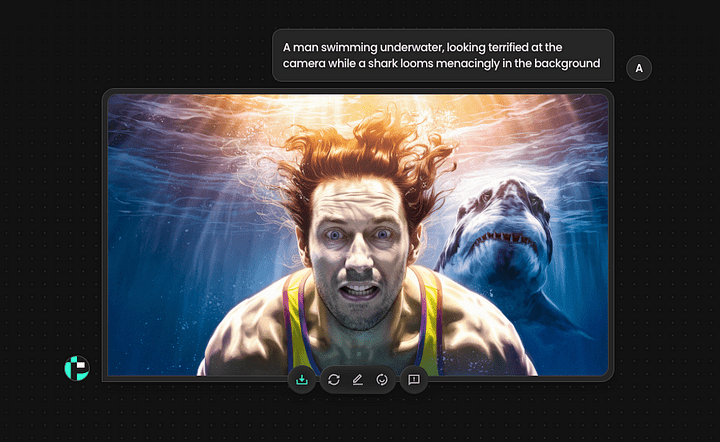
For example, you might enter a prompt like: “A man swimming underwater, looking terrified at the camera while a shark looms menacingly in the background.”
After that, the image typically generates in about 20 seconds.
After a second, you’ll see the first version of your thumbnail.
It’s impressive, though it’s worth noting that AI has been capable of generating images like this for nearly two years. Tools such as ChatGPT and others have offered similar functionality for a while.
That said, let’s take a look at what makes Pikzels stand out.
For each image, you’re given three main options:
Redo
Edit
Faceswap
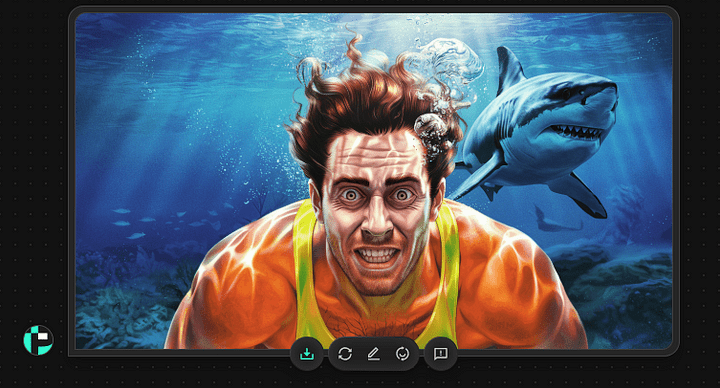
After using the Redo option once, here’s the updated version of the thumbnail I received:
Keep in mind that working with AI often involves some trial and error. It takes a bit of experimentation to understand what delivers the best results.
One helpful tip: keep your prompts simple. Avoid overloading the input with too many details at once.
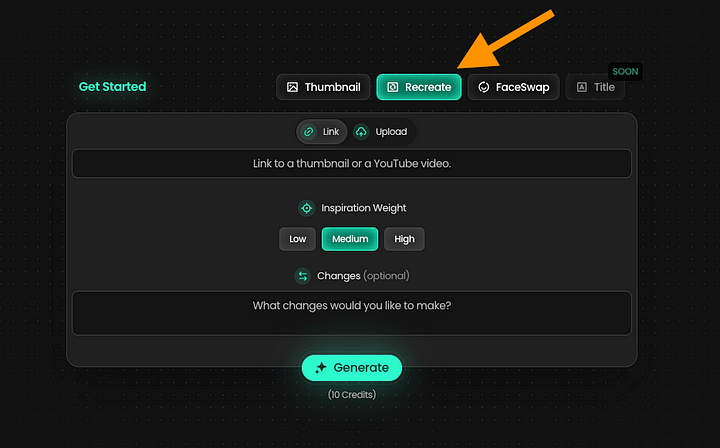
Now let’s explore the feature that really sets Pikzels apart as a thumbnail creation tool: the Recreate feature.
This allows you to take a thumbnail from a channel you admire and generate a similar version with just a few clicks.
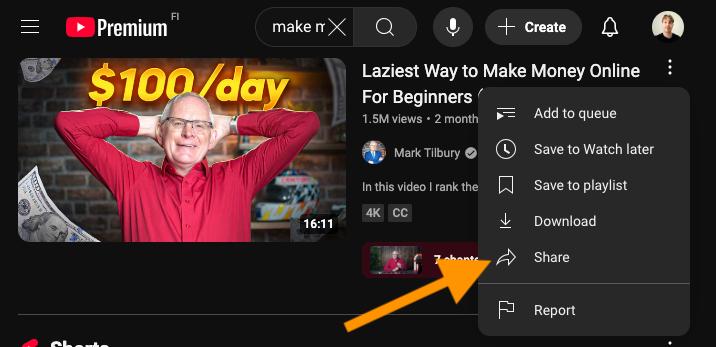
For example, here’s a thumbnail I found:
If you want to create a similar thumbnail for your own video, the process is simple.
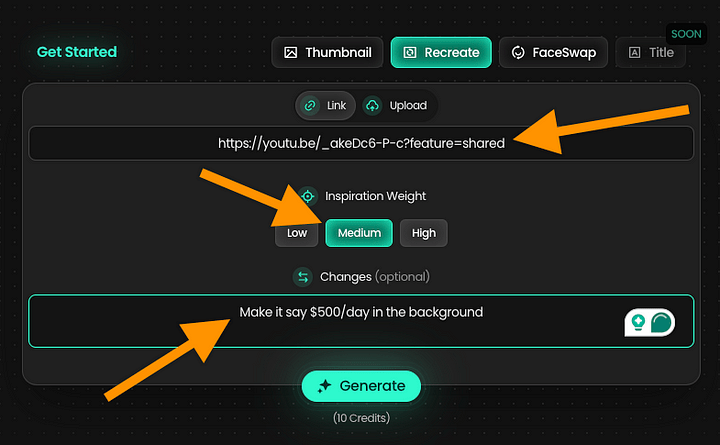
In the Pikzels app, just paste the link to the video you want to reference. The tool will handle the rest.
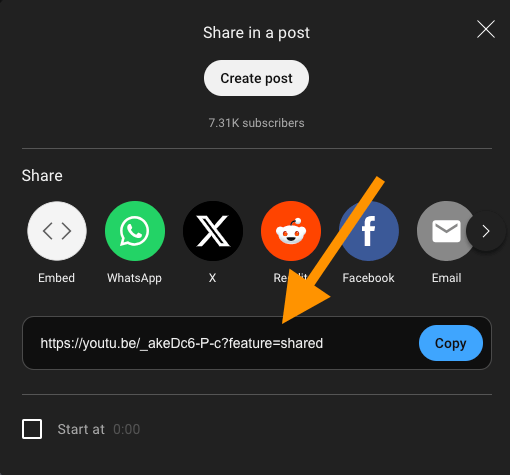
To get the shareable link on YouTube, click the three dots next to the video and select “Share.”
Copy the link to the clipboard.
Next, paste the link into Pikzels. You can also adjust the Inspiration Weight to control how closely the new thumbnail follows the original. Then, describe any changes you’d like the AI to make to the original design.
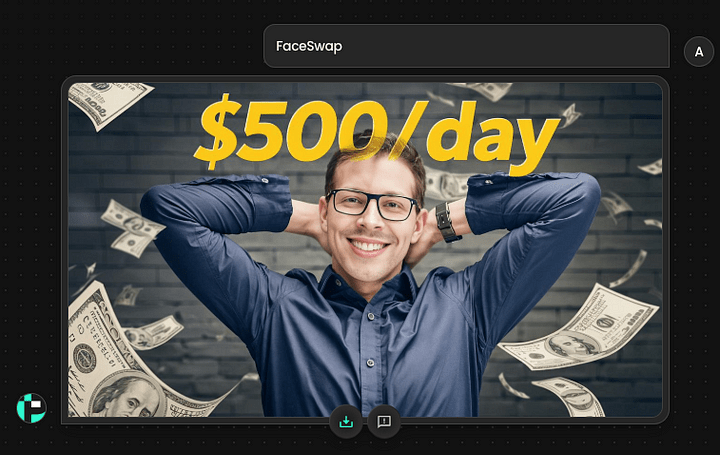
For example, I asked the AI to change the text from “$100/day” to “$500/day.”
Here’s the result it generated:
Not bad—it captures the same overall vibe and style as the original. Here’s a side-by-side comparison:
Keep in mind that these thumbnails are fully customizable.
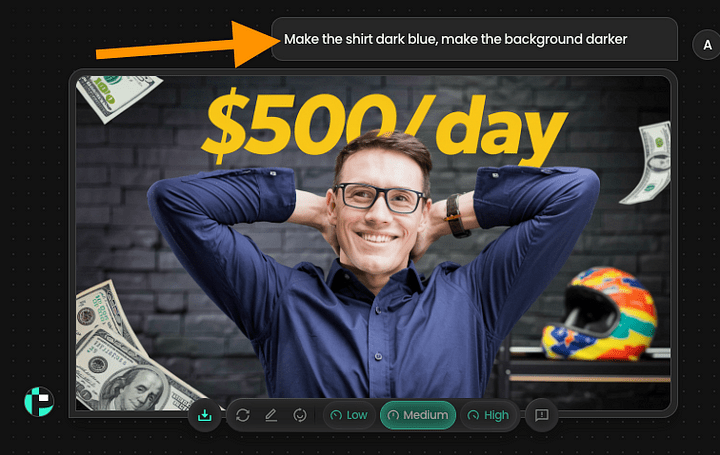
For example, here’s what I got when I asked the AI to darken the background and change the shirt color to blue:
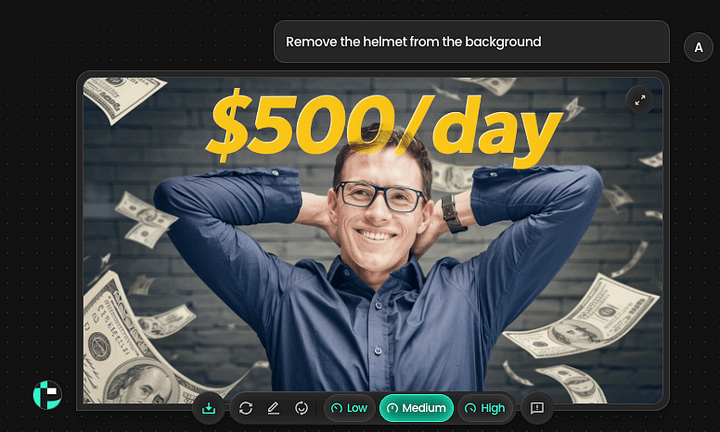
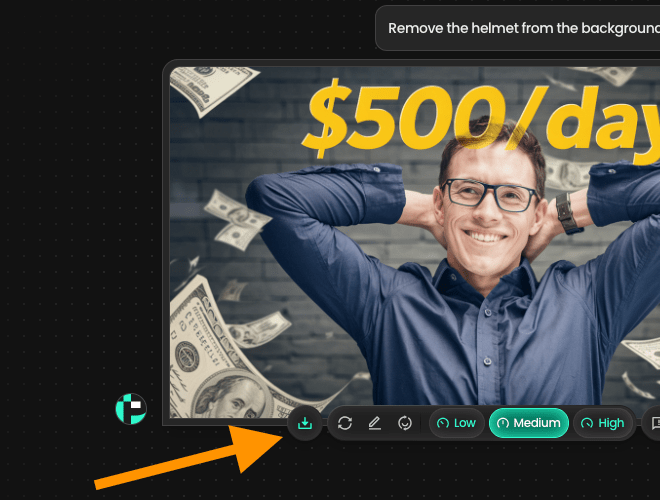
I also asked the AI to remove the helmet. Here’s the updated version it generated:
Just like that—the helmet is gone.
One thing to keep in mind: when you make edits, the AI might unintentionally alter other parts of the image. This is a common limitation, as AI still has trouble maintaining full consistency in visual elements.
That said, I think this version works well now.
There’s still one major issue—the thumbnail doesn’t resemble me at all.
It features a completely random, AI-generated person.
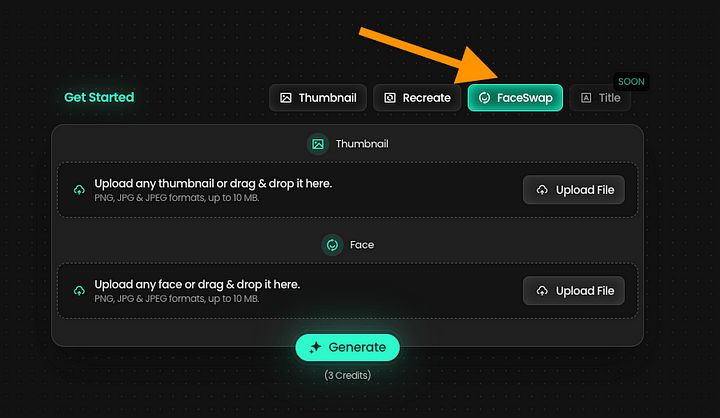
The good news is that Pikzels includes a Face Swap feature, which lets you insert your own face directly into the thumbnail.
The Face Swap
To use the AI face swap feature, click on the FaceSwap feature.
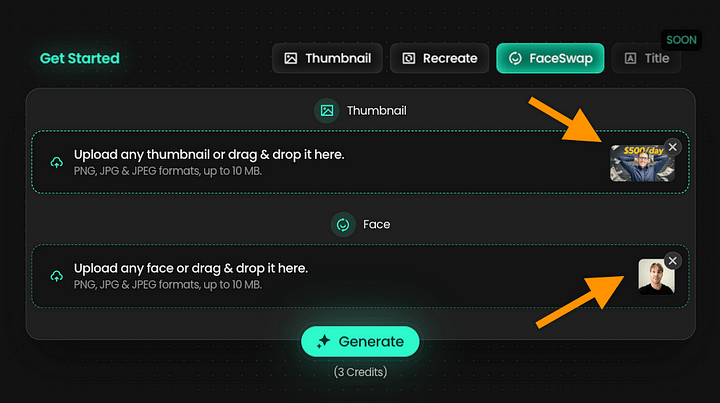
Upload the thumbnail and your picture to the view.
Then generate and wait for 20 seconds.
Here’s the image I used:
Finally, I asked the AI to remove the glasses, since I don’t wear them. After a few quick adjustments and re-generations, here’s the final version of my thumbnail:
Obviously, that’s not perfect. But it’s still close to what I look like. Perhaps a bit too young, but otherwise, really impressive.
Tip: One step at a time!
When creating or editing thumbnails in Pikzels, it’s best to take a step-by-step approach. Start with simple instructions to generate the initial image, then make edits gradually—one or two changes at a time.
Here’s the exact workflow I used to create the thumbnails shown above:
Recreate
Edit: “Darker background”
Generate
Edit: “Remove glasses”
Generate
Edit: “Remove background helmet”
Generate
Edit: “Change background color”
This helps prevent the AI from becoming overwhelmed and producing inconsistent results.
Taking it one step at a time is the key to creating high-quality thumbnails with AI.
User-friendly: Just describe what you want, and the AI generates a thumbnail to match.
High-quality output: Among the tools I’ve tested, Pikzels consistently delivered the best results.
Face swap feature: Thumbnails initially feature random faces, but Pikzels lets you realistically replace them with your own.
Inspiration tool: A standout feature that allows you to replicate the style of an existing thumbnail—great for consistency and creativity.
Cons
Limited free trial: The trial version allows for just five thumbnails, all with a large watermark—making it essentially unusable.
Inconsistent results: You may need to spend multiple credits to refine or fix outputs, which can feel wasteful.
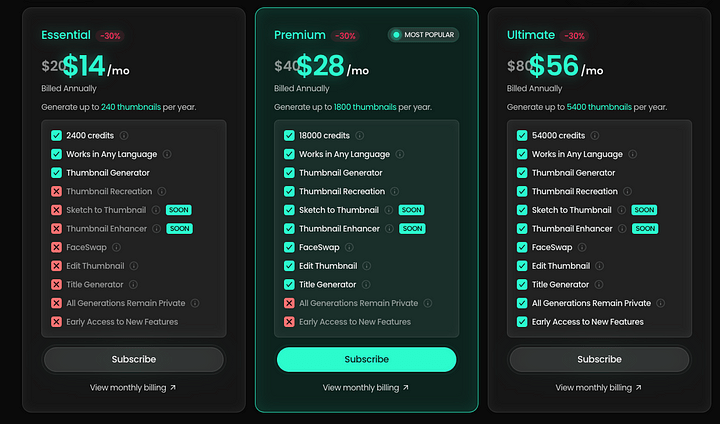
Pricing: At $80/month for 300 thumbnails, it’s costly—especially considering it often takes 20–30 iterations to get one solid thumbnail.
Market saturation risk: As more creators use tools like this, the novelty and impact of AI-generated thumbnails could decline. Overuse may lead to a generic, less engaging aesthetic.
My Honest Take
If you’re just starting out with thumbnail creation, Pikzels is worth trying. It can save time, streamline the process, and help spark creative ideas.
That said, there’s a downside. As AI-generated thumbnails become more common, their effectiveness may fade. What once stood out can start to feel generic and overdone.
Right now, though, tools like Pikzels are still new enough that they haven’t saturated the space. There’s still room to stand out—if you use them well.
Stay informed about evolving trends. Recently, YouTube seems to be favoring more minimal, cleaner visuals with fewer edits. Thumbnails are following suit—simpler designs that align with the content are gaining traction.
Balance automation with originality, and you’ll stay ahead of the curve.
I recently came across a new SEO tool called Semdash, so I decided to test it out.
In this post, I’ll share my experience, the results I got, and my honest thoughts on how it performs.
I’ll also compare it with my preferred SEO tool, Semrush (yes, the names are quite similar).
Let’s get started.
Disclaimer: This post has affiliate links at no cost to you.
What Is Semdash?
Semdash is a similar tool to Semrush and other SEO tools that you’ve probably heard of before. If you look at the UI, it looks exactly the same but with different colors and branding.
Semdash provides insights into competitor traffic, topic competitiveness, keyword opportunities, and more.
But let’s see how it performs and if it’s worth it.
My Experience with Semdash
I tested my website, nodesk.fi, using Semdash’s domain analyzer.
I simply entered the domain, selected the location and language—that part was straightforward.
Now, let’s take a look at the data Semdash provided and see how it compares to other tools and real-world results.
1. Traffic Distribution
Semdash provided the traffic distribution for nodesk.fi, indicating that most visitors are from Finland, with a small percentage coming from Sweden.
Promising! This is indeed the case. The traffic is mostly from Finland and Sweden.
2. Organic Traffic Distribution
Semdash also gave me an organic position distributio chart that looks like this:
Based on this report, it says that the domain ranks outside of the top 5, mainly in the second and third search results page on Google.
That is true based on what we’ve seen in the actual data on our site.
3. Organic Keyword Distribution
Semdash creates organic keyword distribution charts too. Here’s one for our site, nodesk.fi:
This metric is similar to the previous one but focuses on the number of keywords ranking in specific positions in the SERPs. Based on our actual data, the results were fairly accurate.
If you’re analyzing competitor sites, this kind of insight can be quite valuable.
4. Traffic Analysis
Now we get to the more interesting part—the traffic and keyword metrics.
Here’s what Semdash estimates for nodesk.fi:
It suggests we have 17,000 visitors monthly. However, in reality, the number is just 1/3th of that.
The estimate is quite far off—but to be fair, traffic prediction is notoriously difficult. Even Semrush didn’t get it right.
5. Top Keywords Report
To help with competitive analysis, Semdash also shows the keywords the target site is ranking for.
Each keyword comes with associated data such as search intent (e.g., commercial), traffic volume, keyword difficulty (KD), cost per click (CPC), and more.
These metrics are useful for evaluating potential niches. For example, a keyword with high CPC and volume but low KD can indicate a valuable, low-competition opportunity.
Semdash also provides a top pages report for the site, offering further insights.
This is close but still wrong. The real top pages are here:
(I won’t share the actual traffic numbers for individual pages, but I can say that the estimates from Semdash were noticeably off.)
Other leading SEO tools, like Semrush, tend to provide more accurate figures in this area.
6. Link Analysis
Semdash lets you analyze your competitors’ links too. This is what all good SEO tools let you do.
Semdash also shows the number of referring domains, backlinks, and both new and lost links and domains.
This information is helpful for understanding how competitive a niche might be. For example, if a site has 100,000 high-quality backlinks and ranks in the top 10 on Google, targeting the same topics could be challenging. Competing would likely require building a similar backlink profile—a process that can take years of consistent effort.
7. Competitiveness Analysis
You can also use the competitiveness analysis feature to see how your site is positioned within the broader competitive landscape.
However, for our site, nodesk.fi, the competitiveness report was quite inaccurate.
Our site focuses on electricity-related content, but Semdash identified major newspapers as competitors—which doesn’t really align with our niche. While there may be some overlap in topics, those sites cover a wide range of subjects. Their reported keyword and traffic numbers (e.g., 15 million keywords and 500,000 visits) are inflated in this context and not a meaningful comparison.
8. Keyword Overview
Next, I explored Semdash’s keyword overview feature.
This tool allows you to enter a keyword—like “AI”—and view data on its competitiveness, search volume, and related keywords. It’s useful for identifying low-competition topics to target on your site.
I ran a search for “AI Tools” and received the following report:
The tool gave “AI Tools” a competitiveness score of 59 out of 100.
While that’s useful, it’s worth noting that most other SEO platforms offer similar data. For comparison, Semrush rates the same keyword as nearly 100% competitive—a significantly higher estimate than Semdash’s.
So essentially:
Semdash suggests it’s a topic worth targeting.
Semrush indicates it’s highly competitive and likely not worth pursuing.
Based on my own experience—having worked in this space for nearly three years—I’d agree with Semrush. “AI Tools” is a highly competitive topic, and targeting it would be challenging without a strong foundation.
Overall, Semdash feels like a simplified, less accurate version of Semrush.
Personally, I’d still choose Semrush over Semdash. For example, the related keyword suggestions were limited, and the competitiveness scores didn’t align with real-world data—both of which are critical features in an SEO tool.
While Semdash does cover the essentials, it falls short in terms of accuracy and advanced capabilities.
At this stage, I wouldn’t recommend using Semdash—even if it comes at a lower price point. You’re likely better off using free tools and your own research until you’re ready to invest in a more reliable option like Semrush.
That said, there’s clearly a lot of buzz around Semdash. I’ll revisit it in the future to see how it evolves.
BTW, you can use better tools like Semrush for free. I’ve arranged a free 14-day pro plan deal.
I help you dominate your competitors with powerful, AI SEO-driven content and YouTube videos that rank, attract organic traffic, and convert like crazy.
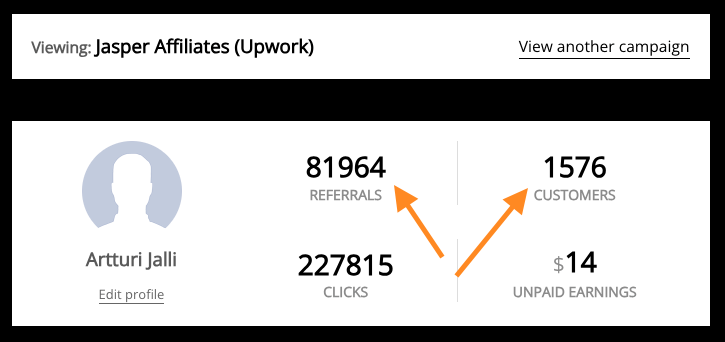
With 2M+ blog views, 70k+ monthly YouTube views, and millions generated for my partners, this strategy will fast-track your sales to success.
For Who Is This?
This is best for anyone looking to get organic leads, customers, and mentions in relevant industry-leading articles.
Most of my clients are startups looking for rapid growth. However, I’m happy to work with all kinds of SaaS businesses.
What’s Included?
To get more customers, you need leads, views, and content.
I do it all.
Here’s what I’ll create for you:
A Practical How-To Blog Post: A helpful showcasing of your product. Written with potential customers in mind—SEO-friendly and easy to read.
A Clear, Value-Focused How-To Video: Think of it as a demo that is engaging and created to inspire confidence in your product. Some of these go viral on YouTube!
An Honest Review Blog Post: Authentically written to highlight your strengths, address potential concerns, and build trust. This targets people who are in the “Yes or No” phase in the funnel.
A Straightforward Review Video: Designed to connect with real users and answer their questions while showcasing your product in action.
Mentions in Relevant, Niche Articles: Natural integrations into well-performing existing articles.
Proof?
Sounds good… but does it work?
Let me introduce one of my clients.
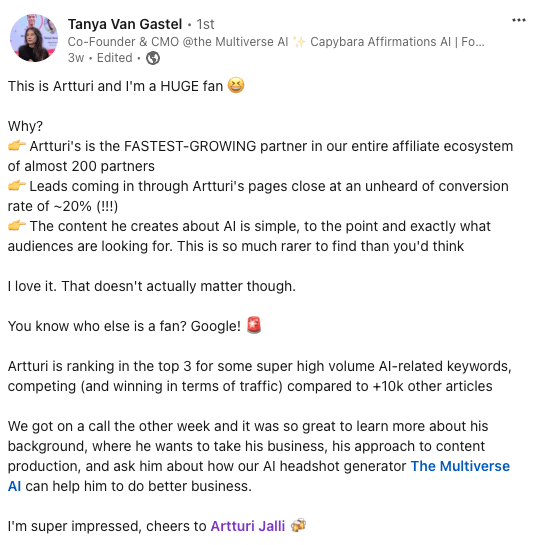
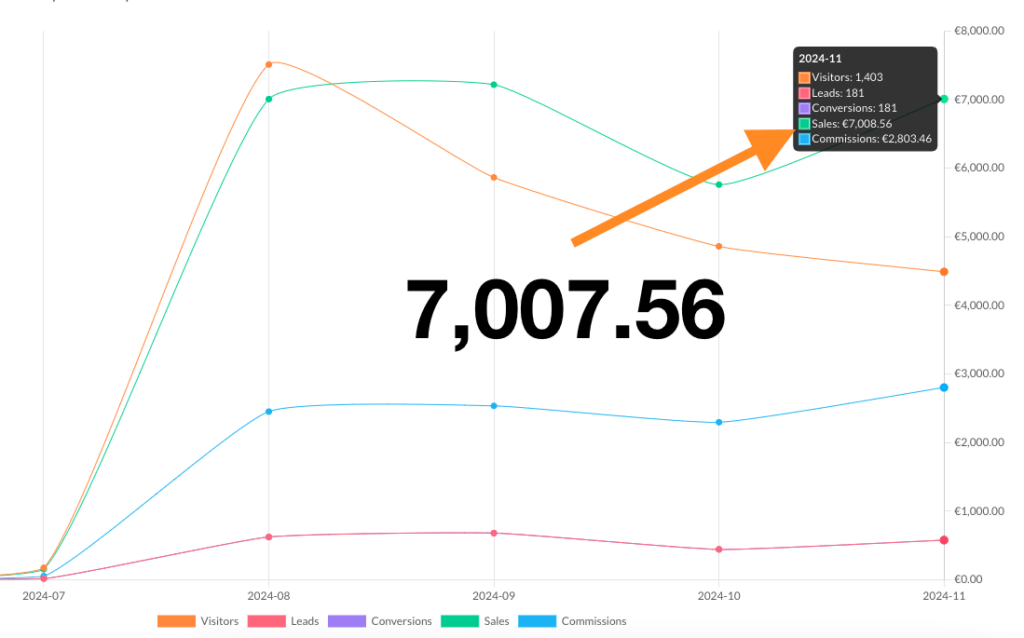
PortraitPal, is a new AI startup in the competitive AI headshot space. I put them through my Software Visibility Kit…
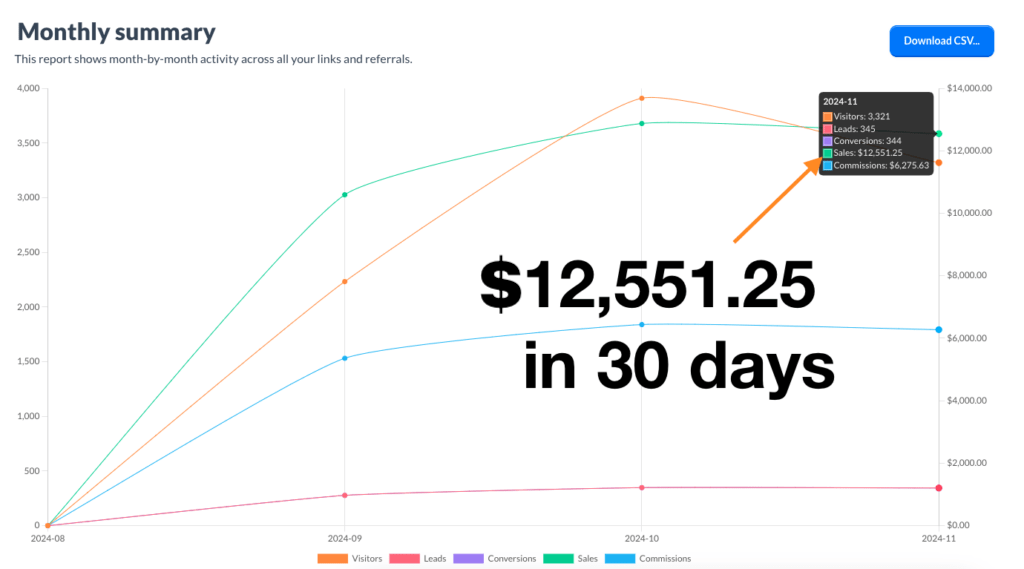
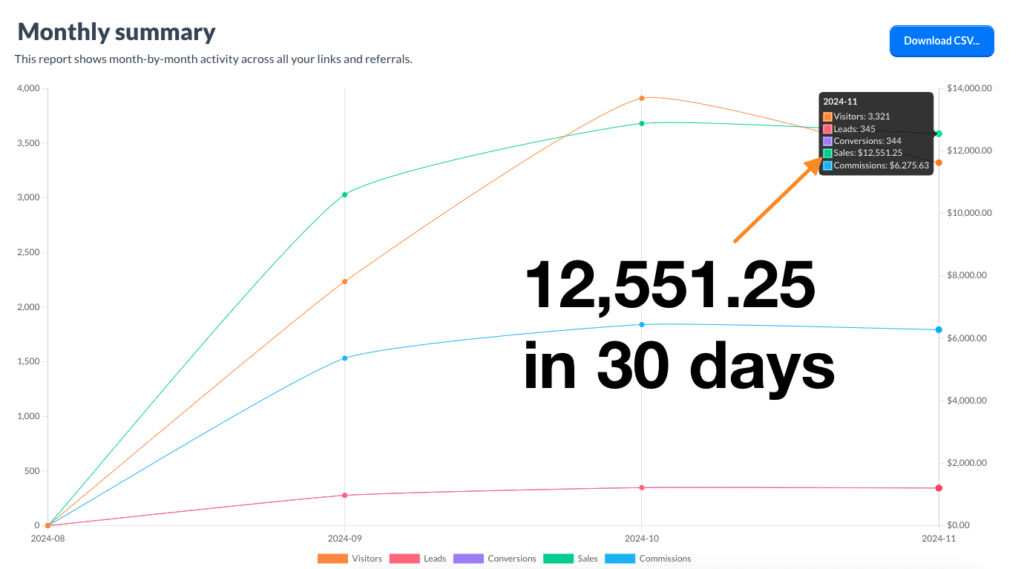
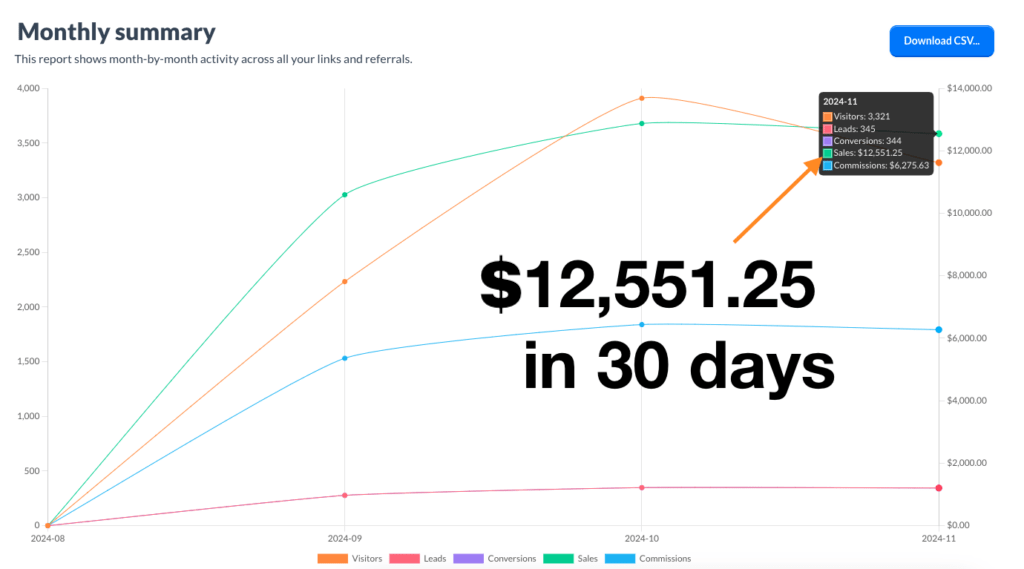
In less than 2 months, they’re making over $12,000/month from my content passively!
This is all thanks to a couple of YouTube videos and blog posts to over 20,000 followers. Yes, that’s just a couple of pieces of content all done in less than a week.
I target people who are close to buying—people who are looking for information with a credit card in their hands. This means people who do searches like “best AI tools” are just a click or two away from buying.
I don’t have a crazy huge audience. I just have the right one.
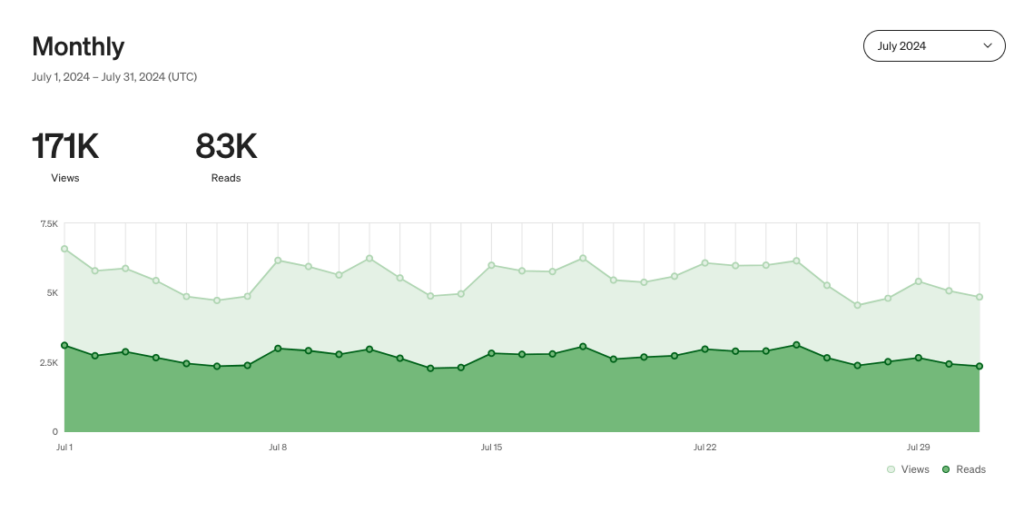
My blog content has over 2M+ total views and counting.
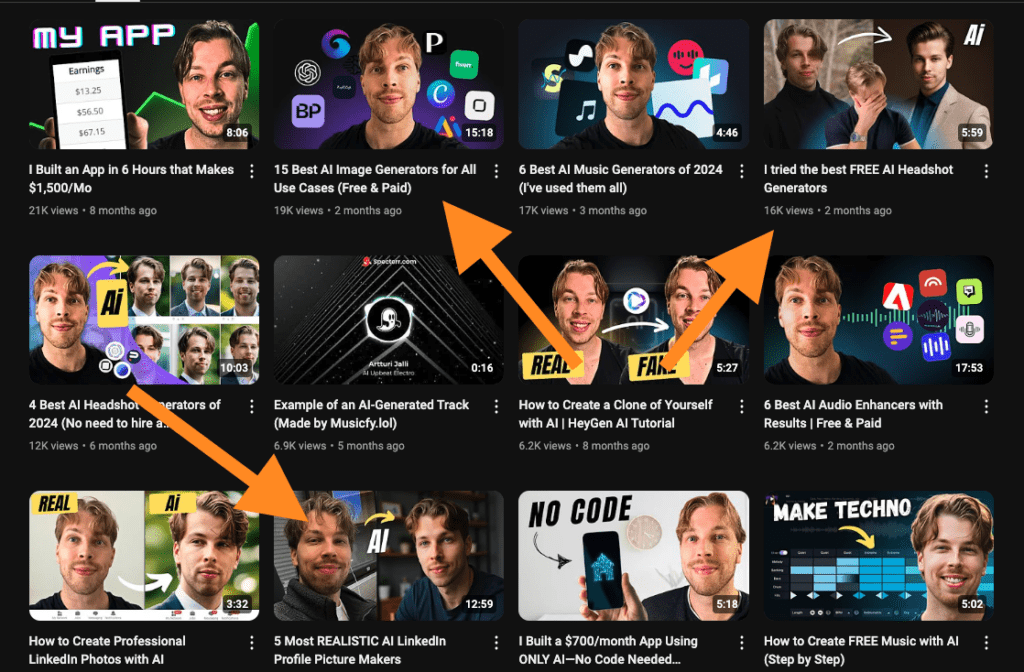
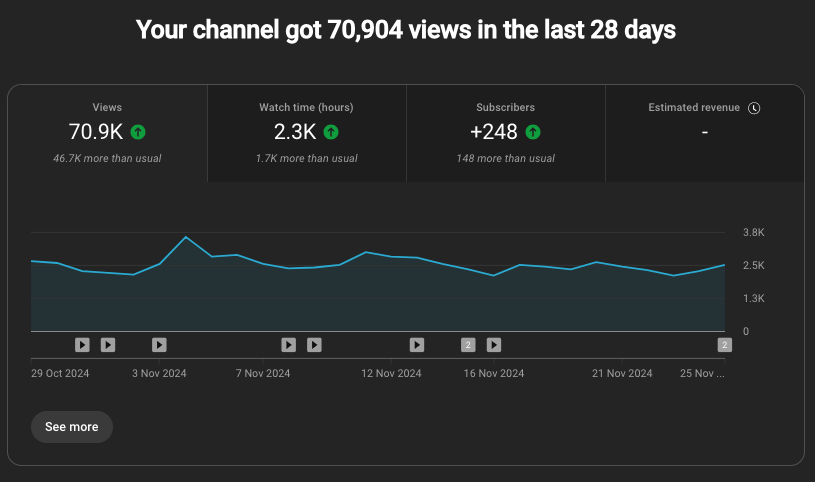
My YouTube channel gets 70k+ monthly organic video views.
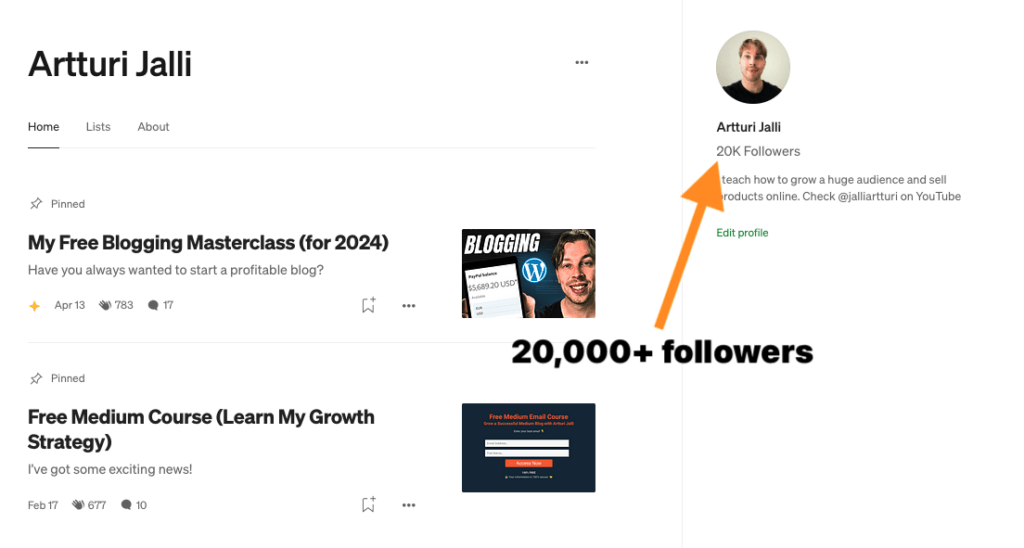
I also have 20k+ avid followers on Medium.com and have generated millions in revenue for my partners.
To put it short: I will create you content once, and it will bring in passive traffic and customers for years.
Start here
This isn’t a cookie-cutter approach. It’s tailored content designed to build trust and drive results.
Let’s discuss your goals and see if we’re a good fit.
👉 Contact me at artturi@softwareviews.net
Please start the email with “I’m interested in Software Growth Kit”.
Testimonials & Results
Let’s Do It!
Sounds good? Please, send me an email (or reply if you’re already in the loop).
But to be fair, the winner is also all about the use case.
For some, LearnWorlds could be a lot better than Thinkific.
If you’re just getting started, Thinkific is the way to go.
But if you have a team, then LearnWorlds might be better. That’s because there you can do all the marketing, community stuff, and more in a better way than on Thinkific.
Let me compare the two platforms a bit closer to give you a better idea.
Free Versions
Before I even try platforms like Thinkific or LearnWorlds, I ensure there are free trials.
I think it’s a signal of confidence and reliability if a platform offers either a free version or a free trial.
Thinkific
Thinkific has an entirely free plan.
It lets you create and publish courses without spending money.
This was great for testing my ideas before upgrading to a paid plan when I started my courses there.
LearnWorlds
LearnWorlds doesn’t have a free plan, but there is a complete 30-day free trial.
This way I could explore the features of the paid plans before deciding to buy.
So this is a win for both Thinkific and LearnWorlds!
Customer Support
I looked into support options because having reliable support is crucial for resolving any issues quickly and keeping everything running smoothly.
Thinkific
Thinkific provides support through a Help Center, community forums, and email.
In my experience, they are active supporters.
However, I sometimes find myself talking to a support bot for a bit too long to my liking before an actual human steps in. (Also, the human answers are usually from a template.)
That being said, I never really have to wait for my answers. That’s great because I have a lot of questions related to specific setups and features.
LearnWorlds
LearnWorlds offers support through email, a detailed knowledge base, and how-to articles.
I found the video tutorials and dedicated (human) support team especially helpful.
They provide 24/7 email support, and higher-tier plans include priority email support and personalized onboarding.
Once again, this is a win for both platforms!
(However, both could improve here a bit as well.)
Coaching/Webinars
Personalized webinars and coaching sessions can increase student engagement. Also, in some cases, they are crucial if you’re doing live teaching.
That’s why I wanted to see if these platforms offer solutions for live webinars and coaching.
Thinkific
Thinkific makes it easy to create 1-on-1 coaching through the platform.
Just create a new event in the products section:
To do this, you need to use the Thinkific Zoom integration. The same applies to live webinars and live teaching.
A course platform mobile app allows students (and instructors) to access courses on the go.
That’s why I wanted to see if there’s one for Thinkific and LearnWorlds.
Thinkific
Thinkific has a mobile app for you and your students to engage with the content on the go.
LearnWorlds
LearnWorlds also offers a branded mobile app option for schools. You can download this from the iOS App Store and Google Play Store.
AI Course Creator
Ok, I had to include this because it’s 2024. I’m of course talking about AI.
As much as I’m not a huge believer in creating content fully automatically with AI, I believe it can streamline some workflows at least.
Thinkific
Thinkific doesn’t use AI to create entire courses.
However, it has some basic AI features, for example, to create a course outline, course name, or ideas.
LearnWorlds
LearnWorlds lets you create an entire course with AI.
It just asks you a bunch of questions related to your course, audience, and goals, and then it renders a ready-made course.
But at least based on my experience, this is something that you need to edit heavily.
Email Sales Funnels
The number one way to sell a course is through email marketing.
You first collect newsletter subscribers and then warm them up with valuable content while subtly promoting your course.
This happens with email sequences that you automate. When someone joins your course, they will start a journey of for example 5 emails during the next 10 days.
There’s no reason to do it manually. That’s why I expect course platforms to offer services like this.
Thinkific
Thinkific doesn’t offer native tools for creating sales funnels, but it integrates well with tools like Mailchimp, ActiveCampaign, and ConvertKit nicely.
However, I’m surprised how big a hassle it still is.
Even though you can do marketing with Zapier and MailChimp integrations, I don’t think a modern course platform should ask you to join two other paid platforms to do basic email automation…
LearnWorlds
LearnWorlds has built-in features for email marketing and sales funnels.
You can use it with tools like Mailchimp and ActiveCampaign.
Then the platform’s automation and funnel-building capabilities make managing your marketing efforts much easier than on Thinkific.
For example, here’s a simple sales funnel I set up on my account:
With the marketing tools on LearnWorlds, you can track progress, customize emails, send times, and more without having to jump between platforms.
SEO Features
SEO or search engine optimization means that your course website or landing page appears on Google (and other search engine) results.
Although SEO is all about building a good landing page and content, there are some small things you can tweak to tick some extra boxes.
That’s why I decided to include the SEO features on the list as well.
Thinkific
Thinkific comes with basic SEO features.
It lets you customize URLs, meta tags, and descriptions for your course pages.
For example, thanks to this, I was able to make my course landing page look like this in Google search results:
You can also integrate your Thinkific account with Google Analytics to see the views and performance.
LearnWorlds
Very similar to Thinkific, LearnWorlds offers good basic SEO features and a Google Analytics 4 integration to see the landing page performance.
Both platforms nail the basics of SEO. And why do I keep on saying the “basics of SEO?”
Well, that’s because SEO is all about you providing value to your audience. There are no specific settings that would make you rank on top of Google.
If you create a landing page full of valuable, well-structured, and consistent content, that’s the definition of SEO.
Third-Party Addons
Both LearnWorlds and Thinkific offer third-party integrations, such as Google Analytics, MailChimp, ConvertKit, and more.
Also, on Thinkific, there’s a plugin store from where you can install extensions to your account to add a missing feature, for example.
Affiliate Programs
Affiliate marketing means that your students get a little kickback for recommending your course. If someone signs up after clicking their link, you will pay them a commission.
This is one of the best marketing strategies out there as it’s all performance-based. If your students don’t bring any customers, you’re not going to pay them. And if they do, you will give them a reward for each sale—automatically.
Affiliate marketing is such a powerful way to promote courses that I had to include it on the list. Before I had experience with both platforms, I was sure that both offer affiliate tools for course creators—and yes, I was right.
Thinkific
Thinkific includes an option for you to set up an affiliate program.
The Thinkific affiliate system which allows you to set up, manage, and track affiliate partnerships.
As I mentioned before, this allows your students (that is, affiliates) to promote your courses and earn commissions on sales.
This expands your course’s audience and reach automatically.
LearnWorlds
LearnWorlds offers built-in affiliate program capabilities across all its plans.
This lets you create and manage affiliate programs, track performance, and provide affiliates with the tools they need to promote your course.
I love the fact that the affiliate program is not a higher-tier plan thing but it belongs to all the plans.
Course Website Builder
This is a no-brainer. To sell a course, you need a website where your students sign up and find your courses, sales, checkout pages, and support.
Once you’ve created your course and built your community, dealing with all the integrations can be overwhelming. Creating a website from scratch on top of that is a daunting task, isn’t it?
That’s why the best online course platforms allow you to do this very easily.
Thinkific
Thinkific offers a built-in website builder that lets you create and customize your course website.
For example, here’s my Thinkific school page (with my two courses listed):
And here’s an example of one of my courses landing pages:
Obviously, no coding is needed. Just drag and drop elements to the view and that’s it! This makes it a smooth and quick process.
If you can’t find what you’re looking for in the basic editor and have a knack for coding, you can use HTML and CSS for more customization too!
LearnWorlds
LearnWorlds provides a comprehensive website builder with customizable templates and a drag-and-drop editor.
Here’s a sample page I built:
And here’s a sample course page:
LearnWorlds offers advanced options like custom domains, HTML/CSS editing, and various elements to create a fully branded online school.
The platform also supports multilingual websites, making it versatile for global audiences.
Payment Plans
If your students can’t pay in one go, you need a payment plan. This is a common excuse for someone to not take your course, so it’s a must-have feature.
Thinkific
Thinkific allows you to offer payment plans. This feature is available in all the paid plans and integrates with payment gateways like Stripe and PayPal to process these payments smoothly.
LearnWorlds
Similar to Thinkific, LearnWorlds allows you to set up payment plans and offer courses in installments.
This is in my opinion a crucial feature and both platforms nailed it!
Coupons and Promotions
Adding some scarcity offers can bump up your course sales as it creates a sense of urgency and incentivizes you to act now.
This is possible thanks to coupons and discounts that I expect both platforms to offer.
Thinkific
Thinkific lets you create coupons and promotions to offer discounts on courses.
You can set up percentage-based or fixed-amount discounts and specify the duration and usage limits of the coupons.
For example, if you want to create a promotion that gives 20% off for the first 100 students, you can do it easily on Thinkific.
One thing I didn’t like on Thinkfic, though, is that you can’t strike through the original price of your course on the landing/checkout page. I thought that’s easy to do but apparently, it’s not.
LearnWorlds
Similar to Thinkific, LearnWorlds allows you to set up promotions and discounts. You can do percentages and fixed discounts.
You can limit the number of codes as well as the date.
Payment Processors
Integration with payment processors is essential for handling transactions securely and efficiently. Imagine you had to send invoices, do refunds, and set discounts manually. That would get out of hand with just a handful of customers.
This is where the online course platforms shine. They’re not just course hosting platforms or community pages but also payment processors (or at least they integrate with one.)
Thinkific
Thinkific doesn’t have a built-in payment processor.
Instead, it relies on integrations with third-party payment gateways like Stripe and PayPal to handle transactions.
Anyways, this means that you don’t need to worry about payments. Everything happens under the hood. You get a checkout page that looks like this automatically:
Also, you can handle refunds and chargebacks there with a click of a button as well.
For example, the other day I had a student who wasn’t happy with my course.
Instead of having to hassle with the refunds, I could just click one button to refund the fee. That was just 15 seconds of extra work for me.
LearnWorlds, like Thinkific, doesn’t have a built-in payment processor. It integrates with popular payment gateways like Stripe and PayPal to do payments and refunds.
To Take Home
Thinkific and LearnWorlds are great course platforms. As you can see from the comparison and reviews, they both have all the necessary features and integrations to successfully host a course.
That being said, now it’s time to consider which one you should choose.
As I mentioned before, I am using Thinkific to host 2 courses. I have an audience of about 25k subscribers and my student count is less than 100.
So for a small one-person team, Thinkific is a great platform to get started.