Adobe Fireflies mentions they have a free AI video generator on Google results…
But now, let’s see if it works.
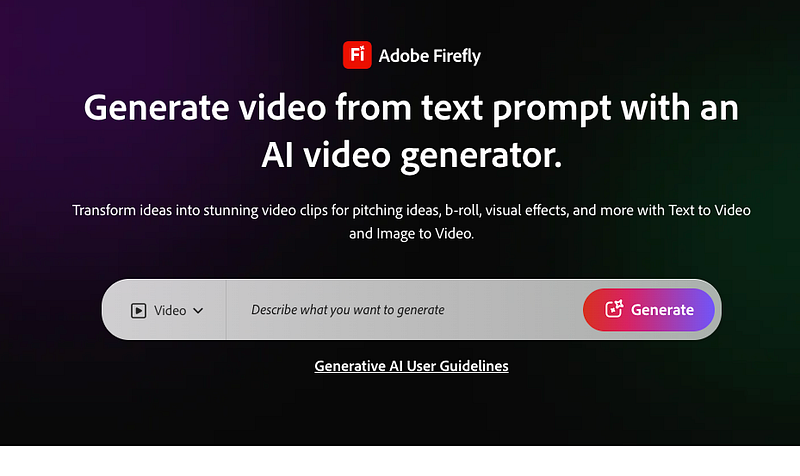
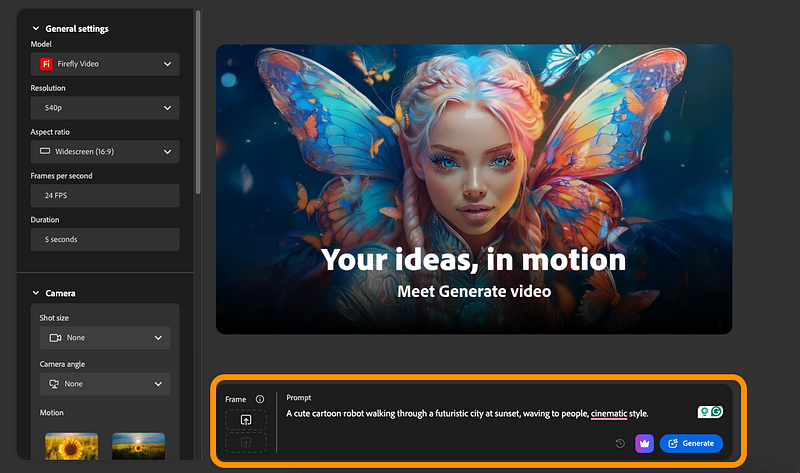
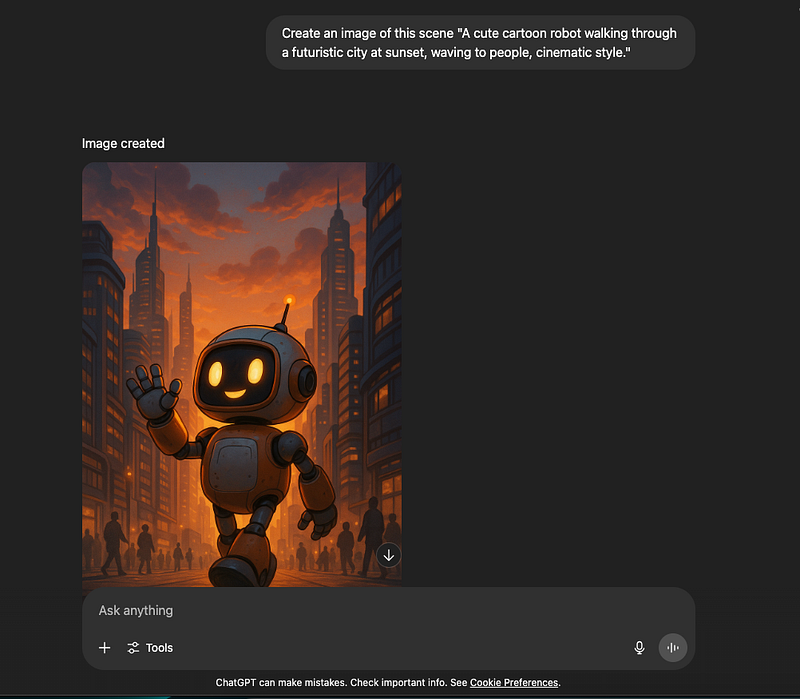
First, I went to their homepage to check if there was a prompt box I could use without signing up:
Found one! Looked promising.
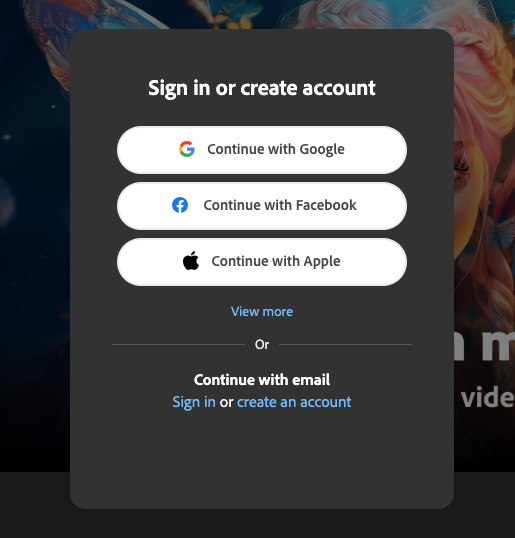
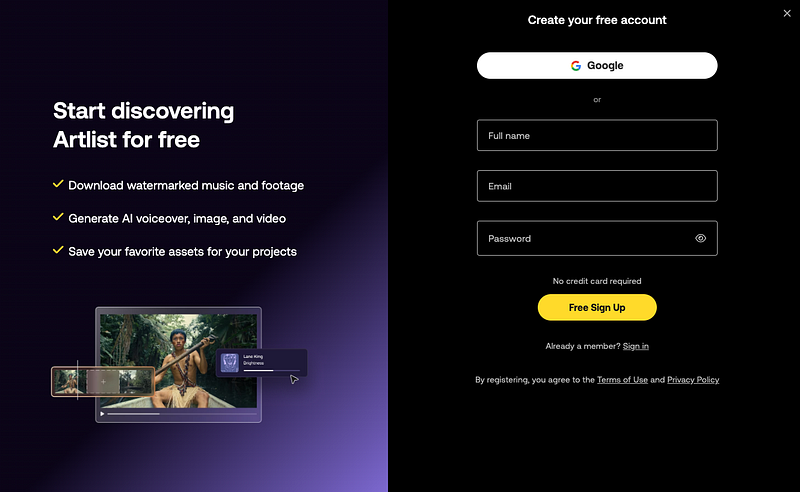
But as soon as I entered the prompt, it asked me to sign up:
No problem. If it’s free to use, I don’t mind signing up.
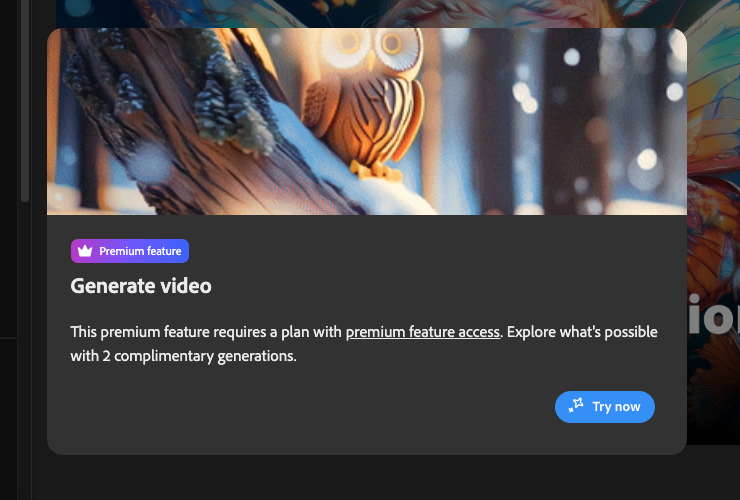
After signing up, I saw a message saying AI video generation is a paid feature. But they do give you two free videos to start with!
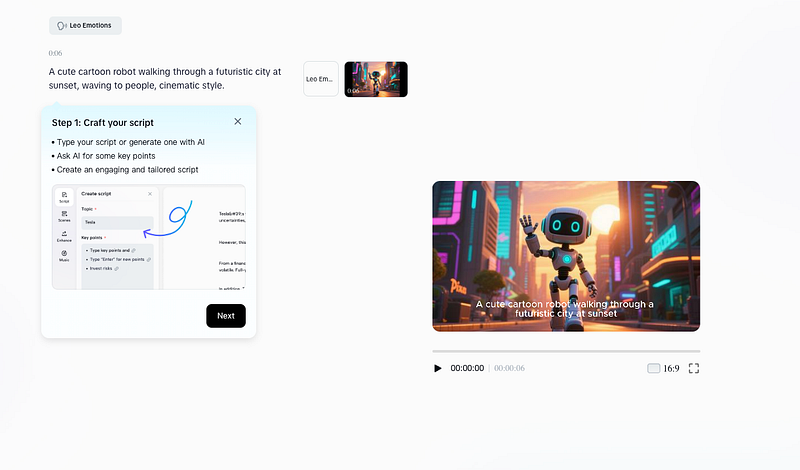
So I went ahead and tried it. Entered the prompt into the box again:
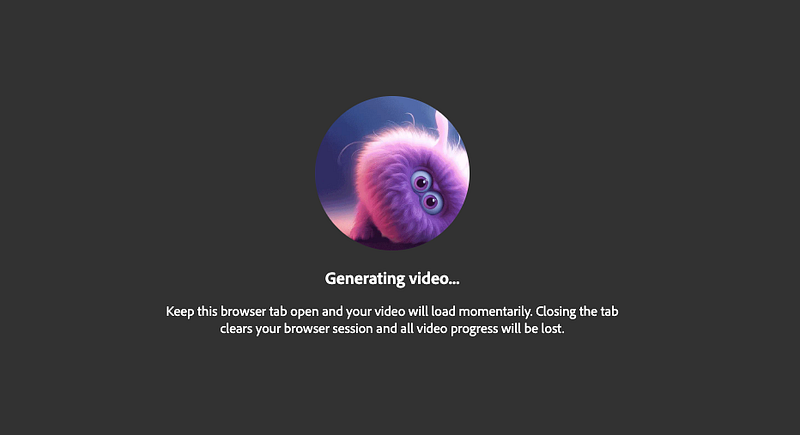
I waited for about a minute for the AI to create my free video.
Here’s the video I got from it:
Even though it’s a short clip, I like it. Honestly, I thought it would turn out worse. Since AI video generation is expensive, I wouldn’t have been shocked if this tool was fully paid with no free videos at all.
And because the free plan included 2 videos, I tried another one. I used the same prompt but this time set it to a TikTok/Reels format.
Here’s what the second one looked like:
I gave it another shot, but this time it asked me to pay before making the next video.
Still, they said it was a free AI video generator, and that’s what I got. At least I was able to see how it works and what kind of content it can make.
That said, it’s pretty limited. Only two videos, and each one is just 5 seconds long.
This tech is still at the beginning. I think it’ll grow a lot over the next few years. Who knows—maybe in 2–3 years you’ll be able to make full movies for free.
Next up is another free AI video generator that looked really promising—Prome AI.
On Google, it has a ton of great reviews, and they say it comes with a free AI video maker.
Sounds like it should be a hit, right?
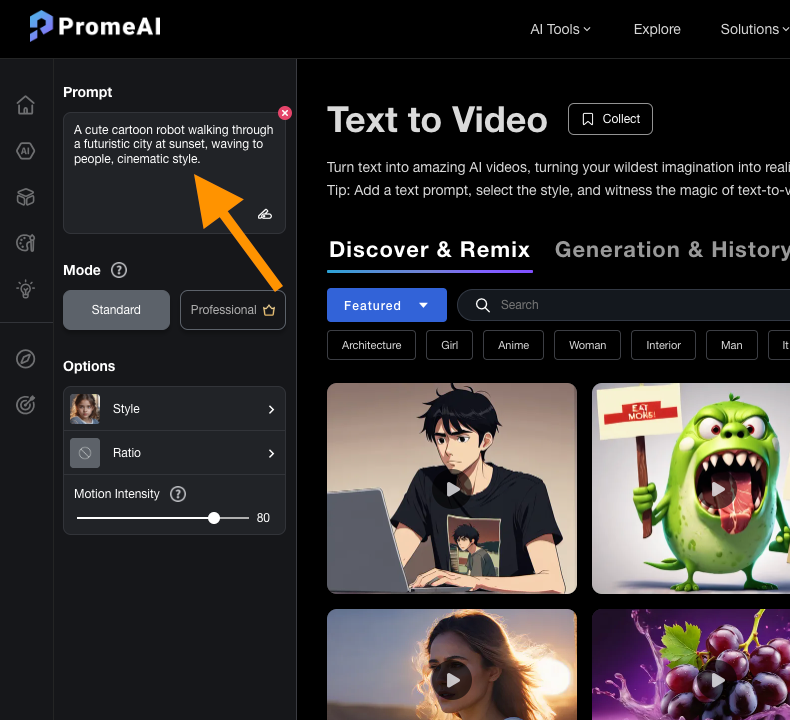
Nice and easy—this one didn’t even ask me to sign up. It took me straight to a page where I could start creating right away:
Next, I had to pick a style. I chose the Sci-Fi option:
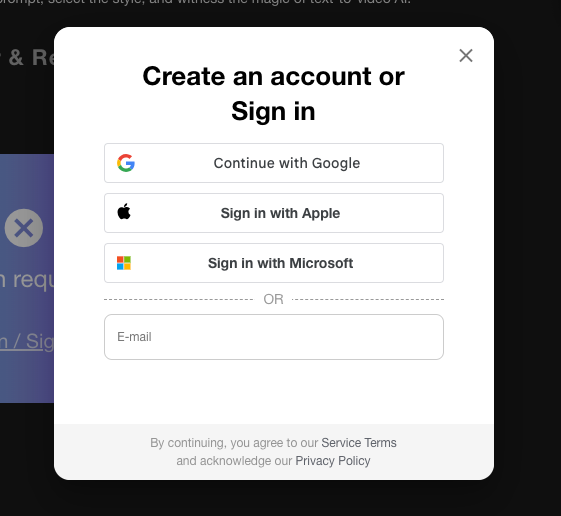
Only after that did the tool finally ask me to sign up:
I went ahead and signed up, and the AI started making my video for free!
By this point, I had tested around 10 tools that claimed to be free, but none of them actually were. So I was glad to see this one didn’t just send me to a payment page. It actually started making the video.
Here’s what I got:
The clip is short, and it does look a bit uncanny and strange. But still, pretty impressive for a free tool.
Of course, I had to test it again to see if the result would be any better.
Here’s the second one I made:
To be fair, that’s a pretty solid clip.
It didn’t add the people I asked for, but it stays consistent for the full 5 seconds and looks pretty cool.
Of course, it’s not what you’d expect from a free AI video generator just yet. But at least this one delivered something without charging, which is more than I can say for most tools.
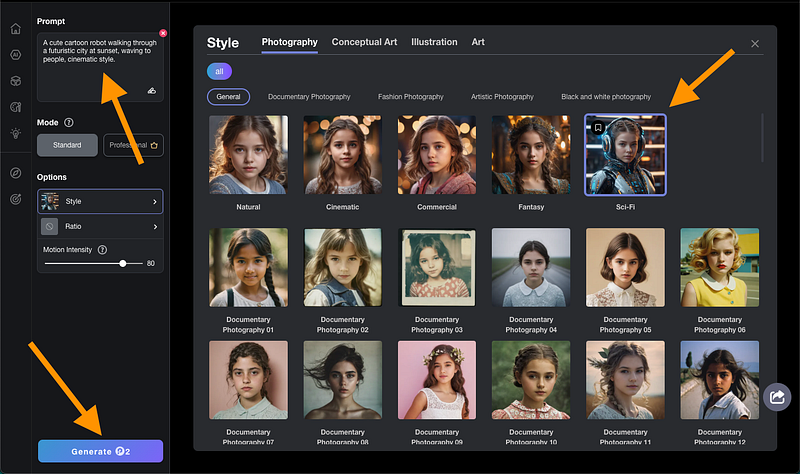
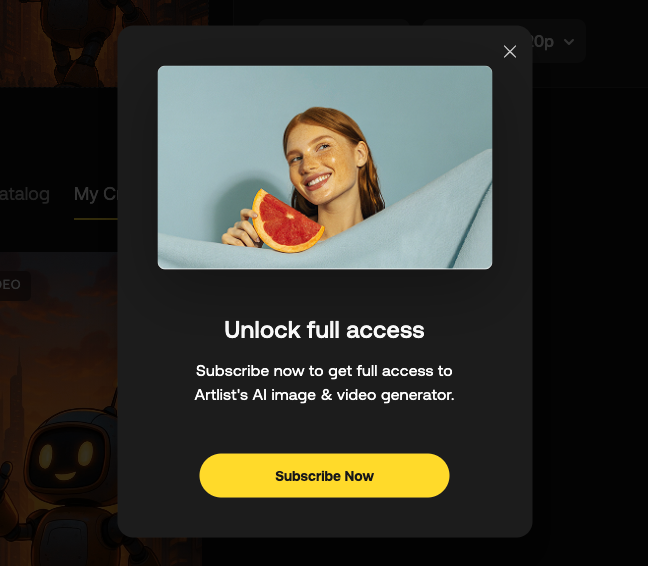
Next up is Artlist.io, another tool that says it has a free AI video generator.
Let’s give it a try.
On the homepage, there’s a prompt box—kind of like ChatGPT—where you can type your video idea.
But this tool doesn’t make videos straight from text.
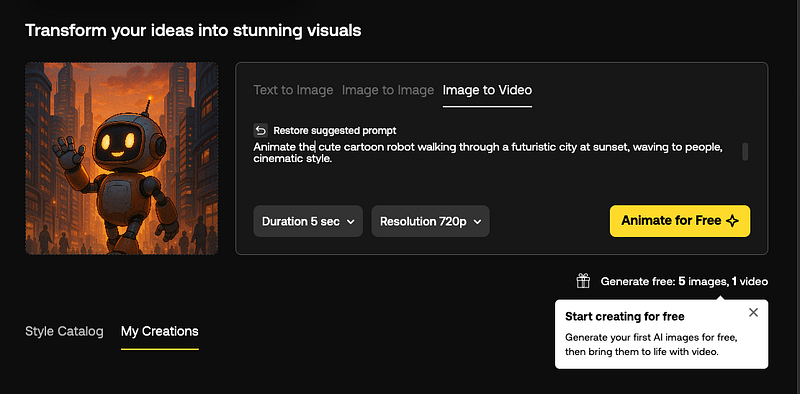
So I couldn’t use the same prompt I used with the others. Instead, it needs an input image.
So I used the same prompt in ChatGPT to first make an image of the scene. Then I took that image and uploaded it into Artlist’s image-to-video generator.
I tried uploading the image, but the tool asked me to sign up first.
I signed up, only to see it had deleted the image I had just uploaded.
But that was just a small hassle. I uploaded the image again and used the same prompt as always:
After that, I sent the image with the prompt to the AI video generator and waited.
About a minute later, it gave me this image video:
Turns out I couldn’t even download it without paying for a plan.
To be honest, the video itself isn’t that great. Compared to Adobe, it’s nothing special.
Still, they did promise a free AI video generator, and at least they gave something for free.
But let’s be real—one low-quality video you can’t even download isn’t what people mean when they search for “AI video generator free.”
So compared to the other free tools, this one might actually be one of the better options… and that says a lot.
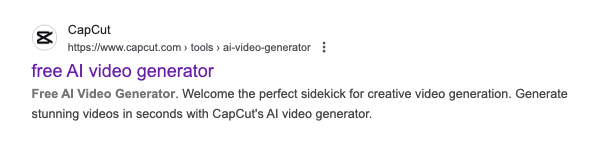
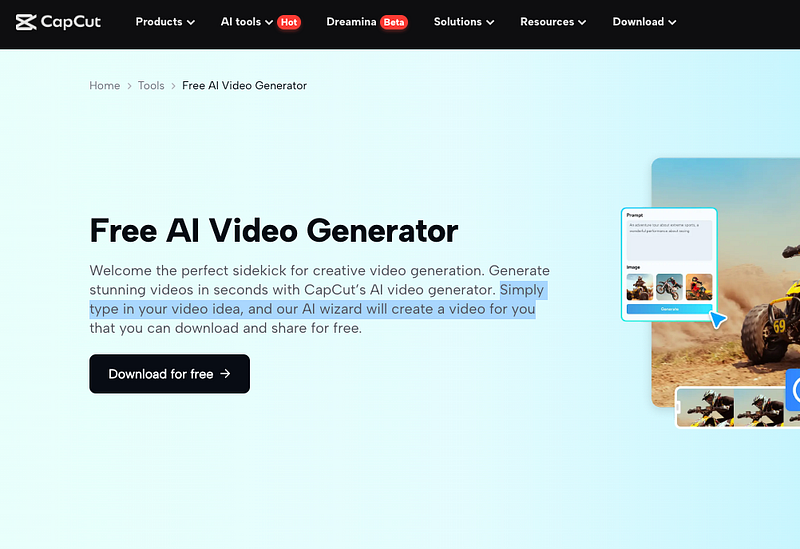
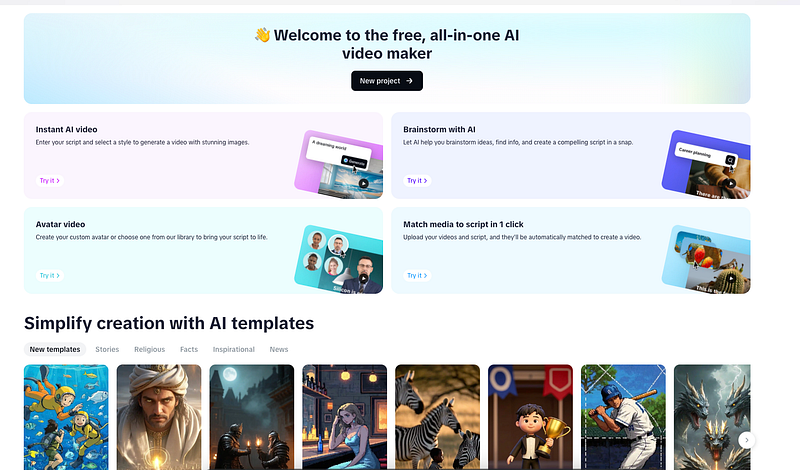
CapCut is a well-known video editor, but it also has a free AI video generator that can turn your text into videos.
This looked promising. I had no idea CapCut even had this feature.
Let’s try it out.
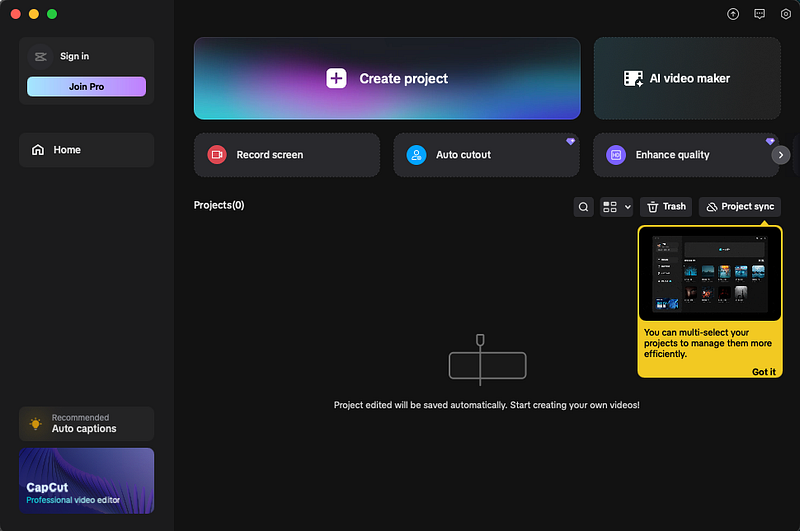
First thing I saw is that CapCut isn’t an online tool—it has to be downloaded. I went ahead and did that to save you the step. Now let’s see how the video creation went.
Next, it asked me to choose the AI video feature. The options were instant AI videos, brainstorming, avatar videos, and media matching.
Honestly, none of these options were what I expected. They felt more like video editing tools than actual AI video generators.
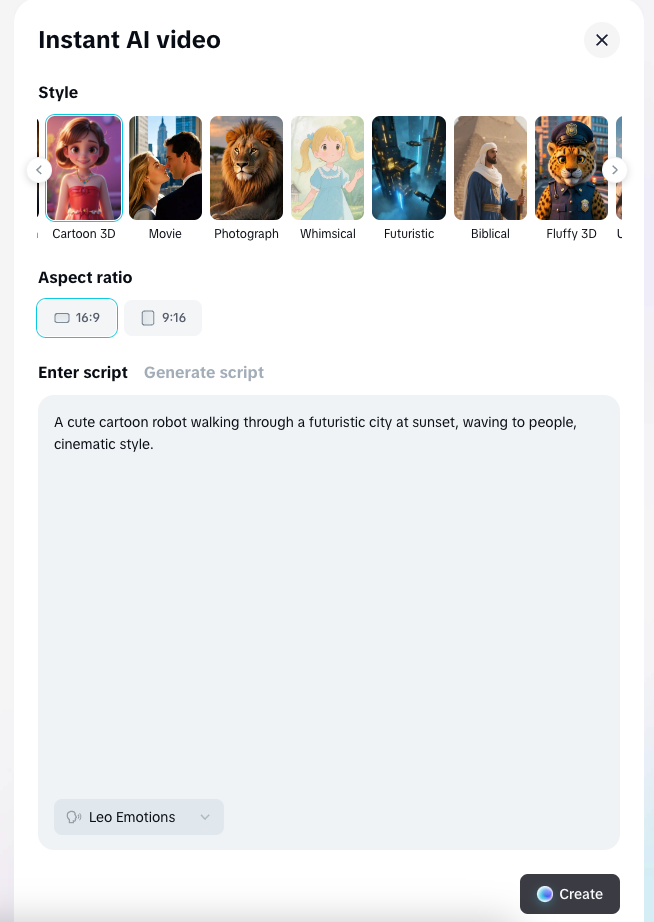
Still, I gave Instant AI Video a shot. I entered the same prompt I used with the other tools:
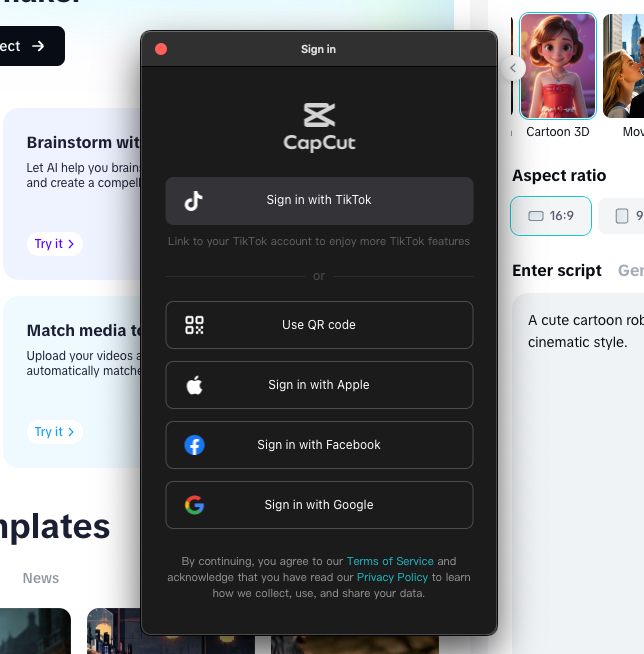
Then the tool asked me to sign up.
I went ahead, but it was a bit annoying—I had already downloaded the app, and now I had to go back to their site just to sign up. I could already tell where this was going…
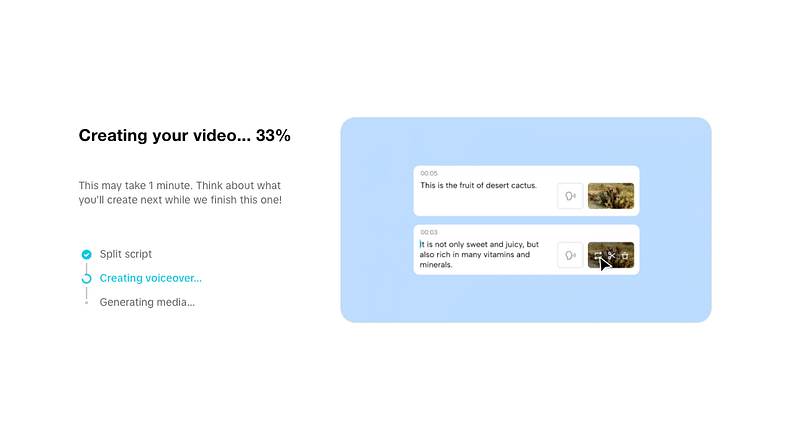
Then I started the video creation—or rather, the AI did. I just had to wait about a minute.
Surprisingly, I actually got something back. I was almost sure this would end up being paid after all those extra steps.
Anyway, here’s the video I got from CapCut AI:
Wow… that was garbage. It’s basically just an AI image with a voiceover and some text slapped on.
Let’s be real. Out of the thousands of people who search for free AI video makers every month, nobody is expecting this kind of result.
And with all the extra hassle—downloading the tool, signing up, waiting at every step—it feels like a letdown. If your goal is making AI videos, don’t waste your time with this feature.
That said, CapCut itself is a great video editor. No doubt about that. It’s one of the easiest tools out there if you just need video editing.
But as for the AI video generator? It’s bad.
Wall of Shame: “Free” AI Video Generators That Weren’t
Here are some tools that promise to be free but really aren’t:
DeepAI — Promises free, no-login AI videos. Reality? Paywalls everywhere. Total waste of time.
Kapwing — Makes you sign up, then immediately throws a paywall. No thanks.
Pika AI (via Pollo AI) — I like Pollo AI, but here “free” means “expensive.” Paywall right after sign-up.
Runway ML (via Pollo AI) — Costs hundreds per year. Nowhere near free.
Kreado AI — Technically free, but only makes stiff presentation-style videos. No creativity.
Synthesia AI — Nice marketing, but only does AI presentations. Not the text-to-video magic you’d expect.
Genape — Stuck in an endless queue. Free? Maybe. Usable? Nope.
Zebracat — Claims to make free videos “10x faster.” In reality, you just hit the paywall 10x faster.
All of these tools said they were free, but once you signed up, you had to pay. No free trial, no real test run.
Thanks for Reading
If you’ve made it this far, thanks for reading. The truth is, right now there just aren’t any good free AI video generators. And most of the ones that say they’re free… aren’t.
It makes sense, though. Running these AI models is expensive, and companies would lose money if they gave them away for free.
Still, they could at least stop advertising them as free when they’re not.
There’s a lot of hype around new AI writing tools.
But most of the time, ChatGPT is still the best for pure writing.
For me, it’s a go-to chatbot and especially helpful for beginners.
Just sign up, ask a question, and it gives you an answer.
You can for example ask it to write a blog post outline.
You can also use ChatGPT to simplify or summarize blog posts. This is what I use it for most, since I often write things that are too hard to read.
AI does well here.
And don’t stress about prompts. That’s mostly hype. Anyone can write them. If you don’t know how, just ask the AI to show you.
But remember: these tools won’t do your job.
For me, AI saves maybe 1–2% of my time. It helps with rephrasing, simplification, and some basic research. That’s it.
In writing, the value isn’t the text — it’s the expertise and experience you bring. If you don’t put in the work before writing, you won’t get results.
Pros
Fast drafting: outlines, intros, summaries in seconds.
Flexible: from blog ideas to code snippets to emails.
Grammarly is a free tool that fixes grammar automatically.
It checks your writing anywhere if you use it with Google Chrome.
For example, here’s this post:
This post has lots of mistakes I’d normally have to catch myself. That takes a long time before publishing.
Grammarly saves me that time.
It checks my text as I type and fixes mistakes on the spot or suggests edits.
With the Grammarly Chrome Extension you can use these features wherever you go, which makes it super handy.
You can use it to improve/fix your emails automatically.
It saves time every time you write, no matter where.
That’s been my experience for the past couple of years.
And if it ever annoys you, just click the plugin icon to turn it off for that page.
I also like that Grammarly’s basic version is free. To be honest, I never upgraded. The free plan fixes typos and basic errors, which is all I need.
And when it comes to AI in writing, don’t let it replace your style. You should still write like you. That’s why I don’t use those random “AI improvements.”
Pros
Always-on checks: grammar, clarity, tone as you type.
Works almost everywhere: browser, desktop, Docs, email.
Tone guidance to avoid awkward wording.
Quick polish before publishing.
Team features if you need to scale.
Cons
Suggestions can change meaning — review carefully.
Pick the AI feature you want. There’s a tool for almost any kind of writing.
For example, under blog writers, you’ll find AI tools for writing blogs.
I picked the “Human Written Blog Post” tool from the list.
Then just choose a topic and let it create the content.
For example, I asked it to write a blog post about Disc Golf rules.
It then asks for a couple of tweaks from your side.
To start, click “Create Outline.”
A few seconds later, you’ll have your AI-generated outline:
Here you can remove parts, edit the text, or regenerate it.
When the outline looks good, click “Generate.”
This opens the blog post generator view.
First, it asks you to create the introduction with AI.
Click “Create Intro” and wait.
Here’s the intro I got:
Then move on to the next section.
For example, it created a basics section for Disc Golf rules.
As you can see, it doesn’t create the whole post at once.
It builds it in parts, and you can adjust everything.
After creating each section, read it through. Add your images, experience, and expertise.
An AI-written post is never good enough on its own.
It can be useful, but it won’t give you an edge unless you make it better than what already exists.
And this was just one example app in GravityWrite. There are many more categories and tools worth exploring. Just remember — always keep a human in the loop.
Pros
All-in-one hub with 200+ templates for blogs, ads, socials, and emails.
Quick first drafts and outlines.
Supports multiple languages and tones.
Image generation + web tools in one place.
Users praise its speed and ease.
Cons
Output needs editing for accuracy and voice.
Free plan is limited — you’ll likely hit caps.
Content can feel generic if prompts are weak.
Some UI quirks reported.
Pricing and allowances vary by plan, can be confusing.
Pricing
Free: ~1,000 words/month
Plus: $15/month (~75k words/month)
Pro: higher tiers listed; users report $69–$79/month depending on caps
Hemingway App is a free gem, great for new bloggers.
I found it early in my career and used it a lot.
It’s similar to Grammarly but focuses on simplifying hard sentences.
Just copy-paste your content into the editor:
It gives a grade for your writing and shows the improvements.
Hover over an issue to see Hemingway’s suggestion.
It won’t fix the sentence for you. It just flags long ones as an issue.
Also, use common sense.
You’ll notice Hemingway suggests changes for almost everything.
Don’t follow all of them or you’ll lose your own style. If there’s any magic left in blogging, it’s that you sound like yourself. The content should read like a normal human wrote it.
Same goes for AI writers. Use them lightly. The text itself doesn’t matter as much as what you say. If you just repeat what’s out there, you won’t get anywhere.
My best blog posts take 100+ hours. Not because of writing, but because of research. Writing takes a couple of hours. The rest is legwork.
Pros
Great for simplifying hard sentences.
Flags passive voice and weak phrasing fast.
“Plus” plan adds AI rewrites and grammar fixes.
Clean editor with no distractions.
Good value if you just need clarity rewrites.
Cons
Not a full grammar suite like bigger tools.
No research or citations — it’s an editor, not a writer.
As I said earlier, ContentShake is a good starter tool for long-form posts.
It even adds images and lets you chat with the AI to improve your post.
For transparency, I don’t use tools like this much. Full automation doesn’t work that well.
But if you’ve never written long guides or detailed posts, this can give you a solid blueprint. Instead of hiring a freelancer for advice, you can get a draft from AI pretty easily.
Just be careful. Don’t treat it as the final word. Adjust the content to match your style, not the AI’s.
Fun fact: I used AI a lot when ChatGPT first came out.
But I quickly realized it missed facts, didn’t say what I wanted, and didn’t sound like me.
Since then, I’ve used AI less — and my results have improved.
Pros
Good starter for long-form SEO drafts.
Clear flow: ideas → outline → draft.
Adds stock images as placeholders.
Lets you refine with AI or edit manually.
Works with Semrush data.
Cons
Needs a lot of human editing.
Lacks depth without your own input.
Not “set and forget.”
Images are just placeholders.
Same fact-checking issues as any AI writer.
Pricing
Part of Semrush Content Toolkit add-on — from $60/month.
Paperpal is my #1 AI research tool and academic writing service.
It generates text based on your role — from post-doc papers to high school essays.
Unlike ChatGPT, Paperpal goes further. It can write, review content, answer research questions, generate ideas, and check for plagiarism.
For example, I used it to create an outline for my paper on The Impact of Climate Change.
In seconds, it built a clear structure for my paper:
Click “Insert” and the outline shows up on the left next to your paper.
Not happy with the result? Click “Regenerate” to get a new version.
You can also paste parts of your paper or outline and ask the AI for tips and action points to improve it.
AI can also expand topics by adding counterarguments, analogies, and examples.
For example, I asked it to expand the outline point I made earlier:
In seconds, it gave me this instruction, highlighted in green:
With these insights, I can refine my paper. I like this approach because it doesn’t just generate generic text with mistakes. It gives real suggestions to improve my writing.
Pros
Built for academia: style, clarity, and submission checks.
Plagiarism checks and citation help.
MS Word integration + “Preflight” for publishers.
Strong feedback on structure and readability.
Positive feedback from users for polishing papers.
Cons
Not for creative writing or marketing.
Free plan is limited — best features are paid.
Citation management isn’t as strong as dedicated tools.
This helps if you’ve never made one before. There are lots of details to get right if you want it to look professional and stand out.
AI resume builders help get your CV on the same level as the competition.
AI is good at spotting patterns and copying them.
But like any tool, you need to tweak it to stand out from other applicants.
Here are a few AI resume writers:
1. Rezi AI
Rezi helps you build a resume with AI. It’s one of the best tools I’ve tested.
Click “Create a new resume.”
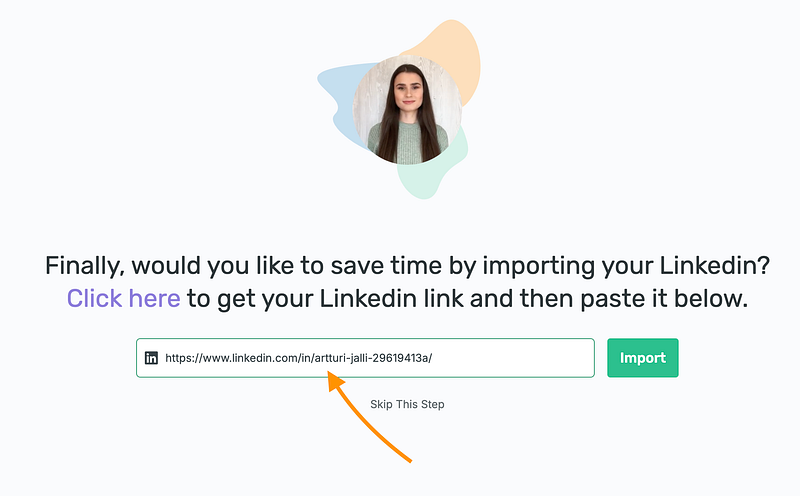
Next, tell the AI a bit about yourself. One thing I really like is the “Import your resume from LinkedIn” option. If your work history is already on LinkedIn, this saves a ton of time.
If you don’t have LinkedIn, just upload your resume and wait about a minute.
After it’s done, you can let the AI help tweak your CV, or make changes yourself.
Include your education:
The AI will create a clean resume for you—and even give it a score.
Of course, you’re not done yet. With Rezi, you can tweak things yourself, change the template, or let the AI adjust automatically.
It’s still pretty impressive. Instead of worrying about wording, layout, or design, the AI does most of the work. It shows your experience and skills in the best way possible.
Pros
ATS-friendly resumes with keyword targeting
Import from LinkedIn or upload a resume to save time
Real-time scoring and suggestions to improve your match
Clean templates and quick editing
Active community and helpful guides
Cons
Customer support can be hit or miss
Scores don’t always match other scanners
Some features require paid plans
Takes some practice to get bullet points just right
Pricing info can vary
Pricing
Free version available. Paid plans start around $2/month in promos, usually about $29/month depending on features.
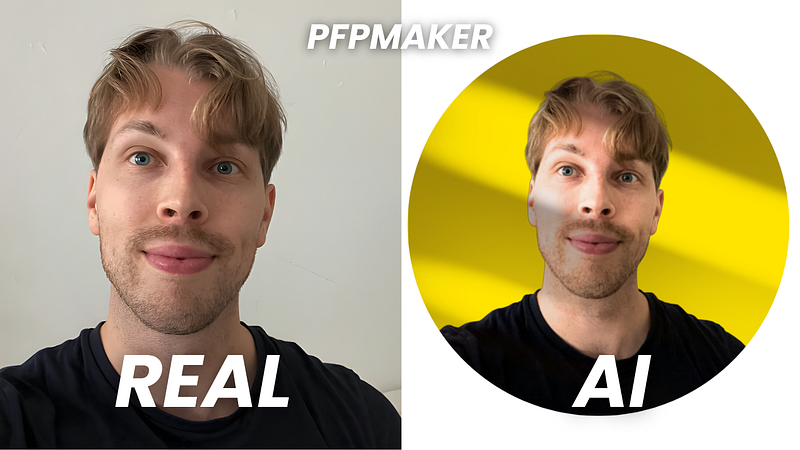
From my set, I found about 10 headshots I’d use on LinkedIn or other social media.
The Remix feature didn’t work well for me. Maybe smaller edits would keep the quality up and avoid blurriness. Some styles also felt a bit repetitive.
The price feels high if you only need one strong headshot, since there’s only one package for individuals. But if you need a larger set, the pricing makes sense.
Be ready to spend up to two hours to get your headshots.
For me, the hardest part was picking 8–16 good photos. That took about 30 minutes. The AI then needed at least another 30 minutes to render, sometimes longer.
You don’t need to keep the window open. BetterPic will email you when your headshots are ready.
Pricing & Value for Money
BetterPic offers three pricing plans:
Basic: $35
Pro: $39
Expert: $79
These are one-time payments, no subscription.
The pricing feels fair for the quality. Other tools cost about the same but don’t offer customization or refunds.
I recommend the Expert plan. It gives you more headshots, which matters since AI results can be hit or miss. Out of 100 images, you’re almost guaranteed to get a handful of great ones.
No hidden fees, but editing does cost credits you can buy when needed.
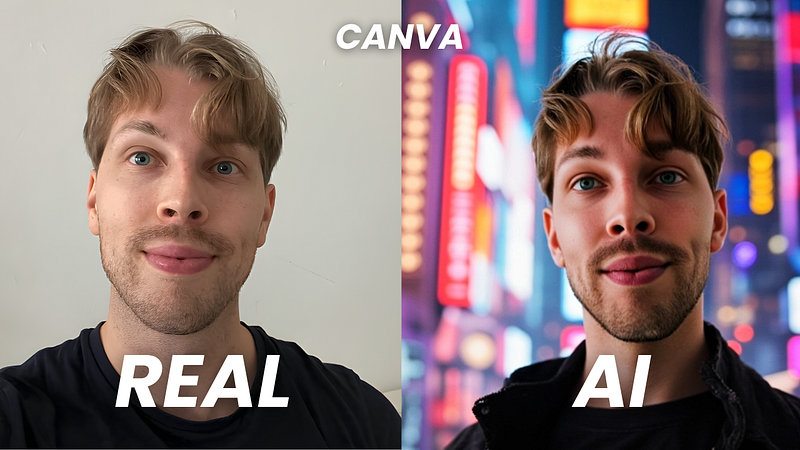
Next, pick a plan that works for you. The Professional or Ultimate plans are best. They give you HD photos and more headshots to choose from.
Then, specify your characteristics.
Also, please, pay attention to the upload details. This tool asks for a couple of selfies from you. But not just any. You have to provide images with good lighting, no others in the images, and so on.
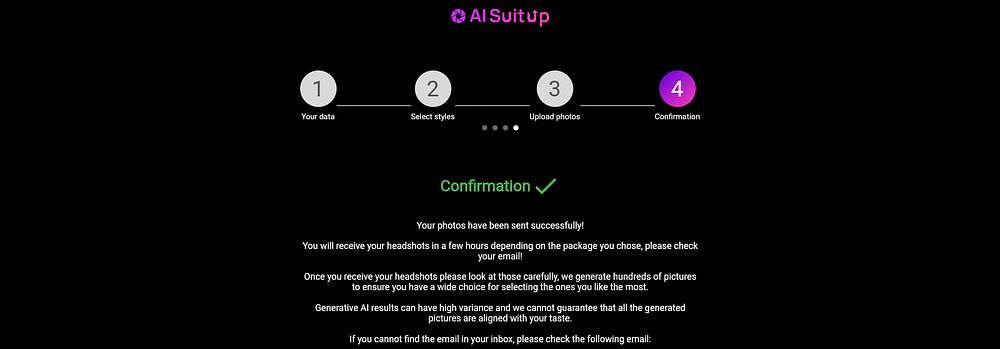
AI SuitUp checks your selfies and points out the ones that are too blurry or not usable.
After that, confirm your selfies, hit send, and you’re good to go.
You’ll get an email when your headshots are ready. Click the link to view your photos.
Then just enjoy it!
Download them one by one or as a full set.
You can also share straight to LinkedIn.
Don’t forget to save the link to your album—it’s the only way to access your headshots.
Results
Let’s look at my results and check the quality.
This is the photo I picked as my base image.
And here are my AI headshots:
At first glance, the results look solid and quite accurate.
Here are my favorite headshots from the tool:
I think the photos look professional and capture me well, especially the eyes. My hair shows up at different lengths since I used selfies with different haircuts. A common issue I’ve had with AI headshots is looking 10–15 years older. These don’t age me too much, though I do look a bit more mature than I really am.
Of course, not every photo is perfect. It’s normal to get a few odd ones. Here are some examples of the misses.
They look a bit uncanny, if I’m honest.
Speed & Processing Time
The processing time depends on the plan.
With the Ultimate plan, my headshots were ready in about an hour.
Even with the Basic plan, if you upload in the morning, you’ll have new photos by the afternoon.
For me, the hardest part was picking selfies.
I don’t post much on social media, so it took some time to find good ones.
The pricing feels fair and affordable. It’s a one-time purchase with no hidden fees. The quality is worth it, especially with the Professional or Ultimate plan where you get 100–150 headshots. Plenty of great options for LinkedIn or other professional use.
Pros
Pretty affordable and one of the most cheap headshot generators on the market
The tool was super easy to use
Different styles and backgrounds for a versatile collection
Most headshots look accurate and usable
Clear instructions and selfie checks before submission
Cons
No option for customization
Some headshots make me look older than I am
A few headshots don’t look like me at all
The Wrap-Up: Is It Worth It?
AI SuitUp is a great choice for high-quality headshots at a fair price.
The photos look professional, and you can pick from different styles and backgrounds.
It doesn’t offer customization, but the headshots are strong enough to use as they are.
This is one of the best AI headshot generators I’ve tested. It beats the free ones by leaps and bounds. However, there are still some tools that beat this one too.
You can check the official list of the best AI headshot generators here.
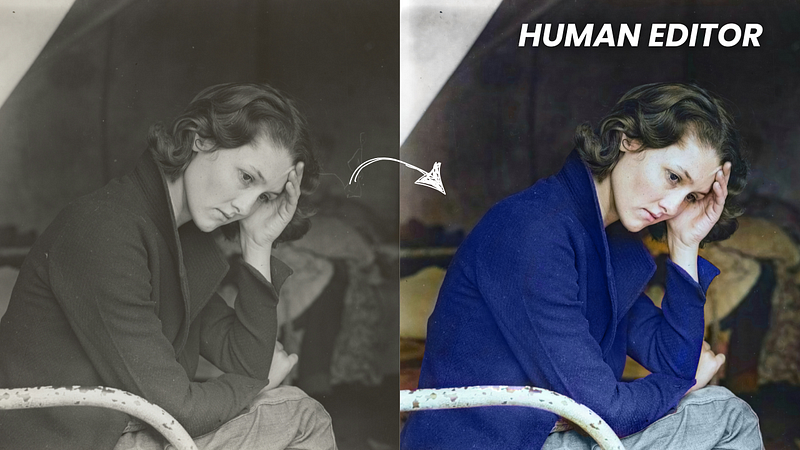
Winxvideo AI excels in colorizing black-and-white photos by Using advanced AI technology, Winxvideo AI can bring black-and-white photos to life with realistic colors.
To use it:
Install the software on your computer
Click “Image AI” and upload a black-and-white photo
Select “AI model” and “Colorizing Monochrome Image”
Preview and export the colorized image
Winxvideo AI takes a few extra steps, but the results are worth it. It doesn’t just add realistic colors — it also improves the image quality by removing scratches, stains, spots, and smudges from old photos.
My Experience with Winxvideo AI
I tested the colorization feature, and here are the results.
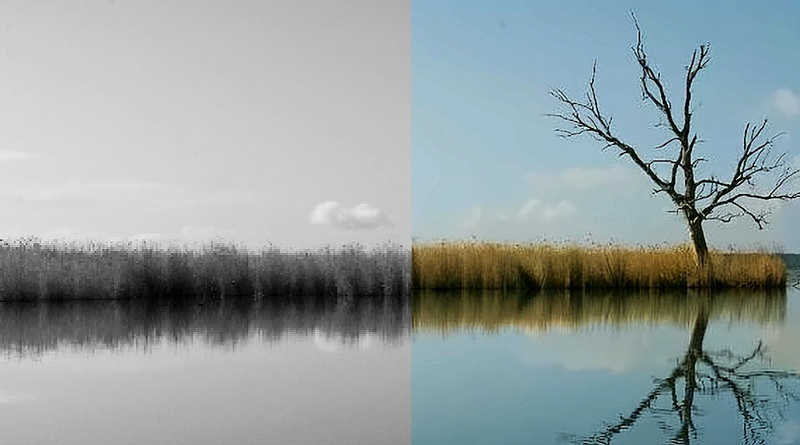
Here’s the input:
Here’s the image after being colorized with AI:
The colorizing process only takes a few seconds. The trees, grass, and sky all look natural and realistic. The sky is a clear blue, just like in real life.
Another great thing is how much the image quality improves. All the original details stay intact, and any blurry branches or grass are fixed, making the whole photo sharper.
Key Features:
AI-powered prediction and analysis
Fast black-and-white to color conversion
Realistic photo colorization
Preserves authentic details
Colorize multiple images at once
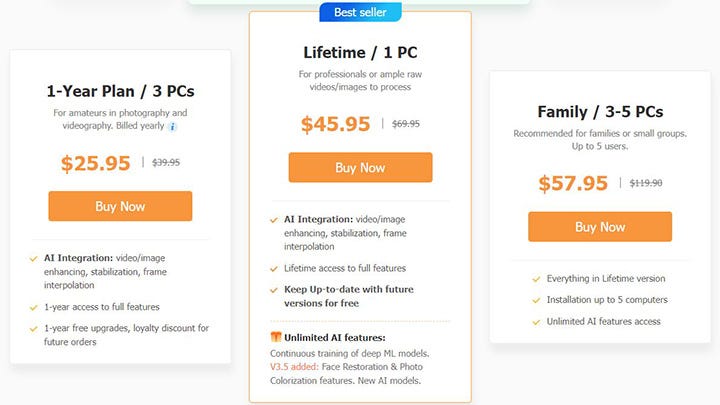
Pricing
Winxvideo AI is free to try. You can test up to 5 images with the trial version.
The full version has three plans:
1-year plan for 3 PCs: $25.95
Lifetime plan for 1 PC: $45.95
Family plan for 3–5 PCs: $57.95
For a limited time, there are special deals on both the 1-year and lifetime plans.
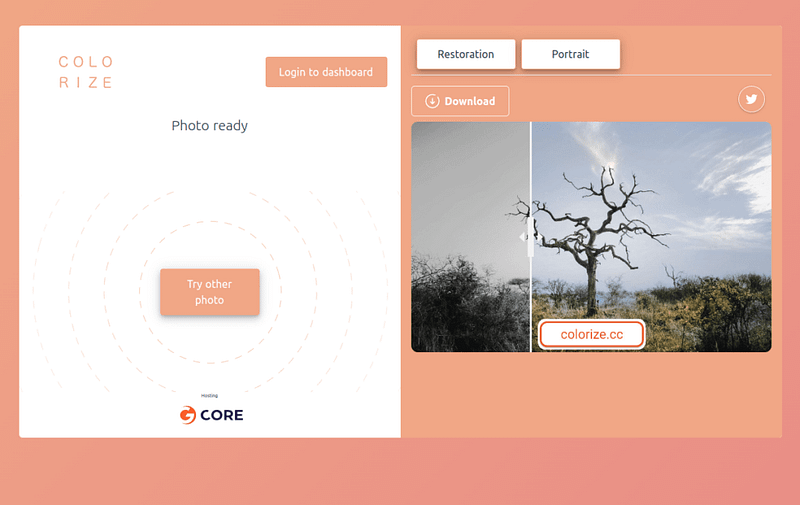
Colorize.cc is an easy-to-use AI image colorizer. You don’t need to download anything or sign up to use it. Even better, you can try it for free!
The main downside compared to most tools on this list is the watermark on the output images. Other than that, I think it’s a neat, good-looking tool, and I’m happy with the results.
To remove the watermark, you’ll need a paid plan. I’ll cover the prices later.
There are two AI engines you can use to colorize images:
Model V1 for people
Model V2 for other images like buildings, landscapes, and vehicles
To use the tool, go to the website, upload a photo, and get your colorized image. That’s it — no editors or downloads needed.
My Experience with Colorize
I ran the same test I did with the other tools, converting a black-and-white image to color.
Here’s the input image:
And here’s the result:
The process only took a few seconds, and the results look great.
This tool is definitely up there when it comes to the best options on this list. It’s hard to rank them because all of these tools give solid results, which makes sense since they use similar technology.
The only downside is the watermark, which you can remove by subscribing to a paid plan.
Key Features
Two AI engines for image colorization
Powerful AI to turn black-and-white photos into color
Image enhancement for restoring colors
Easy-to-use, simple interface
Free version includes watermarked images
Pricing
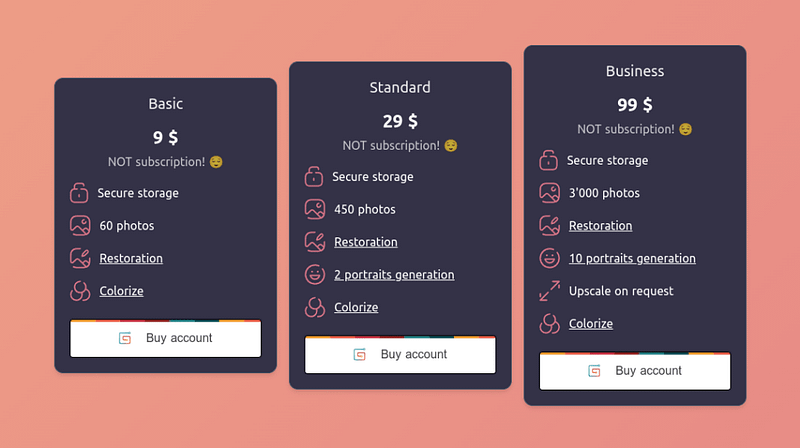
In addition to the free plan, there are three paid options. The main benefits of the paid plans are more images you can colorize and no watermarks on the output.
The plans are:
Basic: $9/month
Standard: $29/month
Business: $99/month
5. Hotpot.ai
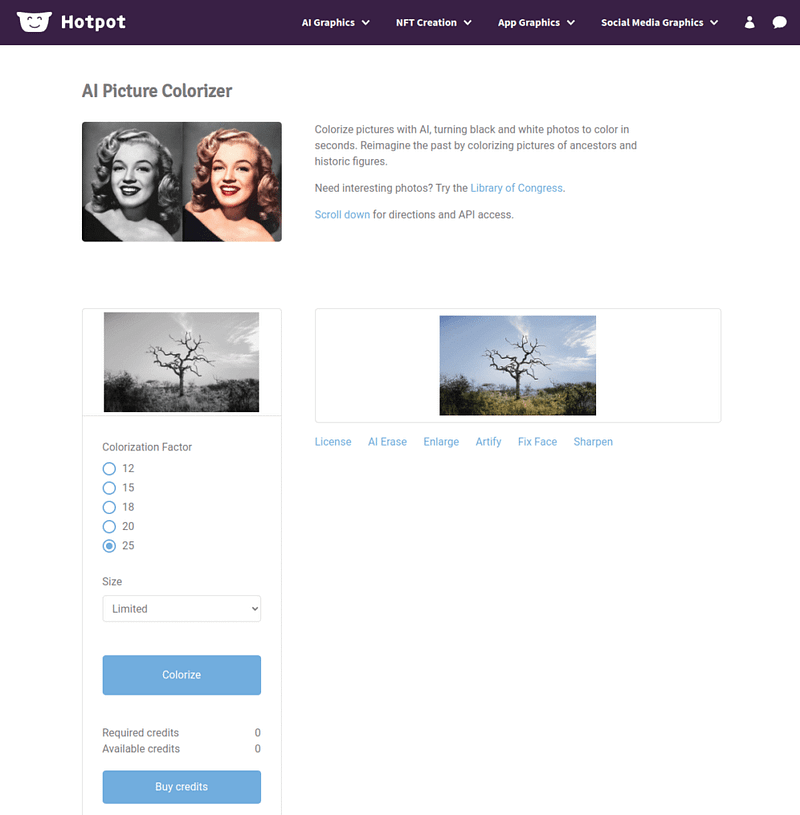
Hotpot AI is a simple way to colorize old black-and-white photos. You can also enhance the colors in older colorized images.
The tool is very easy to use. Just go to Hotpot’s website, upload a photo, wait a few seconds, and you’ll get a nicely colorized image.
Hotpot is perfect for anyone who wants to quickly and automatically add color to black-and-white photos.
If you want to fine-tune the result, you can adjust the colorization factor from 12 to 25, which can affect the image quality.
There are also several other options for your images. You can erase, enlarge, clarify, fix faces, and sharpen them.
The best part? You can try it for free, and no technical experience is needed.
My Experience with Hotpot AI
Here’s an example of me colorizing a stock photo.
Here’s the input:
Here’s the colorized version:
The result looks really good. The AI seems to understand the image well. The only thing I noticed is that the colors aren’t very vibrant, but overall, the AI did a great job.
Key Features
Colorize black-and-white photos
Enhance images
Works in your browser
Free trial you can try easily
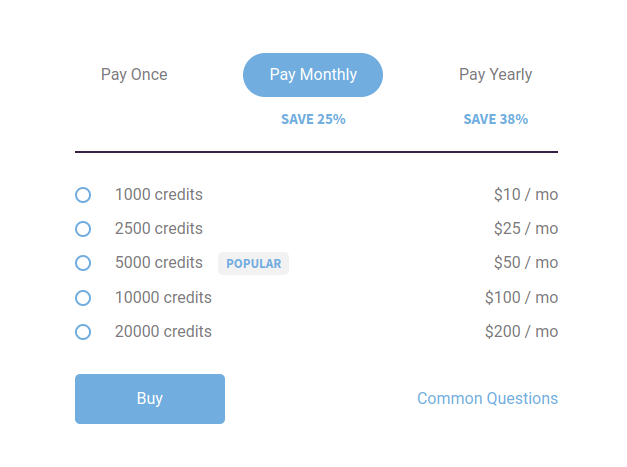
Pricing
You can use Hotpot for free for personal use. If you want to use the image colorizer for commercial purposes, you need to buy credits:
1,000 credits: $10/month
2,500 credits: $25/month
5,000 credits: $50/month
10,000 credits: $100/month
20,000 credits: $200/month
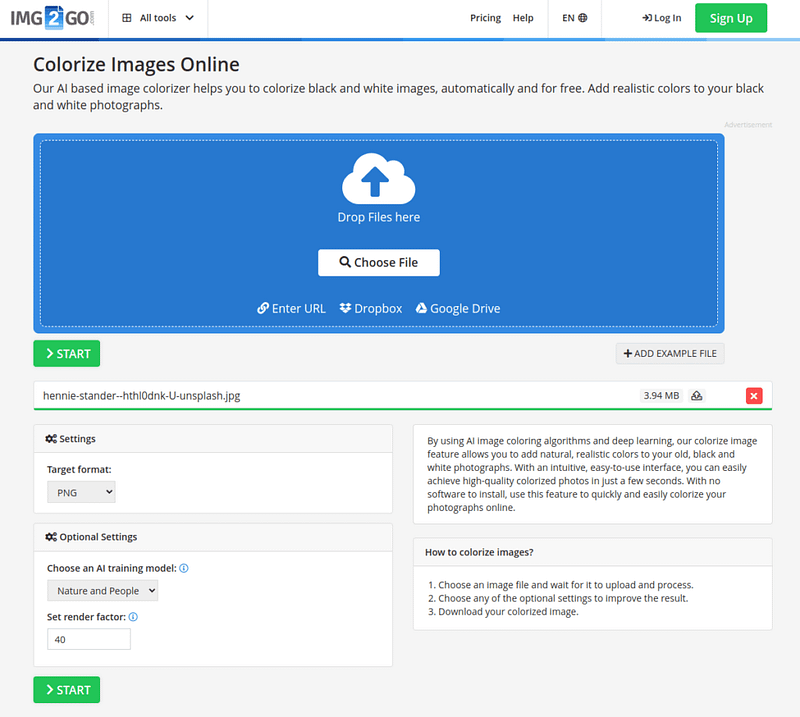
6. Img2Go.com
Img2Go is a free AI tool for turning black-and-white images into color with realistic results.
It uses AI and deep learning to bring your photos to life.
Like the other tools on this list, you just go to the website, upload an image, and wait a few seconds to get a colorized version.
You can also use Img2Go to enhance the colors of older colorized photos.
My Experience with Img2Go
Here’s the result when I converted a black-and-white image to color.
Here’s the original black-and-white image:
And here’s the colorized version:
To test this tool, I set the rendering factor to 40. It was a bit slower, but the image quality came out great.
To me, the result looks very natural — you wouldn’t guess it started as a black-and-white photo!
As you can see, the results are pretty similar to the other tools so far. 🙂
Key Features
Works online, no downloads needed
Add color to black-and-white images
Enhance colorized images easily
Very easy to use, with results in seconds
Pricing
This tool is completely free!
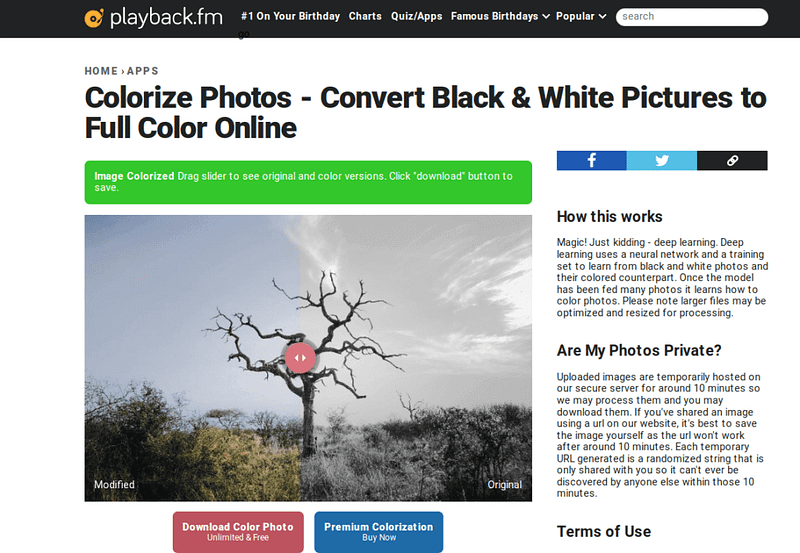
7. Playback.fm
Playback.fm is an AI image colorizer that makes it easy to turn black-and-white photos into color.
You can use it for free, with no limitations. It’s simple to use — just upload a photo and wait a few seconds. The AI will create a colorized version quickly.
You can also use Playback.fm to improve the colors of photos that are already colorized but look faded or off.
The AI behind this tool recognizes objects in the image and colors them accordingly. It’s trained on millions of images using deep learning and neural networks.
My Experience with Playback
I tested the tool to colorize a black-and-white photo. The results look good and are similar to what the other tools on this list produced.
Here’s the original black-and-white image:
Here’s the colorized version:
Key Features
Online tool that is easy and free to use
Add color to black-and-white images in seconds
Uses advanced AI to colorize and enhance photos
Pricing
You can use this tool for free!
If you want even better colorization, there’s a premium version. You can see the price by colorizing an image and clicking the “Premium Colorization” button.
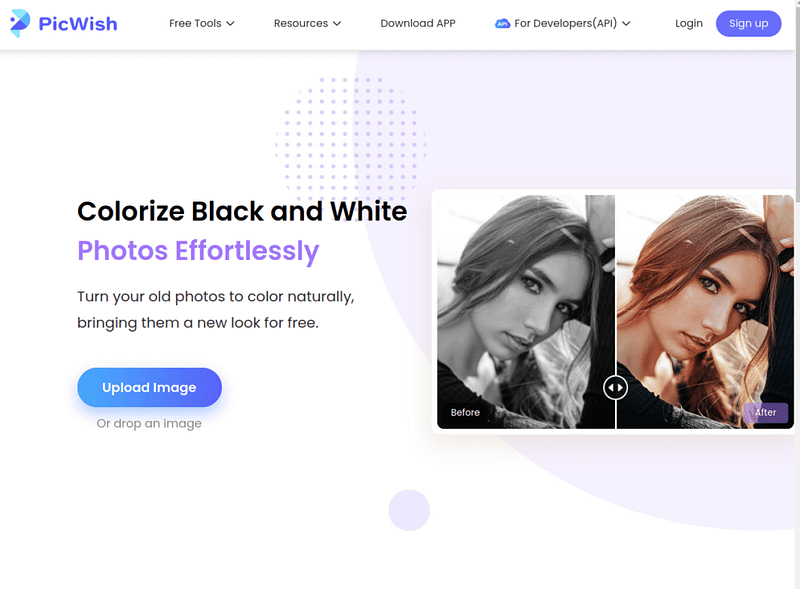
8. Picwish.com
Looking for an easy way to turn black-and-white photos into realistic, natural-looking color images?
Picwish is a fast solution for bringing old photos to life with natural colors. It’s also known for its API, which developers can use to integrate the service into their apps.
Like the other tools on this list, Picwish is easy to use. Just upload an image, let the AI work, and you’ll get a colorized photo in no time.
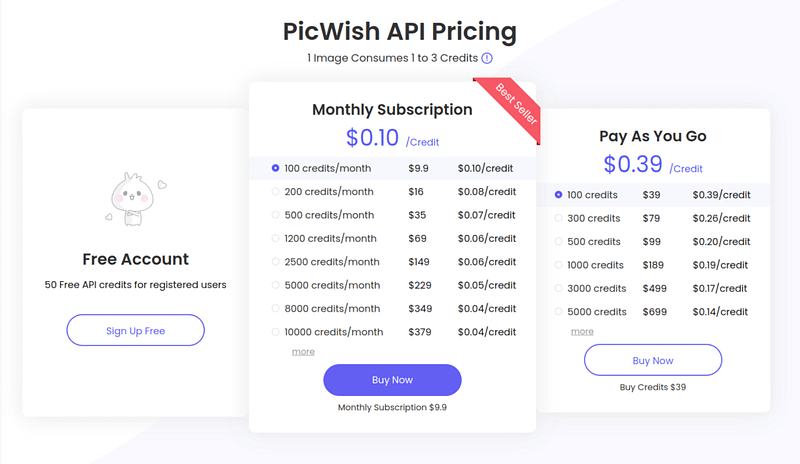
If you’re more technical and want to use their API, you can check out the API documentation for details.
My Experience with Picwish
Here’s an example of how I used the tool on the same image I’ve been using throughout this guide.
I think the results look great. The AI seems to understand the image and colors each part correctly.
The only downside is that you need to create an account to download the colorized image.
Key Features
Uses advanced AI to colorize old images
Turn black-and-white photos into realistic, colorful images
Free to try
Easy-to-use interface with quick results, no technical skills needed
API available for developers to integrate into their apps
Pricing
The demo version is free — you just need to create an account to download the colorized images.
For developers who want to use the API more, here is the pricing:
The API is for anyone who wants to integrate this service into their apps or websites.
9. Vance.ai
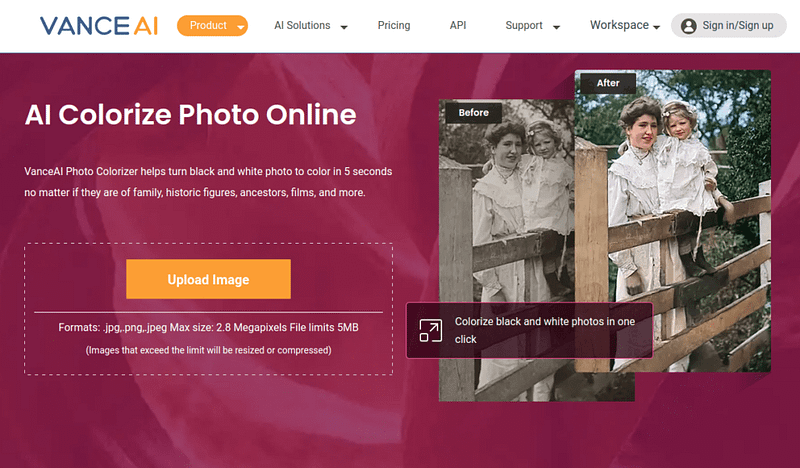
Vance uses advanced AI to turn black-and-white images into colorful photos.
It’s a quick and easy tool if you want to colorize images fast. You don’t need to sign up or download anything — it works right in your browser with a simple interface.
To colorize an image with Vance:
Open their website
Drag and drop your image
Wait about 5 seconds for the AI
Preview and enjoy the result
My Experience with Vance
Here’s an example where I turned a black-and-white image into a colorized scenery photo.
Here’s the original black-and-white image I used:
And here’s the colorized version:
I think the result looks pretty good. The colors are a bit muted, more on the black-and-white side compared to other tools, but the AI still understands the image and colors it well.
Key Features
Online photo colorizer — no need to install anything
Free trial for image colorization
Data-safe uploads — images are deleted within 24 hours so they don’t stay on the server
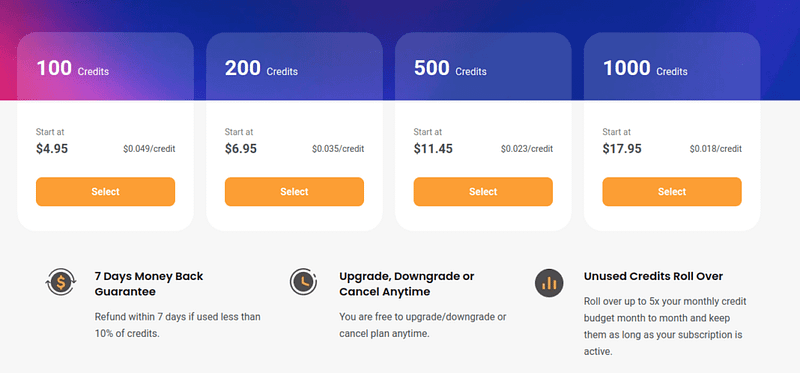
Pricing
Besides the free plan, Vance AI has a credit-based payment system for power users: